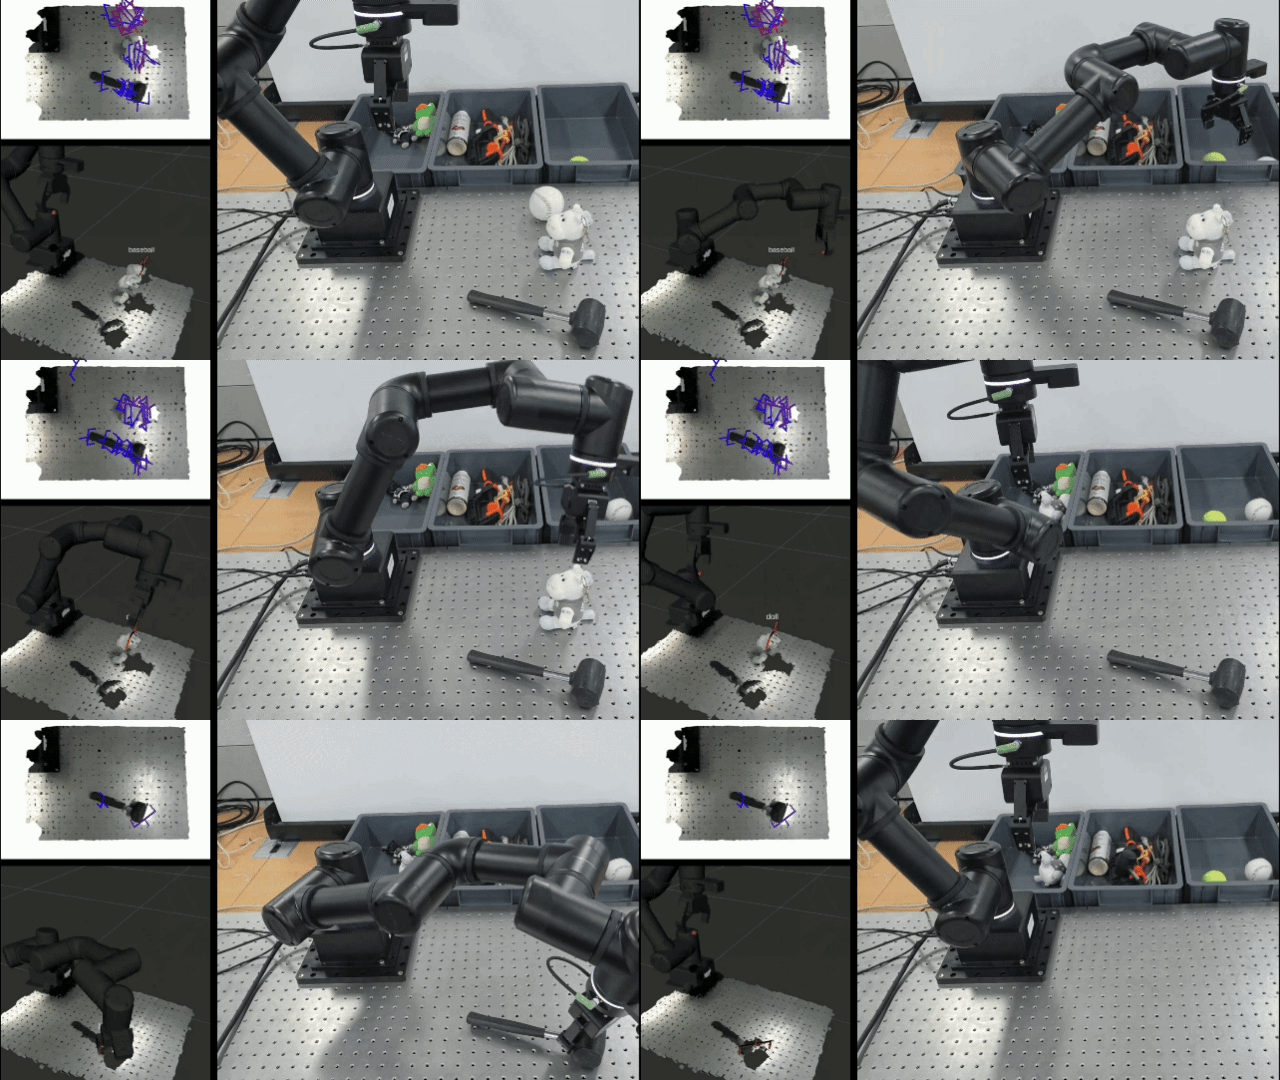
Pick-and-Place on OMY with GraspNet and Gemini
Full Demo
A demo video of the GraspNet pick-and-place operation.
1. Overview
We built pick-and-place on OMY using GraspNet-baseline, an open-source 6-DoF grasp detection network from the MVIG lab at SJTU, to generate grasp candidates directly from a captured point cloud — no per-object training or pre-recorded poses required. On top of that, we added a Google Gemini integration for two things: classifying an already-picked object with no training of our own, and locating a specific object from a plain-text description.
- Object Classification & Sorting (
omy_graspnet.launch.py) — picks any object, and (when AI mode is on) uses Gemini to classify it and route it to a different place based on rules you set live in a command window. With AI mode off, it just picks the best-scoring candidate and places it at one fixed spot — a plain GraspNet-only pick. - Target Grasping (
omy_target_graspnet.launch.py) — type what you want (e.g."tennis ball","hammer handle"), and it finds and picks exactly that.
The full code is on the feature-graspnet branch.
2. System Architecture
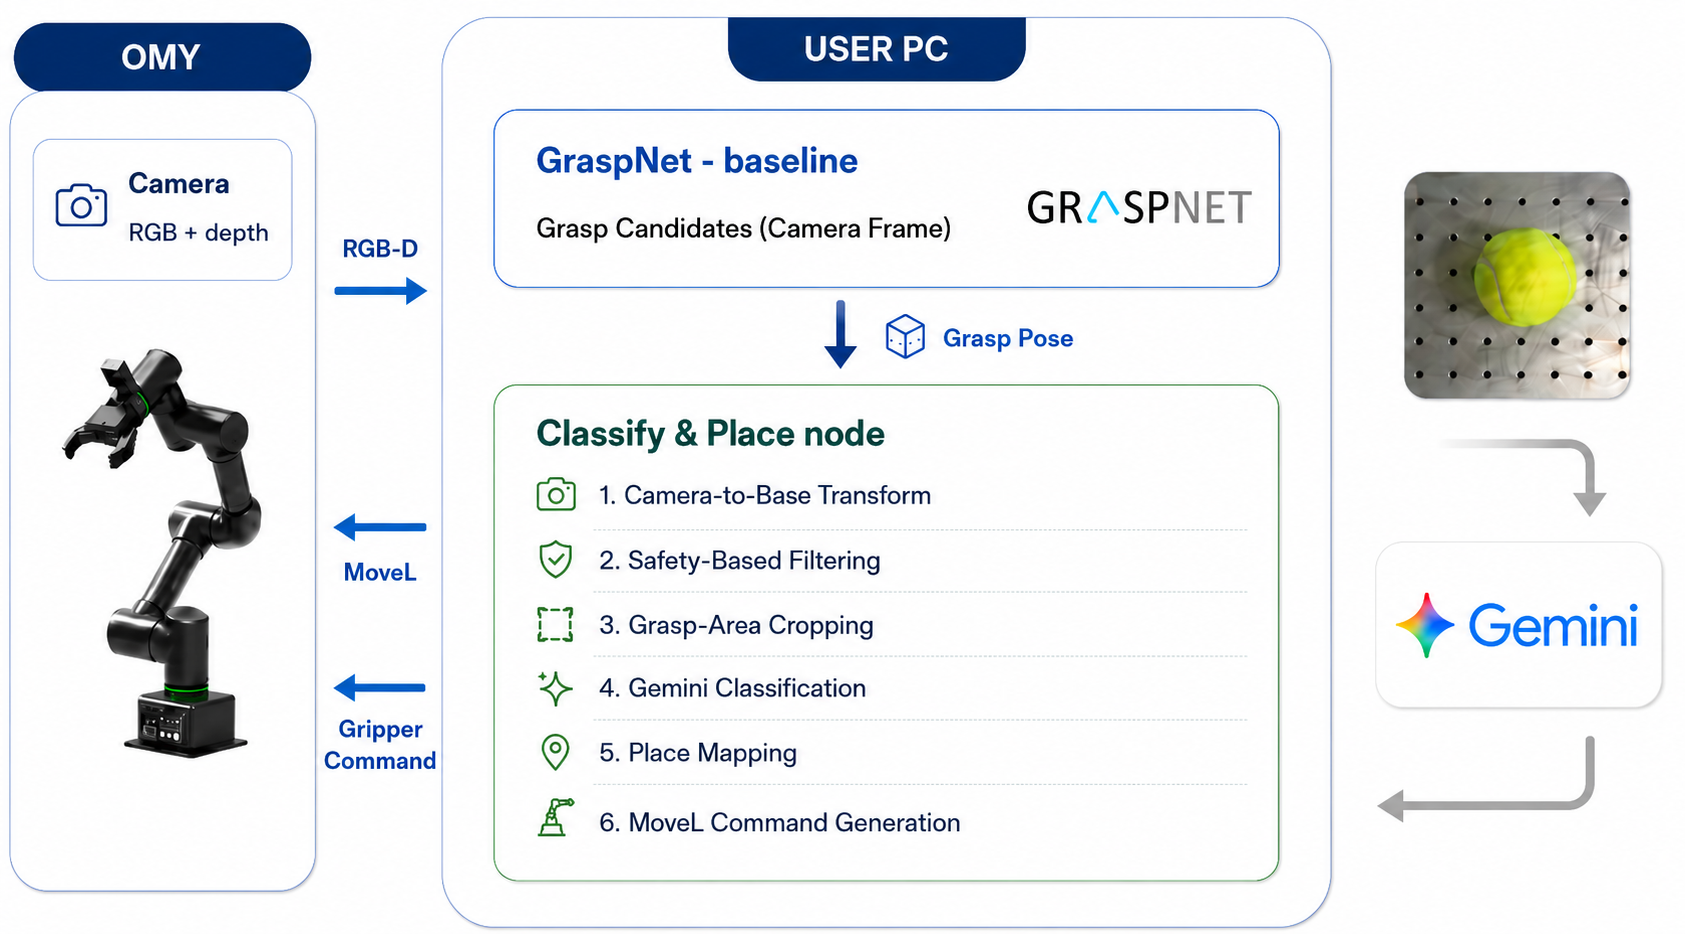
- Robot: runs OMY's own bringup.
- User PC: runs Cyclo Control (the
MoveLcontroller) and our GraspNet + Gemini pick-and-place node. This is where GraspNet-baseline's GPU inference and the Gemini API calls happen. The resultingMoveL/gripper commands go out over the network the same way any other Cyclo Control command would.
At a high level, each detection cycle: captures an RGB-D frame → runs GraspNet-baseline inference → filters candidates for safety (reachability, tilt, table clearance, etc.) → optionally calls Gemini (classify what was picked, or locate what you asked for) → sends the resulting MoveL + gripper commands.
3. Operation Guide
Run these in order, each in its own terminal.
Step 1 — Get the Code and Build the Container (User PC)
This build is heavier than the base image (CUDA toolkit, torch, graspnet-baseline), so the first run takes a while:
git clone -b feature-graspnet https://github.com/ROBOTIS-GIT/open_manipulator.git
cd open_manipulator/docker
./container.sh start
./container.sh enter
You'll also need Cyclo Control set up in the same container for Step 4 below, if you haven't already:
cd ~/ros2_ws/src
git clone https://github.com/ROBOTIS-GIT/cyclo_control.git
vcs import . < cyclo_control/cyclo_control_ci.repos
cd ~/ros2_ws
sudo apt update
rosdep install --from-paths src --ignore-src -r -y --rosdistro jazzy
# --parallel-workers/MAKEFLAGS capped to avoid OOM on hosts with many cores but limited RAM
MAKEFLAGS='-j4' colcon build --symlink-install --parallel-workers 4 --cmake-args -DCMAKE_BUILD_TYPE=Release
source install/setup.bash
To use the gripper, point Cyclo Control at the arm controller's default topic:
sed -i 's|joint_command_topic: "/leader/joint_trajectory"|joint_command_topic: "/arm_controller/joint_trajectory"|g' ~/ros2_ws/src/cyclo_control/cyclo_motion_controller_ros/config/omy_config.yaml
Zenoh setup (see Zenoh Communication for details):
cat >> ~/.bashrc << 'EOF'
export ZENOH_CONFIG_OVERRIDE='transport/shared_memory/enabled=true;mode="client";connect/endpoints=["tcp/robot_ip:7447"]'
EOF
source ~/.bashrc
Replace robot_ip with the robot's actual IP address.
The Robot side doesn't need this branch — it just runs OMY's normal bringup, so follow the regular Setup Guide for that.
Step 2 — Set Up the Gemini API Key
Both features call the Gemini API — for classification, target localization, or both, depending on which one you run. You'll need your own API key:
- Get a free API key from Google AI Studio.
- Set it as an environment variable inside the container — never commit it to any tracked file:
echo 'export GEMINI_API_KEY="your-key-here"' >> ~/.bashrcsource ~/.bashrc
If GEMINI_API_KEY isn't set, both nodes still run — they just skip the Gemini call and fall back to picking the best-scoring candidate, regardless of what rules or target text you set.
Step 3 — Bring Up OMY (Robot Container)
ros2 launch open_manipulator_bringup omy_f3m.launch.py
Step 4 — Launch Cyclo Control & a GraspNet Feature (User PC Container)
First, launch the MoveL controller:
ros2 launch cyclo_motion_controller_ros omy_controller.launch.py
Then, in another terminal in the same container, launch one of the two GraspNet features:
Object Classification & Sorting
ros2 launch open_manipulator_playground omy_graspnet.launch.py
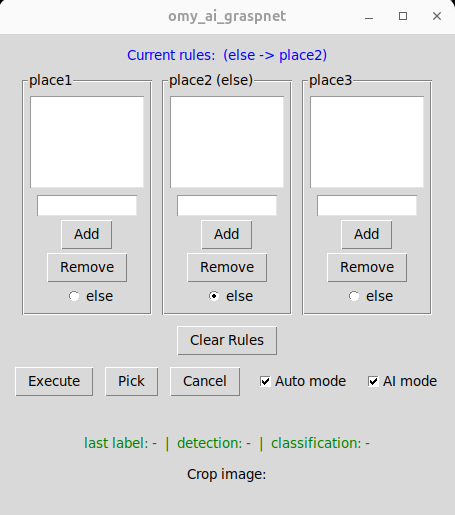
A command window opens with a box per place (place1, place2, ...):
- Type a category name (e.g.
doll) into a place's text box and click Add to send that category there.place2here is set aselse, so anything that doesn't match a rule goes there by default — select else under a different box to make that one the default instead. - Click Execute to run one detection cycle, or check Auto mode to have it repeat pick-and-place continuously. Pick runs the last detected grasp again; Cancel stops an in-progress auto loop.
- AI mode turns Gemini classification on or off. With it off, the rules above are ignored and it just picks the best-scoring candidate and places it at one fixed spot — a plain GraspNet-only pick.
- Clear Rules removes everything you've added, back to just the default place.
The boxes in the window (place1, place2, ...) come from open_manipulator_playground/config/omy_ai_graspnet_places.yaml. To add a new place, hand-jog the arm to where you want it to place, read its end_effector_link pose, and add it as a new entry under places: in that file. Restart the node, and a new box for it shows up automatically.
Drop a reference photo for a category into open_manipulator_playground/images/, named <category>_reference.png (e.g. doll_reference.png). If one exists, it gets sent to Gemini alongside the crop as a few-shot example, which noticeably improves accuracy over relying on the category name alone.
Target Grasping
ros2 launch open_manipulator_playground omy_target_graspnet.launch.py
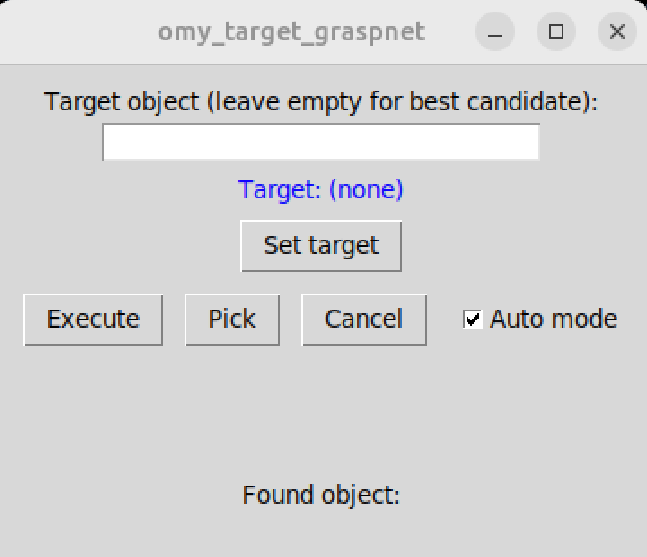
A command window opens with a single text box instead of place rules:
- Type what you want to pick — a whole object (
tennis ball) or a specific part of one (hammer handle,center of bottle) — and click Set target. Leave it empty to just pick the best-scoring candidate. - Execute / Pick / Cancel / Auto mode work the same as above.
Both launch files share the same arguments:
| Argument | Default | Description |
|---|---|---|
execute_motion | true | Whether the arm is actually allowed to move (set false for detection-only, no motion). |
auto | true | Whether it repeats pick-and-place in a loop until cancelled. |
top_k | 50 | How many grasp candidates to visualize in the debug 3D view. |
movel_duration_sec | 3.0 | Base duration for arm motion, in seconds. |
gripper_close_bias | 0.6 | How much extra the gripper closes beyond the measured object width. |
place_enabled | true | Whether to actually place after picking, or just pick and hold. |
4. How It Works
4.1 Basic Operation (AI Mode Off)
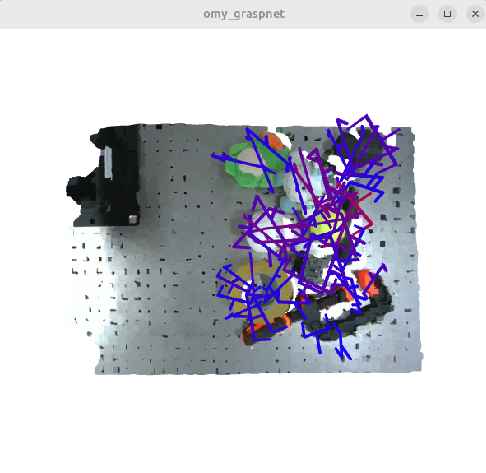
With AI mode off, this is the whole pipeline: capture a point cloud, hand it to GraspNet-baseline, and filter/rank whatever candidates come back for safety (reachable, not too flat an angle, actually above the table). The 3D window is a debug view — it shows every candidate that survived filtering, up to top_k (50 here):
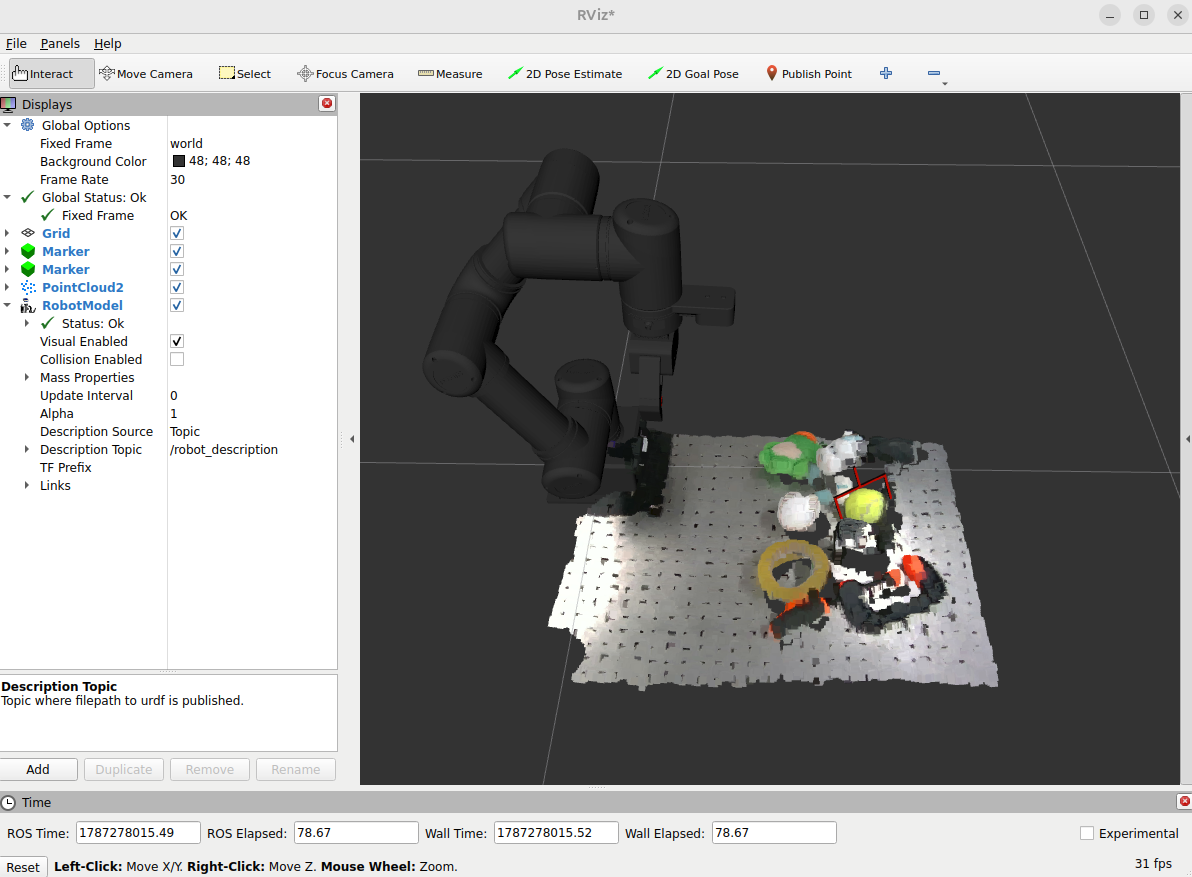
RViz, on the other hand, only ever shows the one candidate that was actually selected and converted into the robot's base frame, as a single red marker:
4.2 Object Classification (AI Mode On)
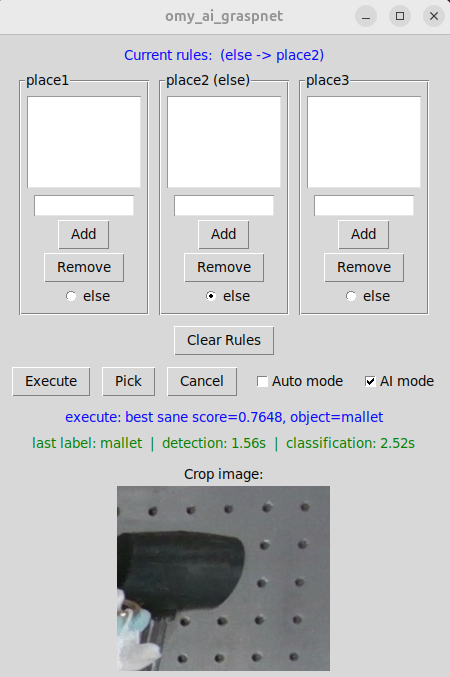
With AI mode on, the same candidate selection happens first — then, since we already know exactly where the grasp is, a small crop of the color image centered on that point gets sent to Gemini for classification. The command window shows that crop along with the returned label and the timing for each step — here it came back mallet:
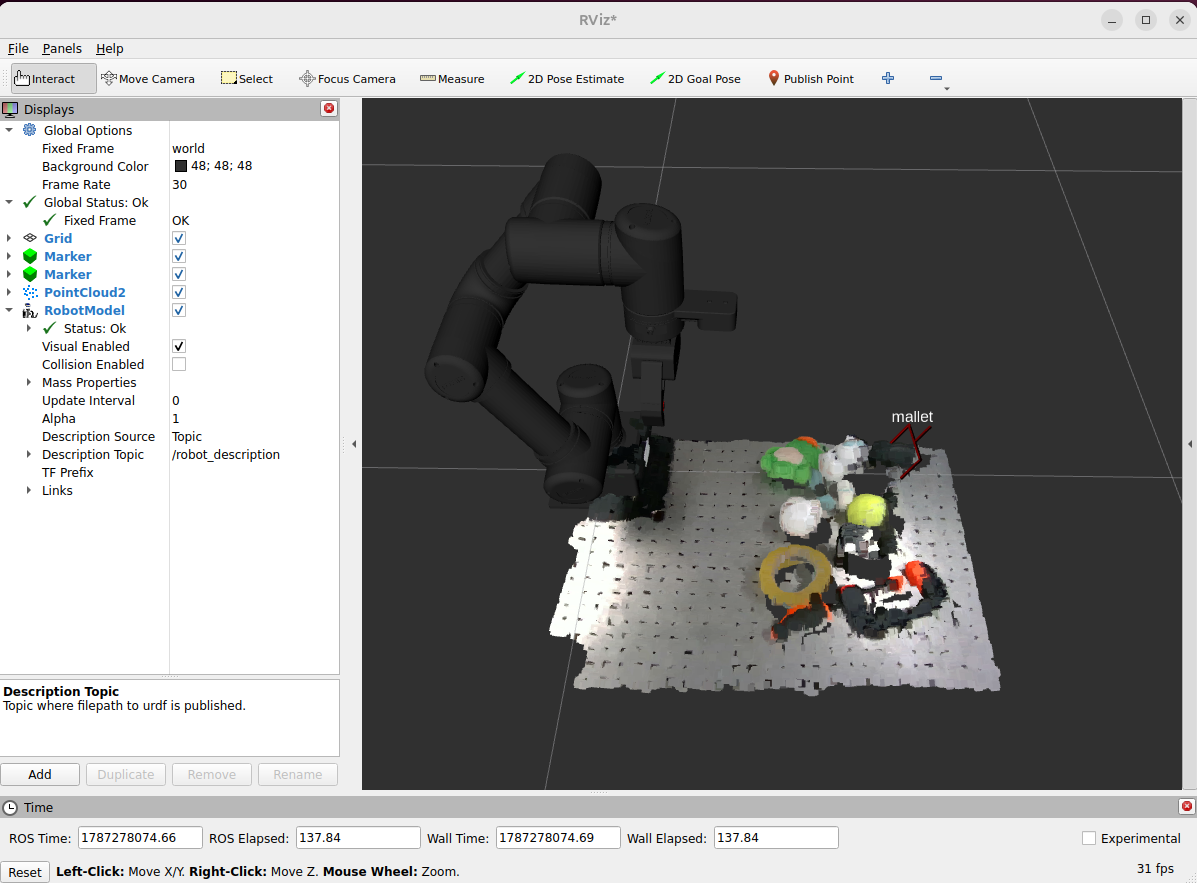
That label also shows up as a text marker floating above the grasp in RViz, and is what decides which place it gets routed to:
4.3 Target Grasping
This mode works the other way around: with tennis ball typed in as the target, the whole image (not a crop) is sent to Gemini first to locate it, and only then do we look at the grasp candidates — picking whichever one is actually closest to that location:
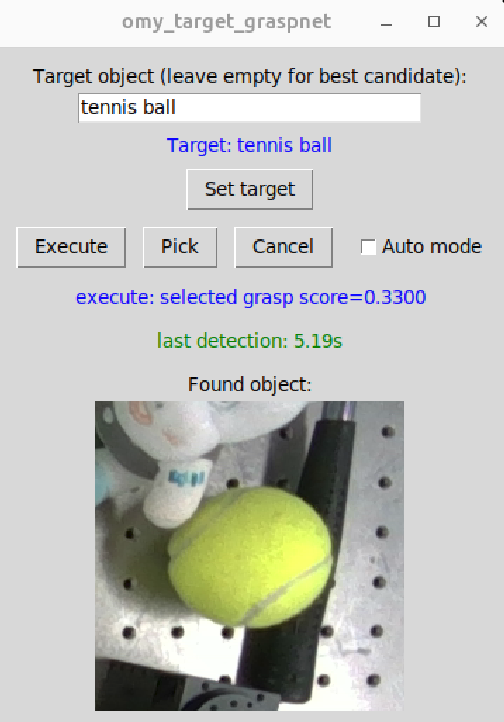
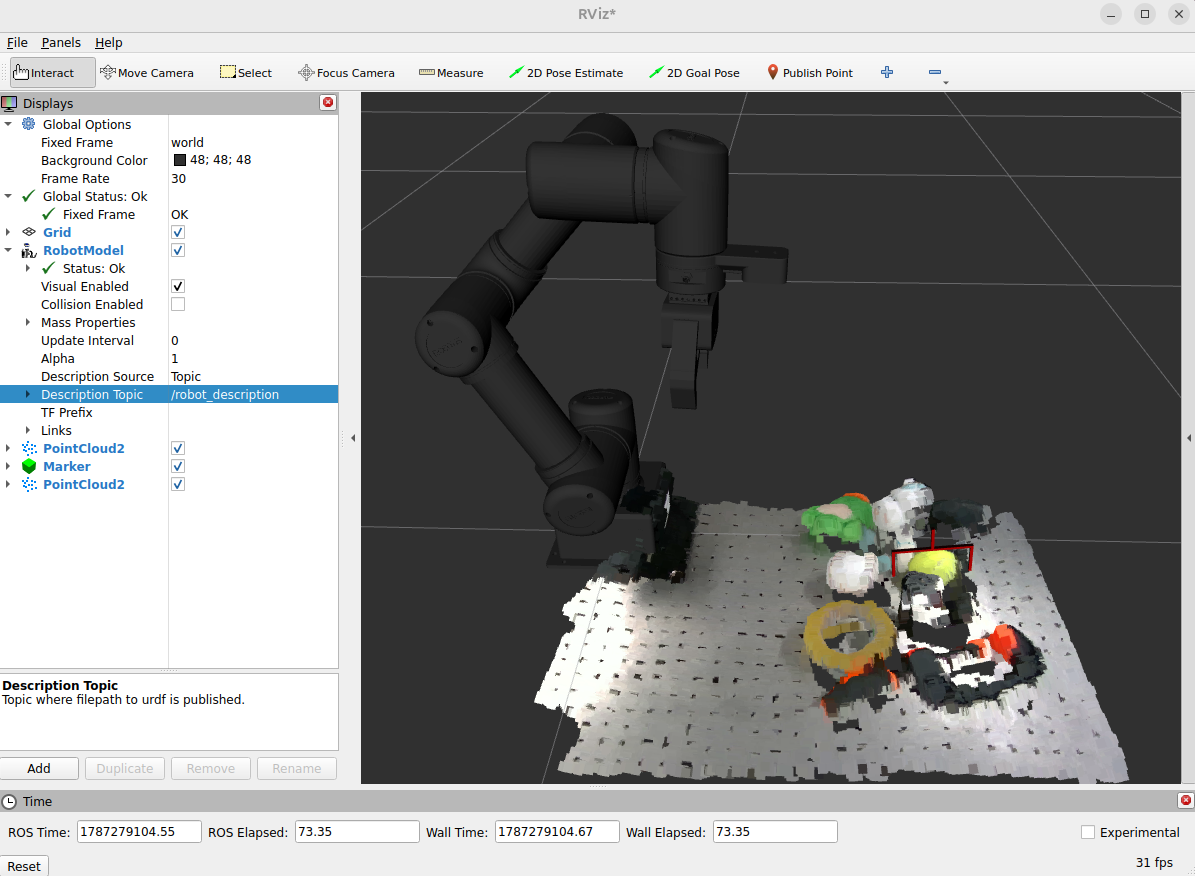
The result, once converted into the robot's base frame, shows up in RViz as a single marker right on the tennis ball:
5. Full Pick-and-Place Cycle
Putting it all together, here's what actually happens end to end for one cycle, with AI mode on:
-
Capture and build a point cloud. We grab an RGB-D frame straight from the camera's SDK and turn the depth image into a 3D point cloud, still in the camera's own optical frame at this point.
-
Hand the point cloud to GraspNet-baseline. GraspNet-baseline takes that point cloud and returns a list of grasp candidates — each one just a 3D position, an orientation, a gripper width, and a confidence score. It doesn't know or return anything about what the object is, and every one of those coordinates is still expressed in the camera's frame, not the robot's.
-
Filter and rank, then transform into the robot's frame. We drop candidates that fail a safety check (too wide for the gripper, too close to the table, unreachable, too flat an approach angle) and rank what's left. The best surviving candidate then goes through a TF lookup and a couple of fixed rotations — camera frame → robot base frame → the gripper's own physical orientation — so it becomes an actual
MoveLtarget pose the Cyclo Control controller can drive the arm to.# optical frame (X-right/Y-down/Z-forward) -> body frame (X-forward/Y-left/Z-up)translation_link = R_LINK_FROM_OPTICAL @ translationrotation_link = R_LINK_FROM_OPTICAL @ Rotation.from_quat(quat).as_matrix()# camera_link -> base_frame, looked up from TFrotation_src_to_base = Rotation.from_quat(tf.rotation).as_matrix()translation_base = rotation_src_to_base @ translation_link + tf.translationrotation_base = rotation_src_to_base @ rotation_link -
Crop the color image around that point and send it to Gemini. We already know exactly which pixel the grasp is at (the same depth-aligned pixel↔3D mapping used for the point cloud lets us look this up), so we cut out a small square of the original color image centered there and send just that crop to Gemini, asking it to classify what's in it — optionally alongside a few reference photos per category for comparison.
-
Gemini answers with a single word. The response is a short text label (e.g.
mallet), which we publish as a text marker in RViz floating above the grasp, and use to decide which place location this category is routed to. -
Execute the pick, then the place. Each waypoint (pregrasp, grasp, lift, place-approach, place, home) is published as a
MoveLcommand to/omy_movel_controller/movel, one after another — the arm approaches along the grasp's own axis, closes the gripper to the object's measured width, lifts, moves to the place pose that matches the label from step 5, releases, and returns to its initial pose.translationhere is justtranslation_basefrom the coordinate transform in Step 3 — a 3-element[x, y, z]array — and_send_movelunpacks it straight into the pose fields and publishes it:def _send_movel(self, translation, quat, duration_sec):msg = MoveL()msg.pose.header.frame_id = self.base_framemsg.pose.pose.position.x, msg.pose.pose.position.y, msg.pose.pose.position.z = translationmsg.pose.pose.orientation.x, msg.pose.pose.orientation.y, \msg.pose.pose.orientation.z, msg.pose.pose.orientation.w = quatmsg.time_from_start = Duration(sec=int(duration_sec))self.movel_pub.publish(msg)