Dataset Preparation - Recording
Before Recording
1. Open the Web UI
a. Access the Web UI in Your Browser
Please enter the IP address of the PC running Physical AI Server (physical_ai_server_bringup.launch.py or ai_server) into your web browser.
If you are running the Physical AI Server and opening the web browser on the same computer,
you can simply enter http://localhost
For example:
- If the PC running Physical AI Server has IP address 192.168.0.105
Accesshttp://192.168.0.105as shown below:

Enter the IP Address
-
Once accessed, the following screen will appear with the
Disconnectedstatus.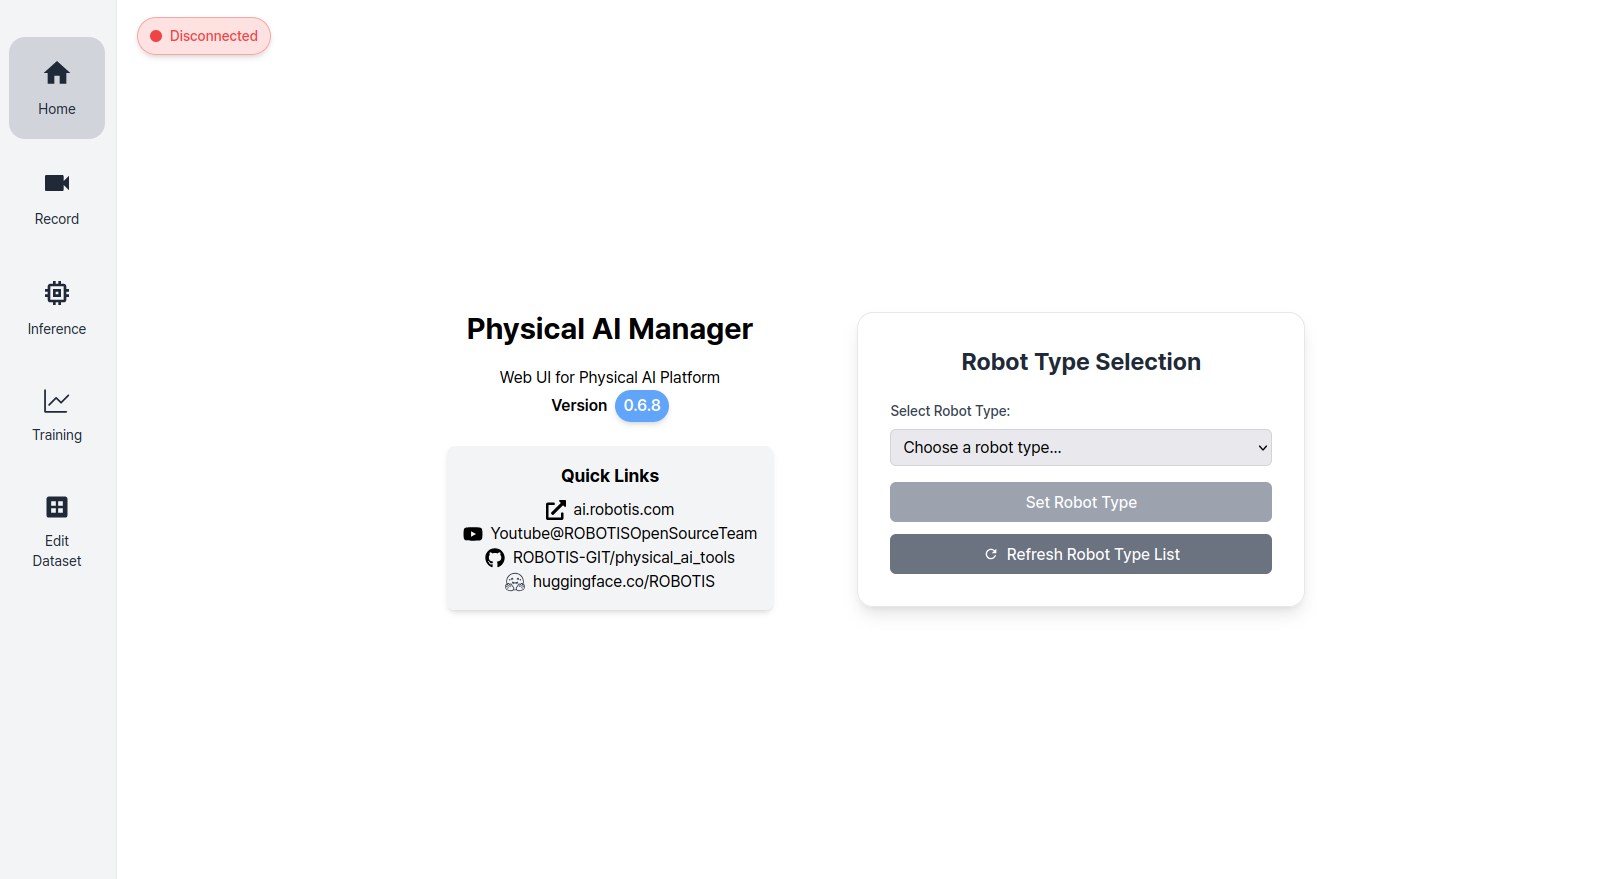
Initial Screen
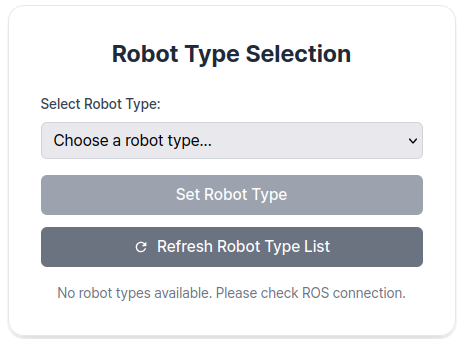
2. Select the Robot Type
On the Home page, select the type of robot you are using.
After clicking the Set Robot Type button, the status will change to Connected.
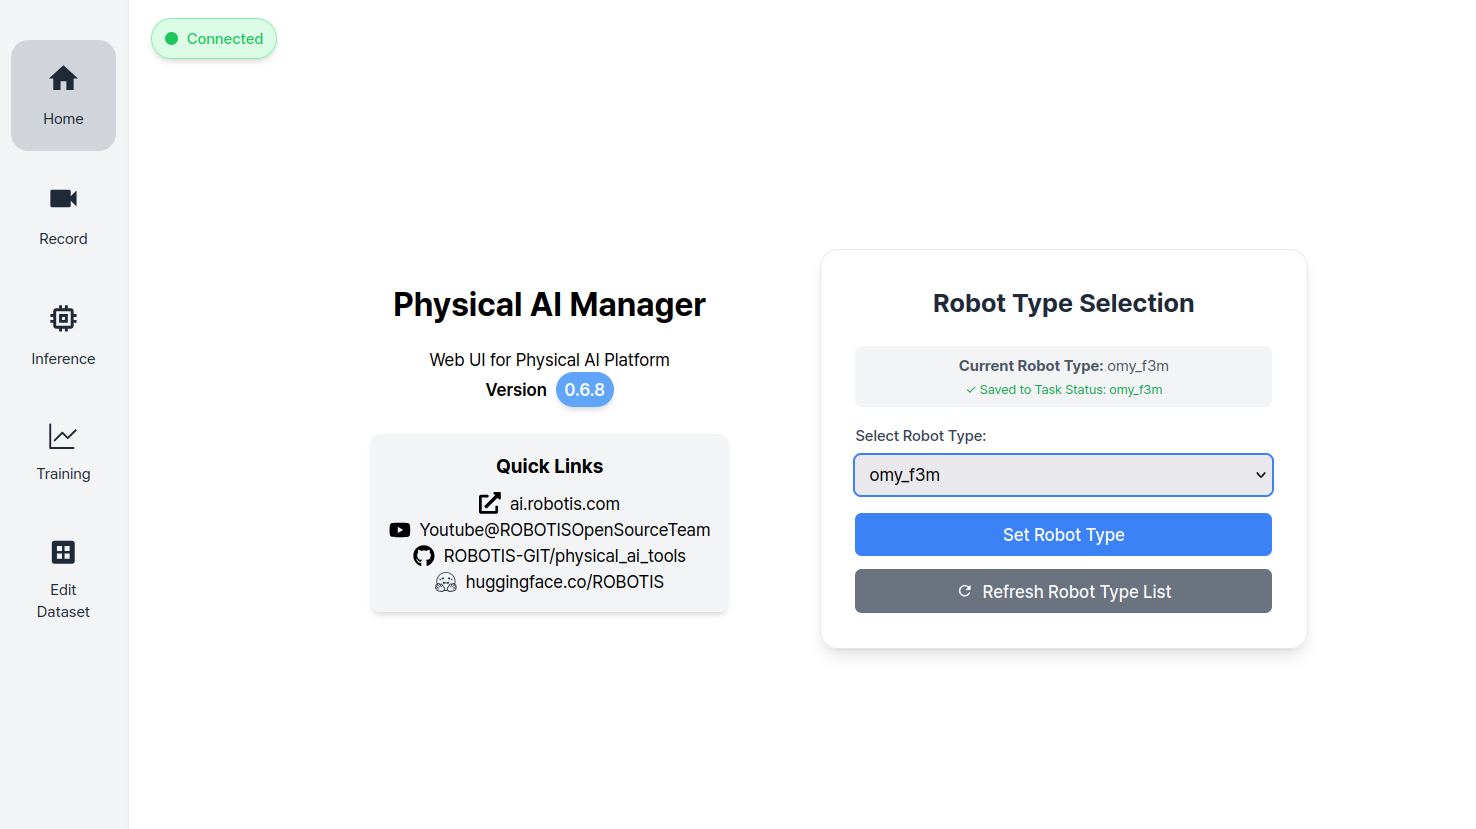
Connected Screen
3. Go to Record Page
You cannot access Record page unless a robot type has been selected on the Home page. Please ensure that the robot type is selected before proceeding.
After the status changes to Connected, you can access the Record page using the button on the left sidebar, as shown below.
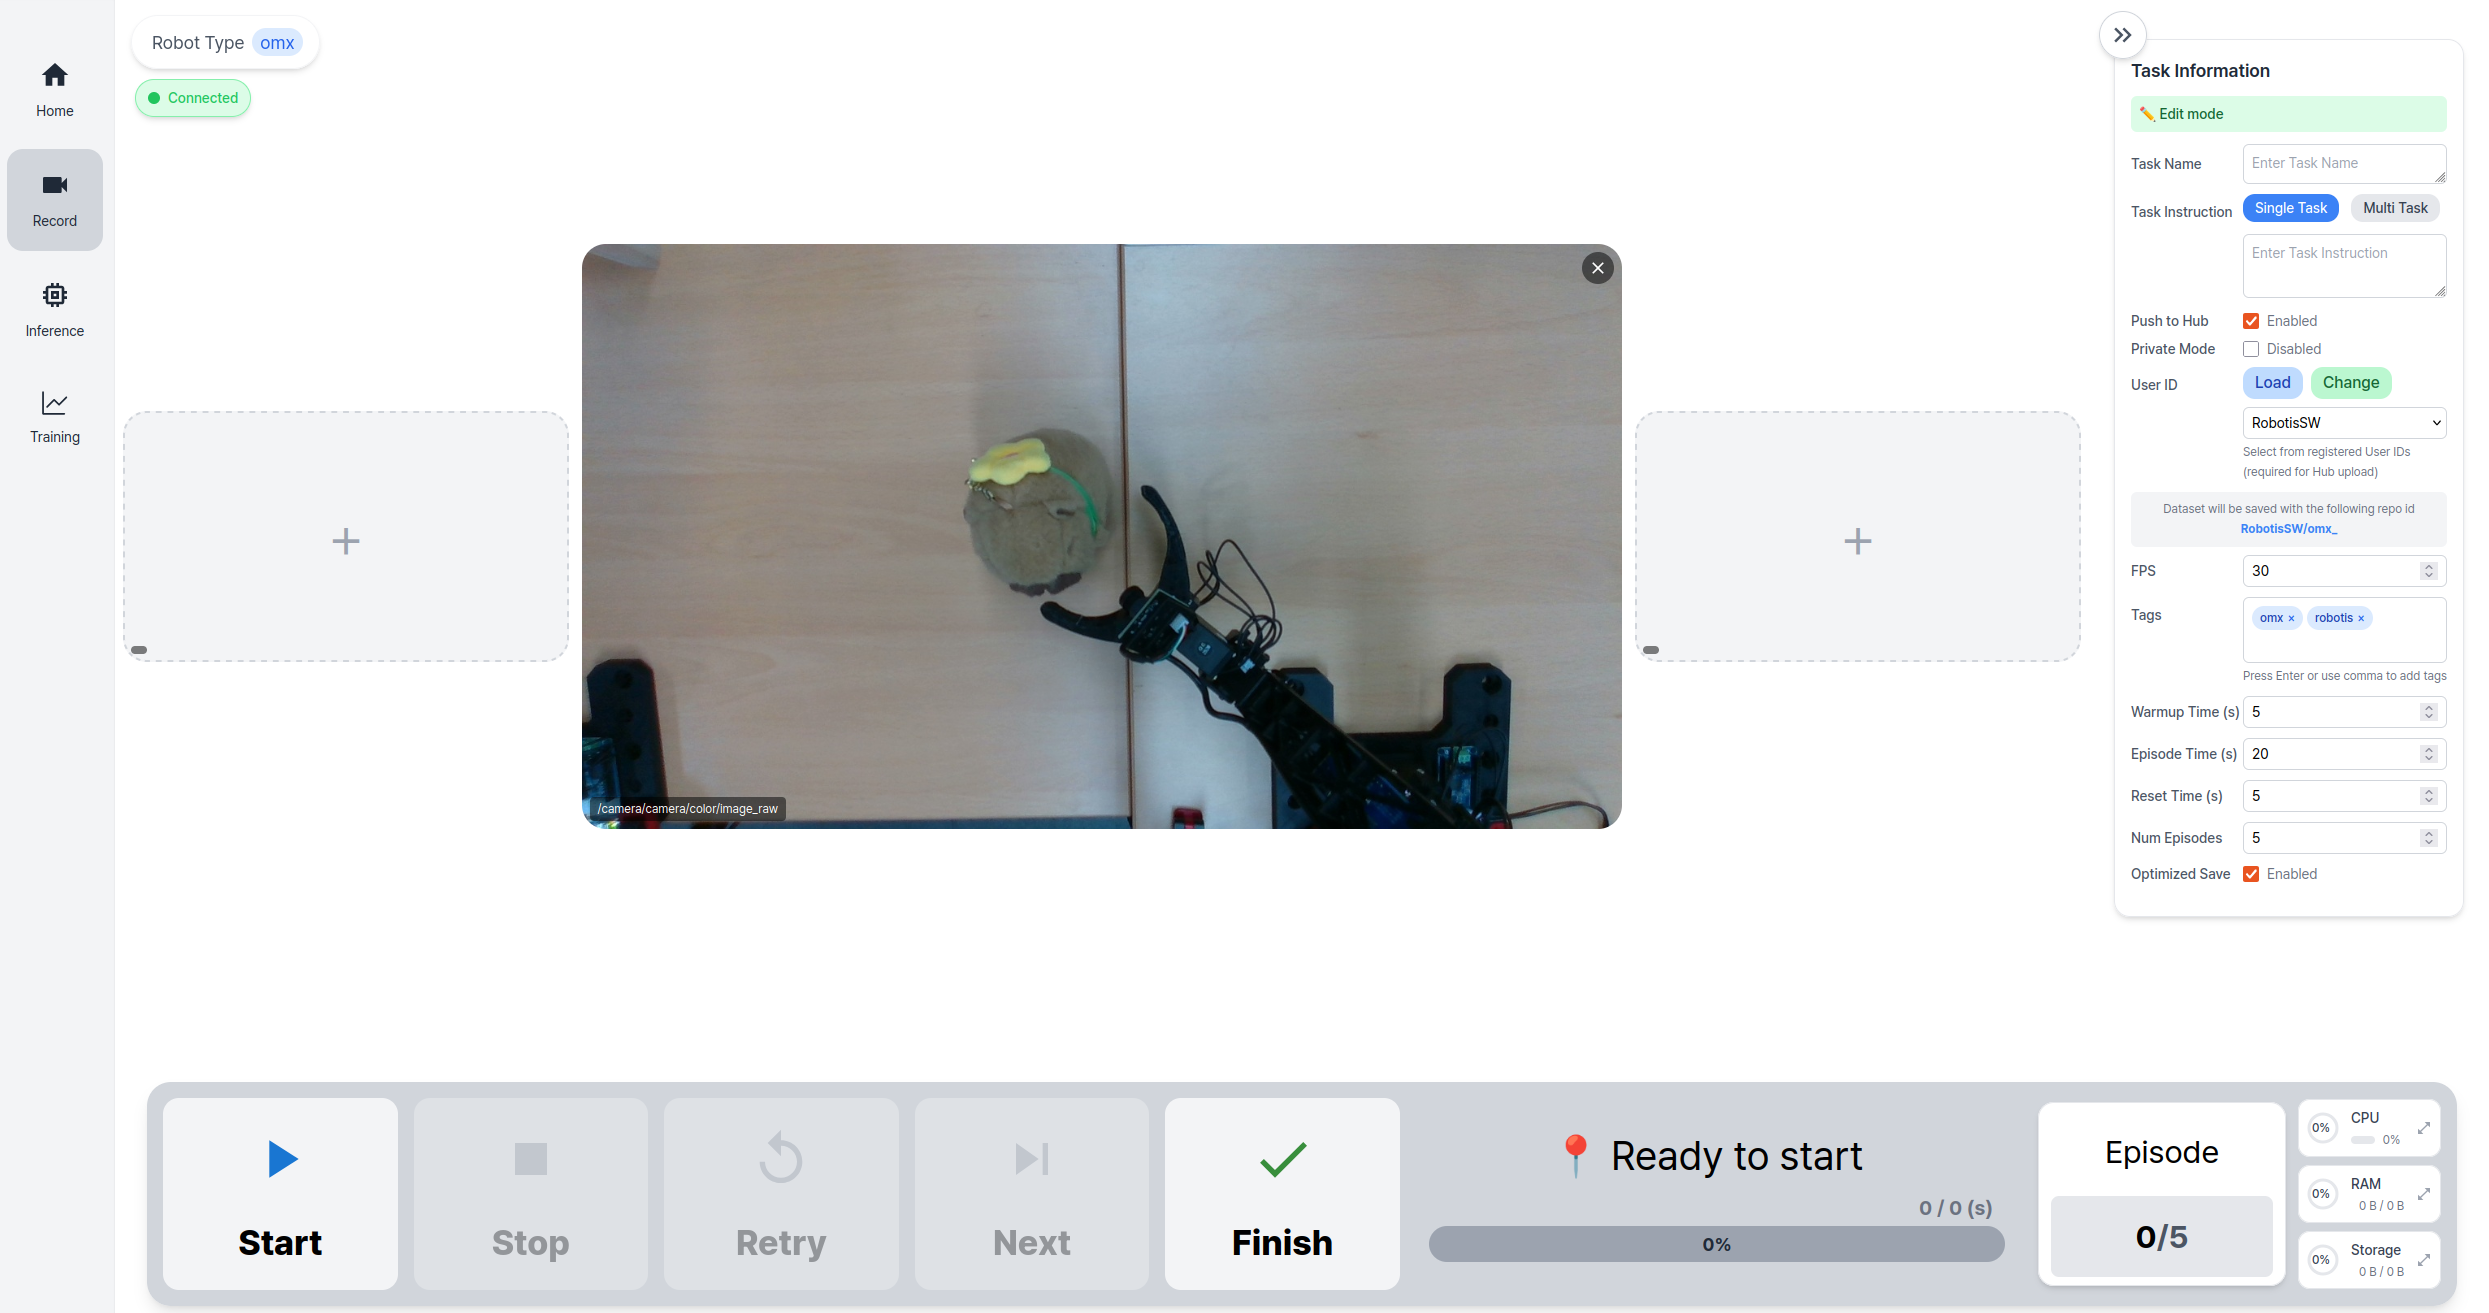
Record Screen
The Record page is divided into three main sections:
-
Image Streaming Area (Center): Displays real-time camera streams from the robot.
-
Task Info Panel (Right side): Enter task name, task instruction, time values, etc.
-
Control Panel (Bottom): Start/stop recording and manage data collection.
The selected robot type is also displayed in the top left corner.
4. Visualize RGB Images
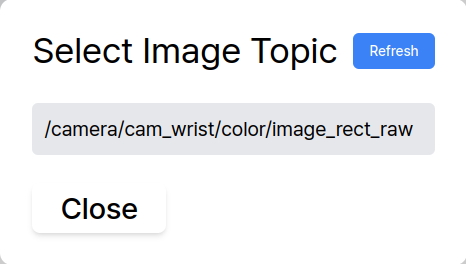
The image stream is displayed automatically upon entering the Record page. You can remove the current stream and select a different one as needed.
To change the image topic:
- Click the
+button in the Image Streaming Area. - Choose a topic from the popup window.
5. Enter Task Information
Fill out the task-related fields in the Task Info Panel, as shown below. For more information about what each field means in the Task Info Panel, please refer to Task Information Field Descriptions below.
- Single Task Mode
- Multi Task Mode
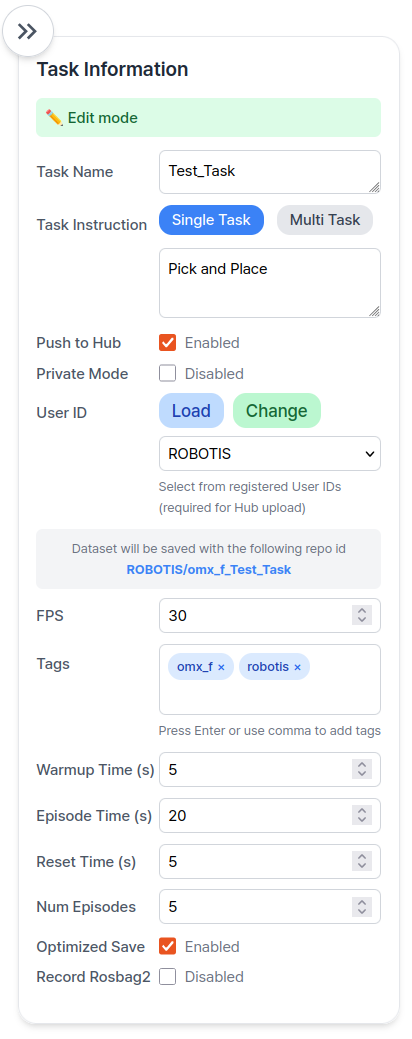
Filled Panel
Please click the Add Instruction button to add additional language instructions.
You can remove an instruction by simply clicking the X button on the right.
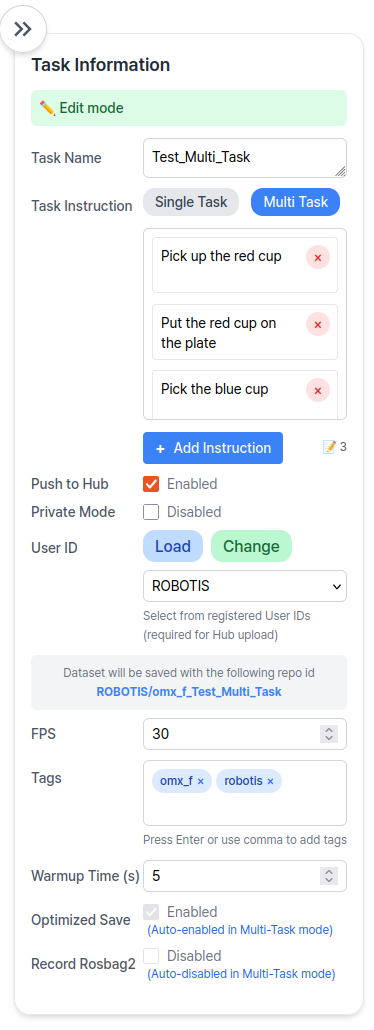
Filled Panel
Task Information Field Descriptions
| Item | Description |
|---|---|
| Task Name | It is used for the folder name of the dataset |
| Task Instruction | It is a sentence that instructs the robot what action to perform, such as "pick and place object". In multi-task mode, you can add Task Instructions by clicking the Add Instruction button. |
| Push to hub | If you want to push the dataset to the Hugging Face Hub, check this box. This allows sharing and training. To push to the Hugging Face Hub, you need to: 1. Have a Hugging Face account 2. Have the necessary permissions to push to the repository |
| Private Mode | Only available when "Push to hub" is checked. Keeps your dataset private on Hugging Face. |
| User ID | Your Hugging Face account username, also used as the folder name for the dataset. - If not using Hugging Face, you can use any name. - If using Hugging Face, click Load to select from registered User IDs.- If no User IDs or want a different one, click Change and enter your Hugging Face token.- The Hugging Face token must have both read and write permissions enabled. 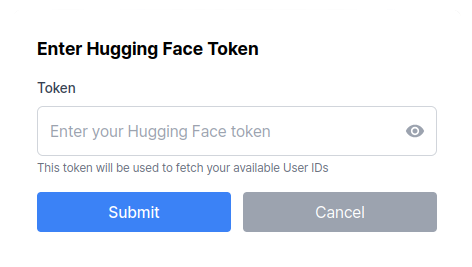 - If you have a registered account but haven't checked "Push to hub", you can either: 1. Load a registered User ID 2. Manually enter any User ID |
| FPS | Frame rate for dataset recording. Recommended value is 15. |
| Tags | Keywords to categorize and organize your dataset in the hub. Multiple tags can be added. Useful for searching or filtering later. |
| Warmup Time | Duration (in seconds) to warm up the robot before starting the recording |
| Episode Time | Duration (in seconds) to record each episode |
| Reset Time | Time allocated (in seconds) for resetting between episodes |
| Num Episodes | Total number of episodes to record |
| Optimized Save | If enabled, uses RAM for faster dataset encoding processing |
| Record Rosbag2 | If enabled, records rosbag2 data along with the dataset |
When the Record Rosbag2 option is enabled, rosbag2 data is recorded along with the LeRobot dataset during recording. This feature allows you to save raw data from the robot's camera image topics and joint topics.
The rosbag folder is created at the following path:
<your_workspace>/physical_ai_tools/docker/workspace/rosbag2/{User ID}/
A rosbag is generated for each episode with the following structure:
.
├── 0/
│   ├── 0_0.mcap
│   └── metadata.yaml
├── 1/
│   ├── 1_0.mcap
│   └── metadata.yaml
(...)
You are now ready to start recording your dataset.
Start Recording
To begin recording, use the Control Panel located at the bottom of the Record page:
- Single Task Record
- Multi Task Record

Step 1: Click the Start Button
Click the Start button to begin the recording session. The system will automatically:
- Warm up the robot for the specified Warm-up Time
- Record each episode for the specified Episode Time
- Wait for the specified Reset Time between episodes
- Repeat the above steps for the specified Number of Episodes
Step 2: Monitor and Control During Recording
While recording is in progress, the following controls are available:
- The
Stopbutton saves the current episode in progress and stops the recording. If you press theStartbutton again, recording will resume from the next episode - The
Retrybutton cancels the current episode and restarts recording for that episode - The
Nextbutton ends the current episode early and moves to the next episode - The
Finishbutton ends the recording session and saves the current dataset, regardless of the remaining number of episodes

Step 1: Click the Start Button
Click the Start button to begin the recording session. The system will automatically:
- Warm up the robot for the specified Warm-up Time
- Start recording the first task
- The
Episodecounter increments by 1 each time a task is completed. - After completing all tasks, the
Scenariocounter increments by 1 and the cycle returns to the first task.
Step 2: Monitor and Control During Recording
While recording is in progress, the following controls are available:
- The
Stopbutton stops the current recording task. If you press theStartbutton again, recording will resume from the next task - The
Skip Taskbutton cancels the current task and move to the next task - The
Retrybutton cancels the current task and restarts recording for that task - The
Nextbutton ends the current task and moves to the next task - The
Finishbutton ends the recording session and saves the dataset
-
The current recording stage is displayed in the control panel:
- 📍 Ready to start — Standby mode before recording begins
- 🔥 Warm-up in progress — Robot is warming up
- 🔴 Recording in progress — Capturing data
- 🏠 Reset in progress — Reset time between episodes
- 💾 Saving... — Encoding and saving the episode
- 🔊 A beep alarm will sound at the start of each recording to indicate the timing.
After Recording
- The dataset will be saved on the host machine.
- If "Push to Hub" is enabled, the dataset will be uploaded to Hugging Face.
- You can access the recorded dataset at the following path from from the host environment or Docker container:
USER PC
<your_workspace>/physical_ai_tools/docker/huggingface/lerobot/
or
USER PC 🐋 PHYSICAL AI TOOLS
${HOME}/.cache/huggingface/lerobot/