Multi-turn error — clearing procedure (AI Worker)
If you see logs like the following while running bringup, a multi-turn error has occurred.
[ros2_control_node-1] [ID:034] RX_PACKET_ERROR : [RxPacketError] Hardware error occurred. Check the error at Control Table (Hardware Error Status)!
[ros2_control_node-1] [comm_id:034][ID:034] Request ping	 - RX_PACKET_ERROR : [RxPacketError] Hardware error occurred. Check the error at Control Table (Hardware Error Status)!
[ros2_control_node-1] [ReadItem][ID:034][comm_id:034] RX_PACKET_ERROR : [RxPacketError] Hardware error occurred. Check the error at Control Table (Hardware Error Status)!
[ros2_control_node-1] [comm_id:034][ID:034] Error Code Details: 0xc (Multi-turn Error): An issue has occurred with the Multi-turn IC
[ros2_control_node-1] [ID:034] Rebooting...
In this example, the multi-turn error is on Dynamixel ID 34.
Use the steps below to clear the multi-turn error.
How to clear the multi-turn error
1. Align the home position
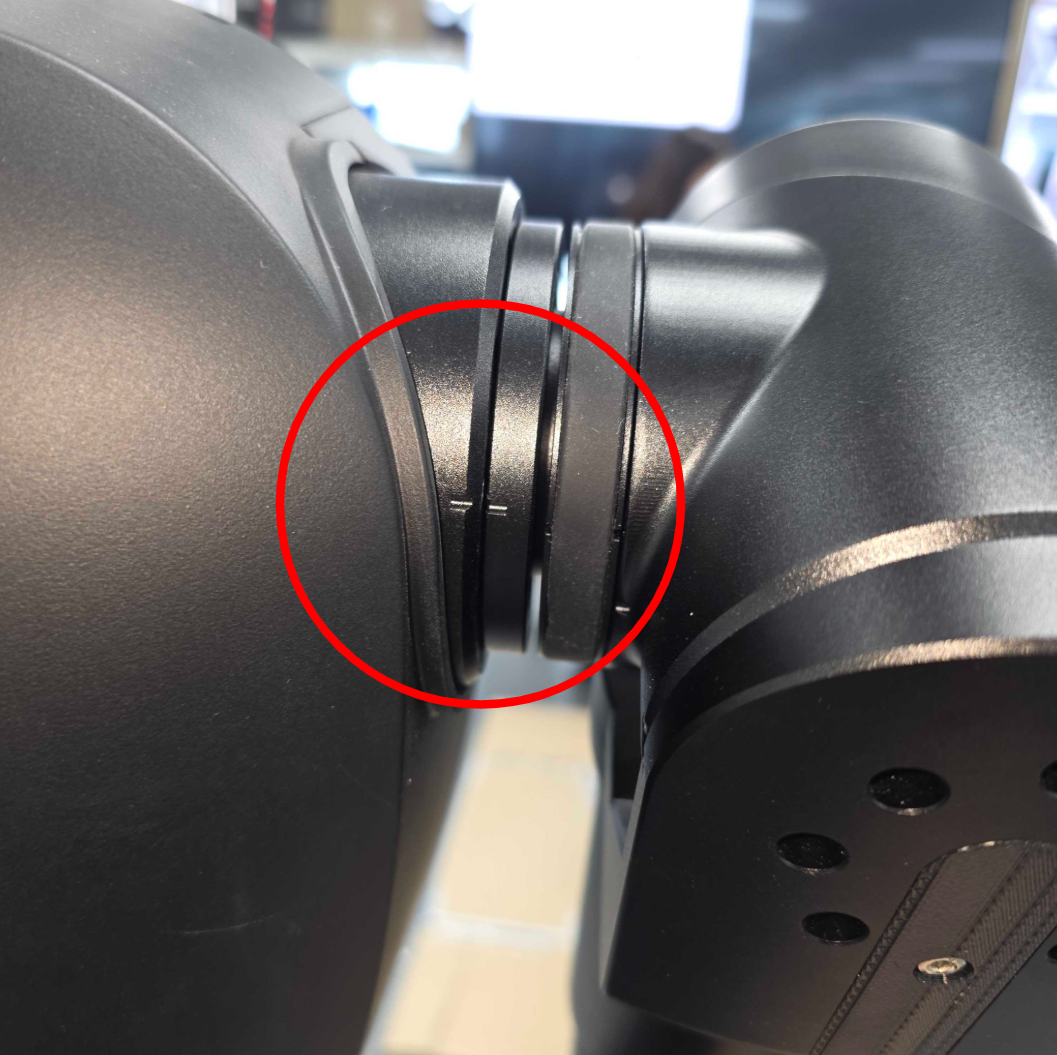
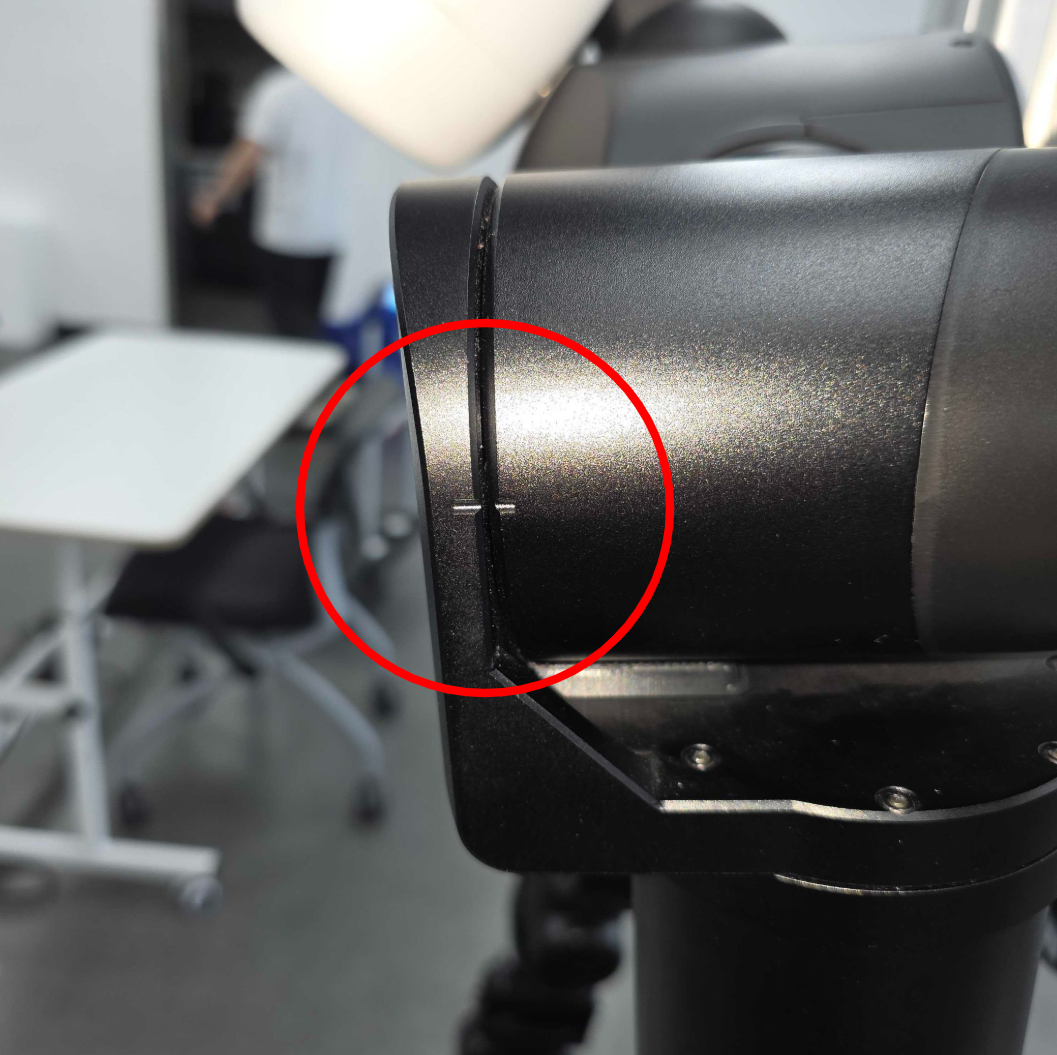
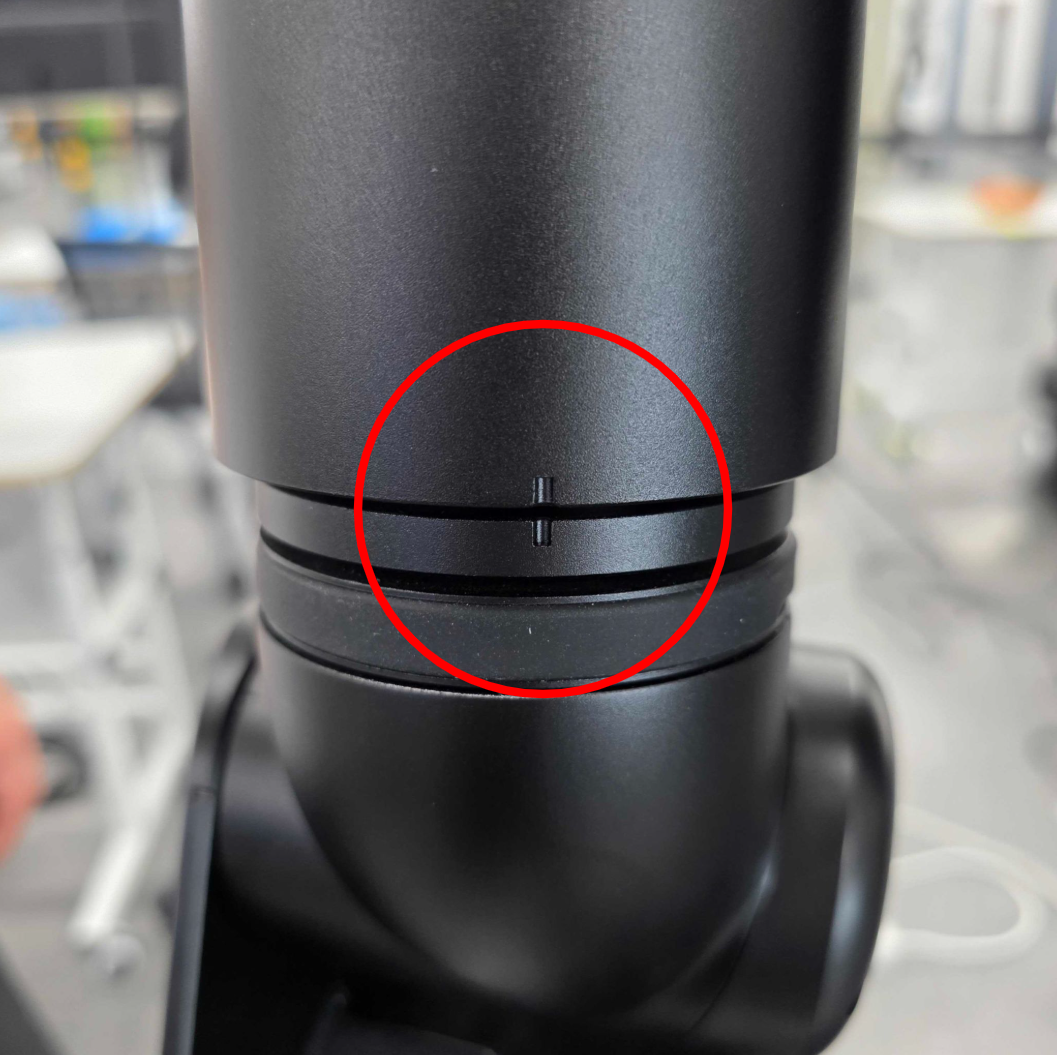
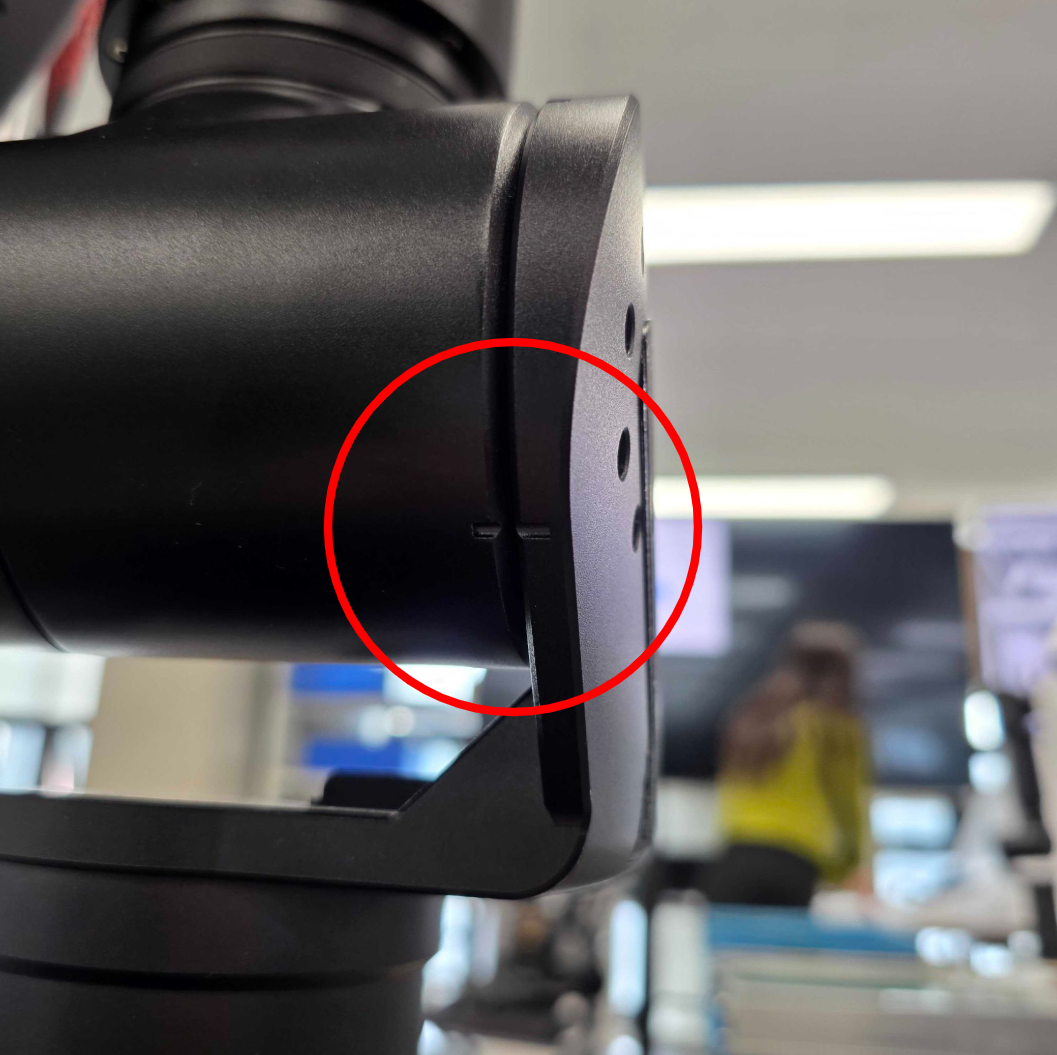
Press the E-stop, align the slit marks while moving the arm toward the home (zero) position, then release the E-stop once alignment is complete.
You only need to set the pose for the joint(s) you plan to clear (for example, the Dynamixel ID shown in the error log). It is not required to align every joint on the arm if the fault is isolated—but keep the arm supported and safe while doing so.
Important: When you perform the multi-turn Clear in Dynamixel Wizard later (Tools → Encoder battery change), the robot must still be in this physically correct alignment. The clear procedure assumes the mechanism matches the home / slit reference at that moment; if the pose is wrong, the encoder state may not clear correctly or the arm may not behave as expected afterward.
Home positions (joint index, Dynamixel ID): the figures below are left arm references. Use the same idea for the right arm if you are clearing servos on that side.
-
Joint 1 (ID 1, 31)
-
Joint 2 (ID 2, 32)
-
Joint 3 (ID 3, 33)
-
Joint 4 (ID 4, 34)
-
Joint 5 (ID 5, 35)
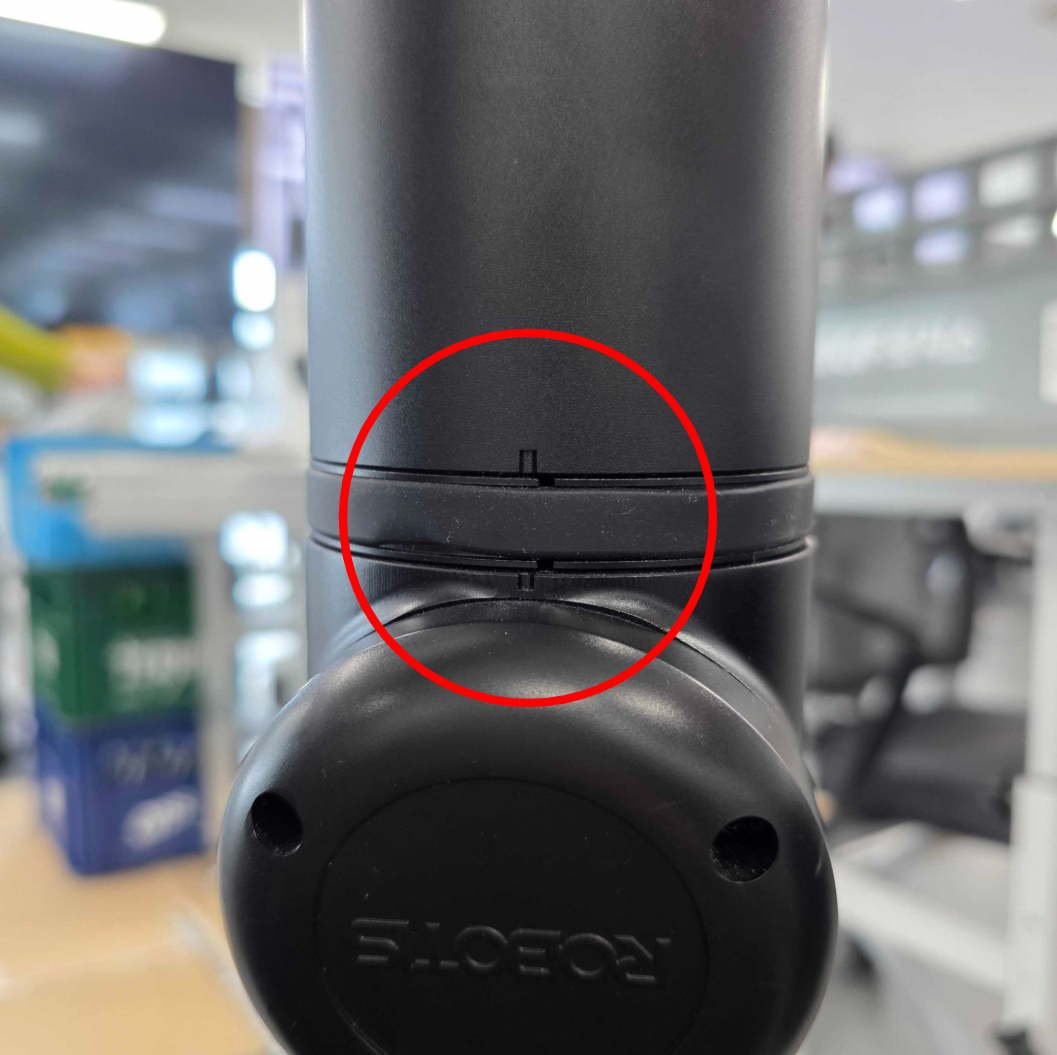
-
Joint 6 (ID 6, 36)
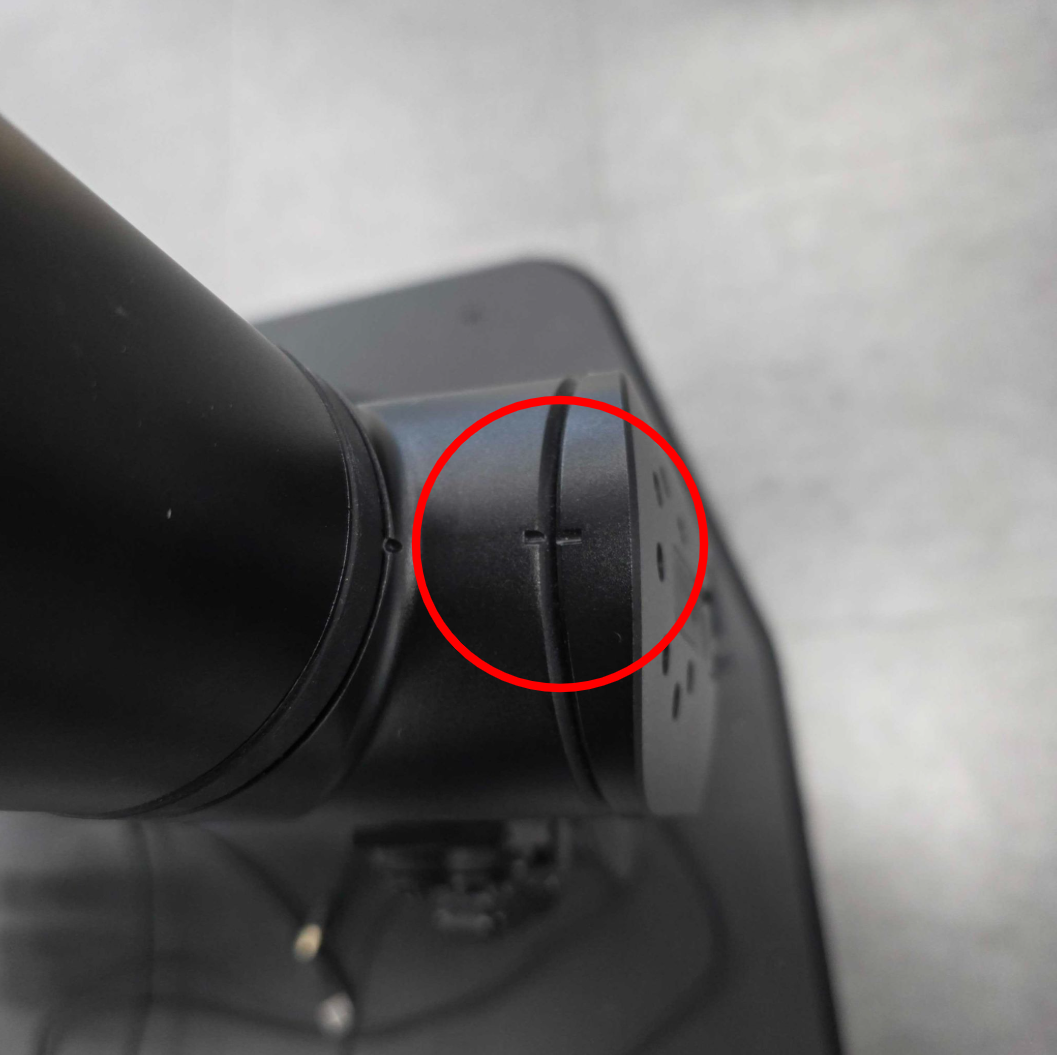
-
Lift Joint (ID 81) - Make sure the top of the slider is 9 cm below the top of the linear rail
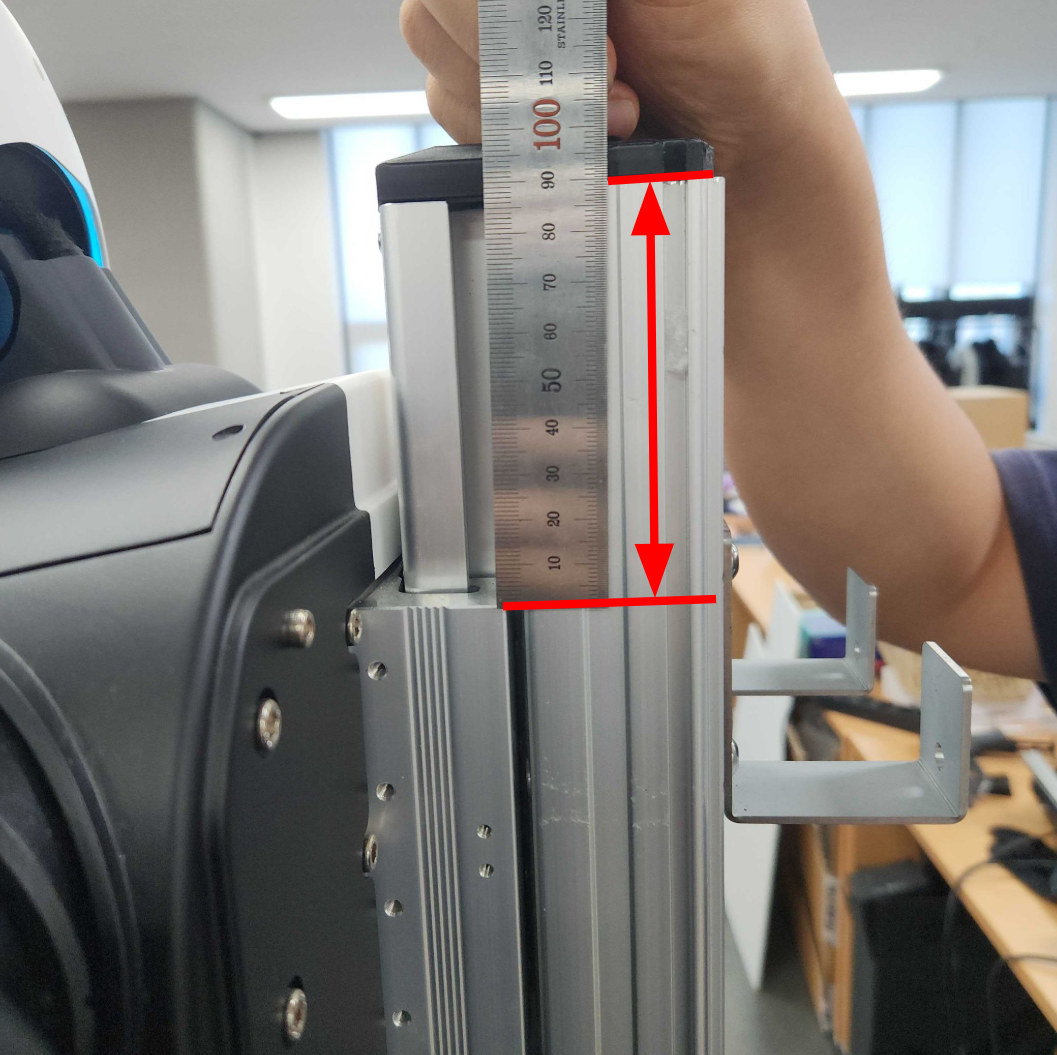
-
Wheels (ID 101, 103, 105) - Align the wheels straight
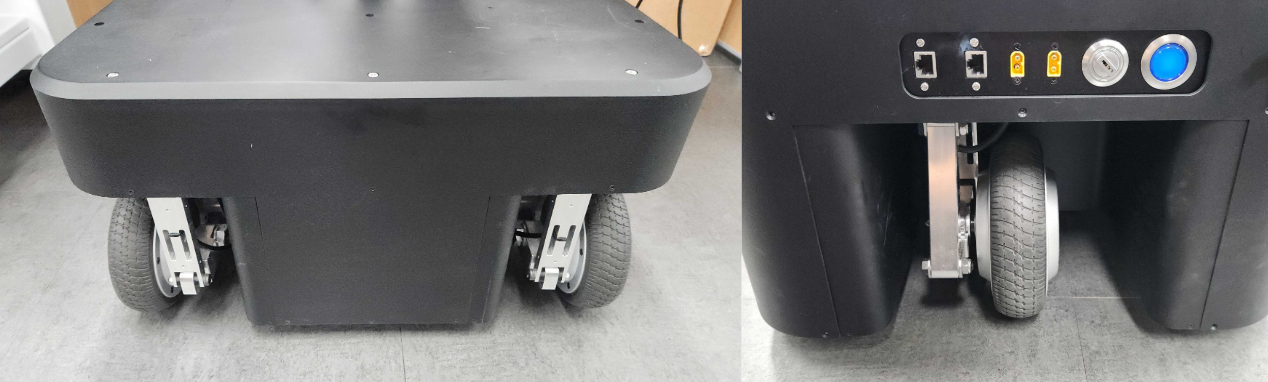
2. Set up and start the noVNC container
⚠️ noVNC and Cyclo Manager
Previously, the AI Worker repository provided noVNC compose directly. After Cyclo Manager was introduced, the noVNC container is now managed from Cyclo Manager instead. Starting with AI Worker 1.2.2, the noVNC Compose file is no longer shipped with AI Worker.
Method 1: Install Cyclo Manager
(How to Install Cyclo Manager).
-
In a web browser(like Chrome), open
http://ffw-snpr48a{serial-number}.local:3000, substituting your robot’s serial number for{serial-number}. (e.g.http://ffw-snpr48a0000.local:3000) -
Navigate to Cyclo Manager -> AI worker -> noVNC Page and click the NOVNC Server Start button on the top and reload the page(F5).
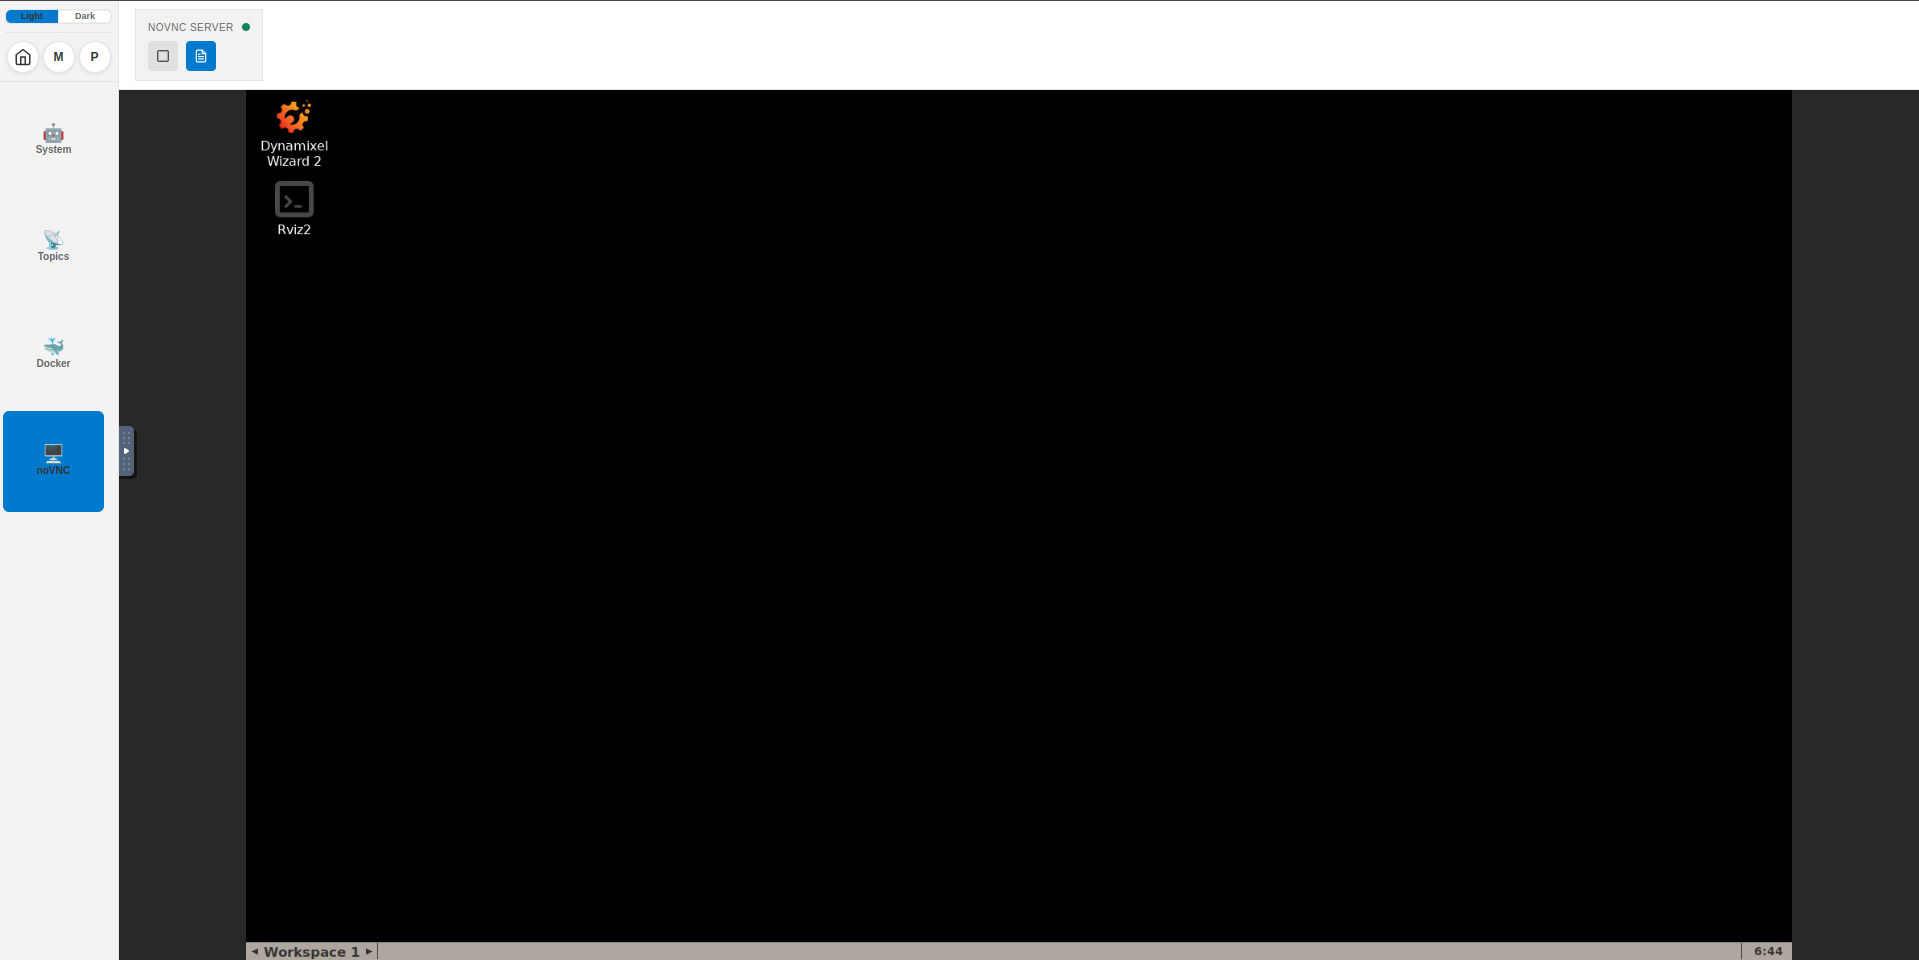
-
Click the
Dynamixel Wizard 2.0icon to open the Dynamixel Wizard 2.0.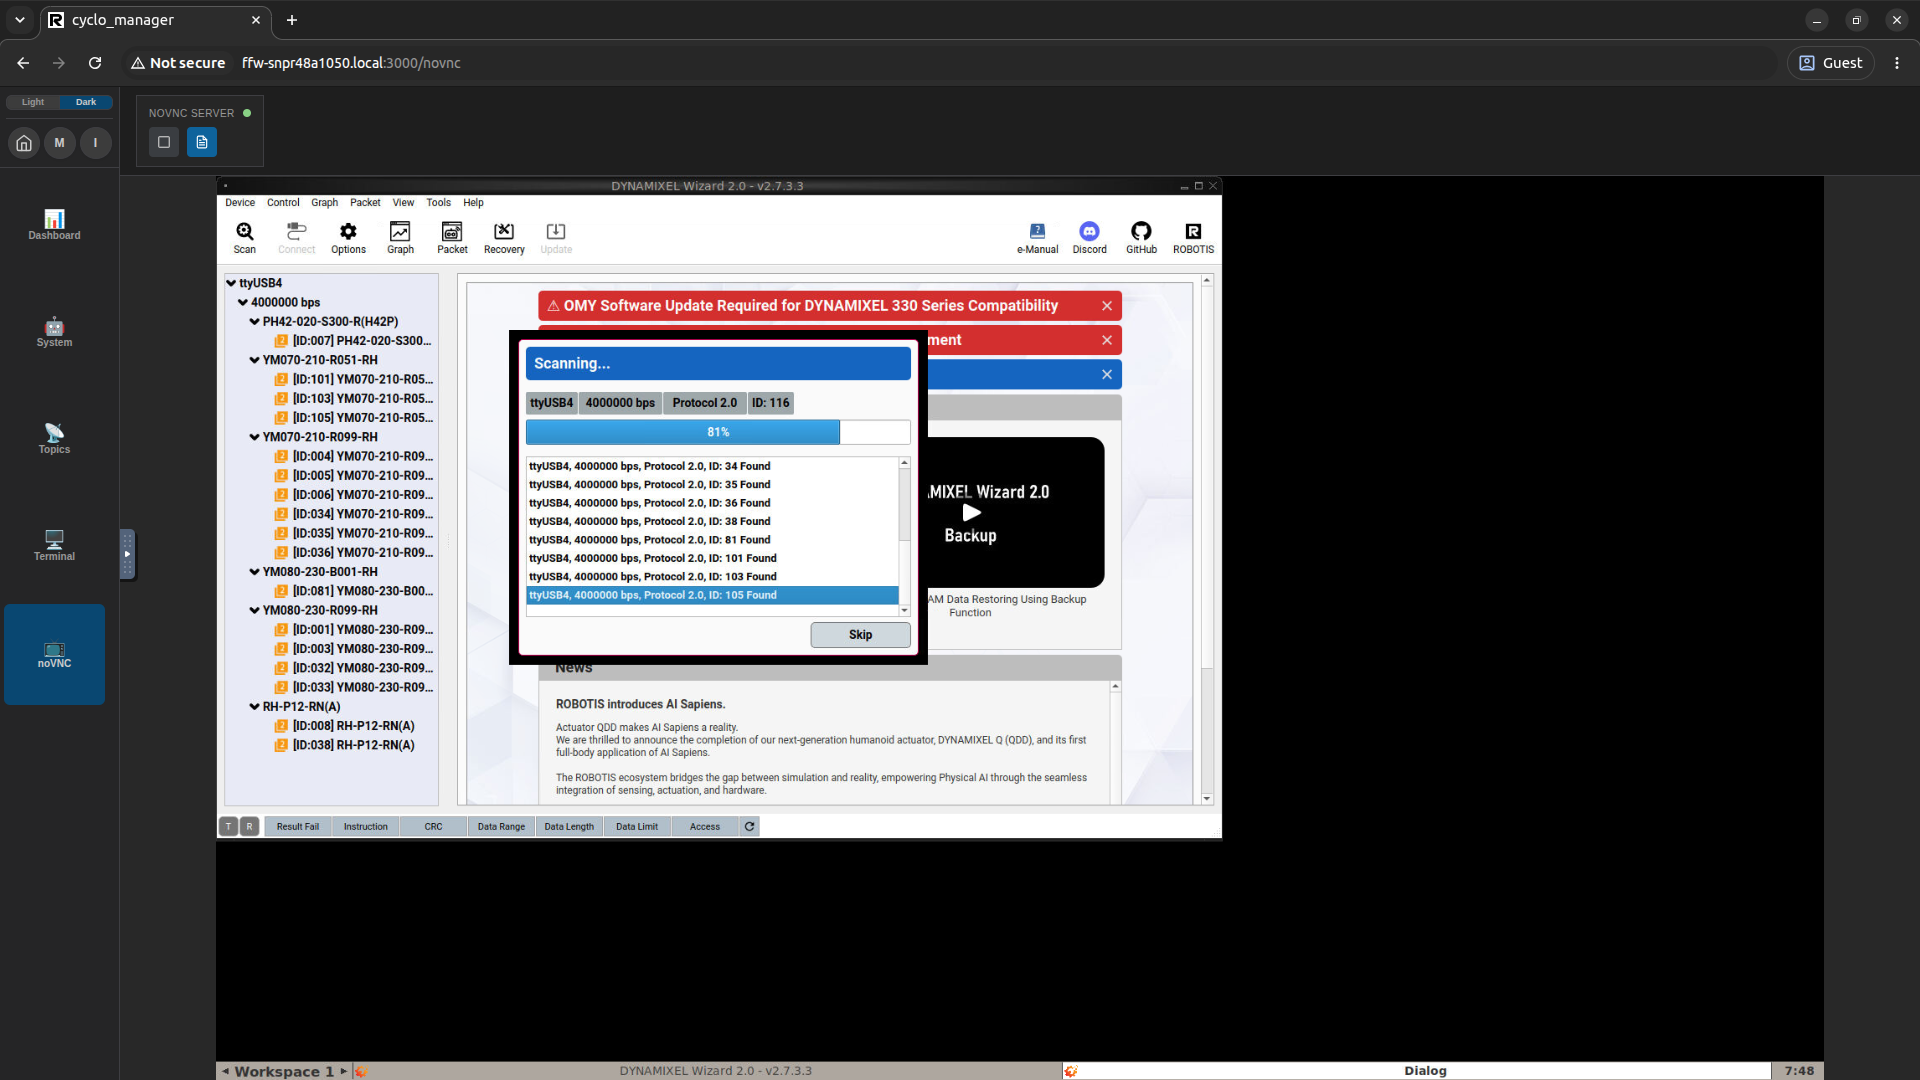
-
Check the
Dynamixel Wizard 2.0version. The current latest version isv2.12.2.2. If an update is needed, stopcyclo_managerand start it again with the--pulloption.
cyclo_manager down
cyclo_manager up --pull
Method 2: Make a docker-compose.novnc.yml file with the following content:
docker-compose.novnc.yml
services:
  novnc-server:
    container_name: novnc-server
    image: robotis/novnc-server:latest
    restart: no
    cap_add:
      - SYS_NICE
    ulimits:
      rtprio: 99
      rttime: -1
      memlock: 8428281856
    network_mode: host
    environment:
      - ROS_DOMAIN_ID=${ROS_DOMAIN_ID:-30}
      - DISPLAY=:99
      - DISPLAY_WIDTH=1920
      - DISPLAY_HEIGHT=1080
      - WEBSOCKIFY_PORT=8090
    volumes:
      - /dev:/dev
      - /dev/shm:/dev/shm
    privileged: true
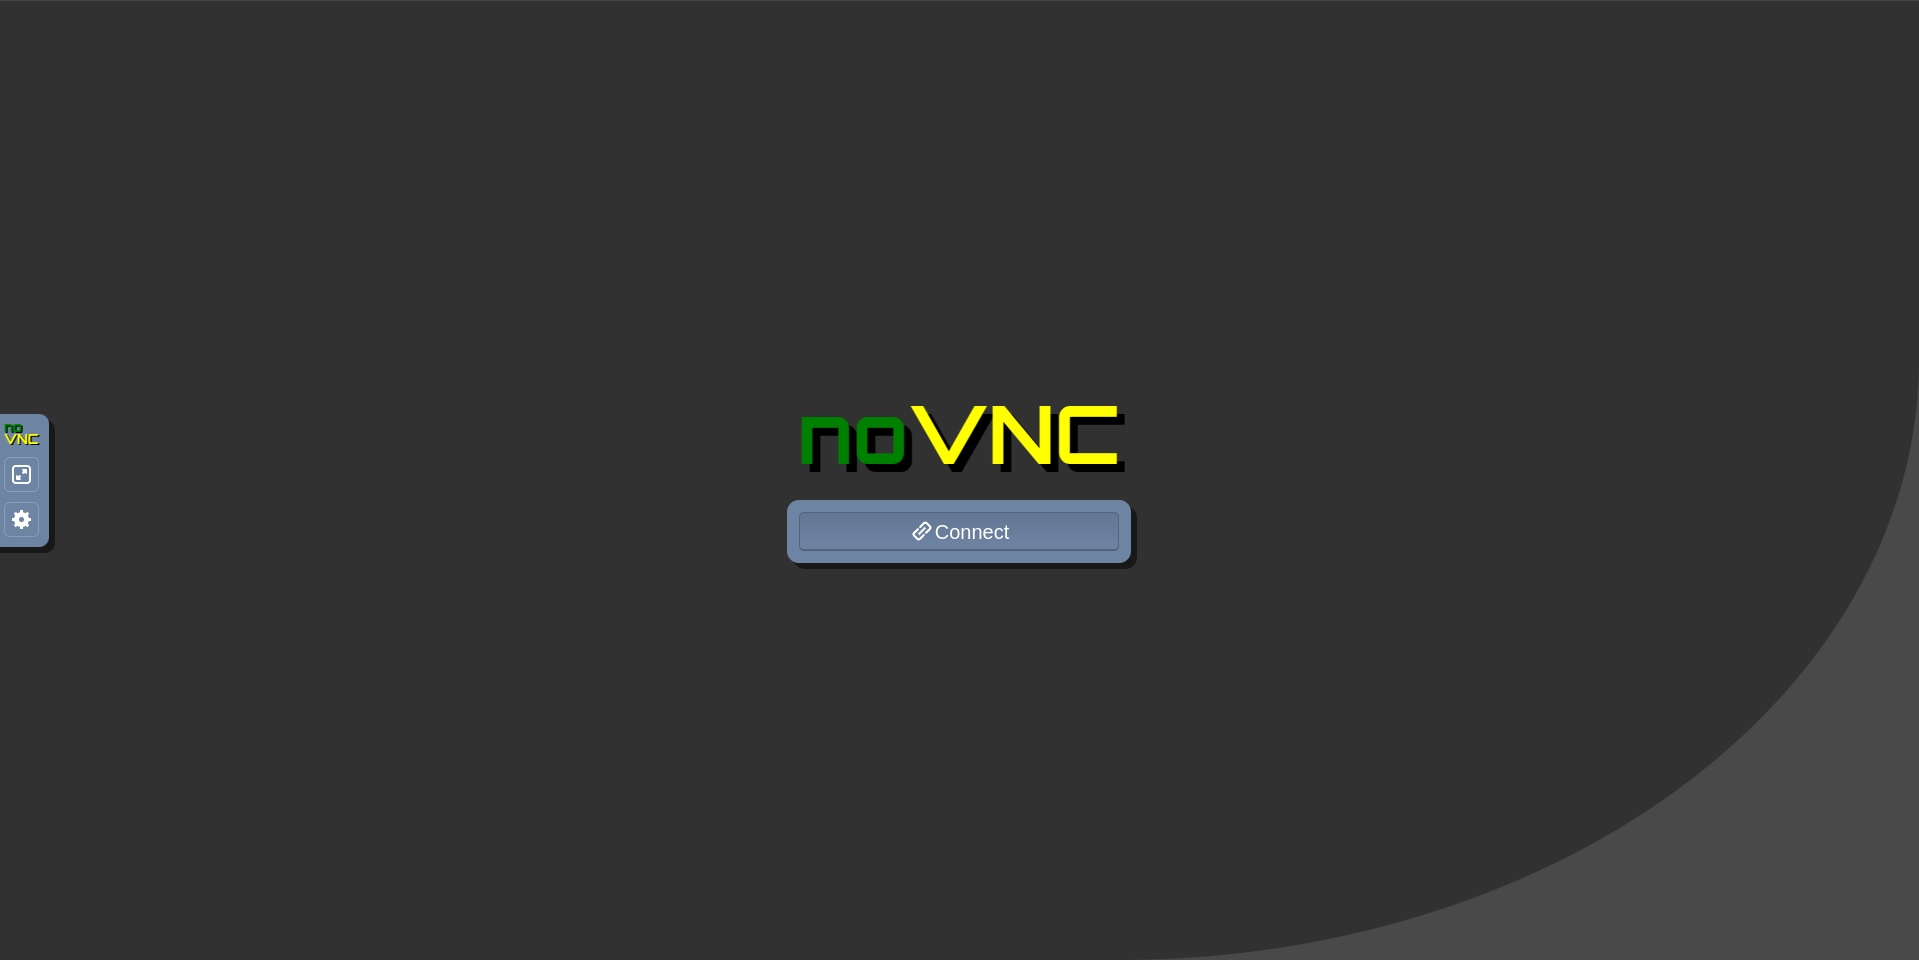
Then run docker compose -f docker/docker-compose.novnc.yml up to start the noVNC container, and browse to http://ffw-snpr48a{serial-number}.local:8090 in a web browser.
Click the connect button and open the Dynamixel Wizard 2.0.
3. Configure Dynamixel Wizard 2.0 and run Scan
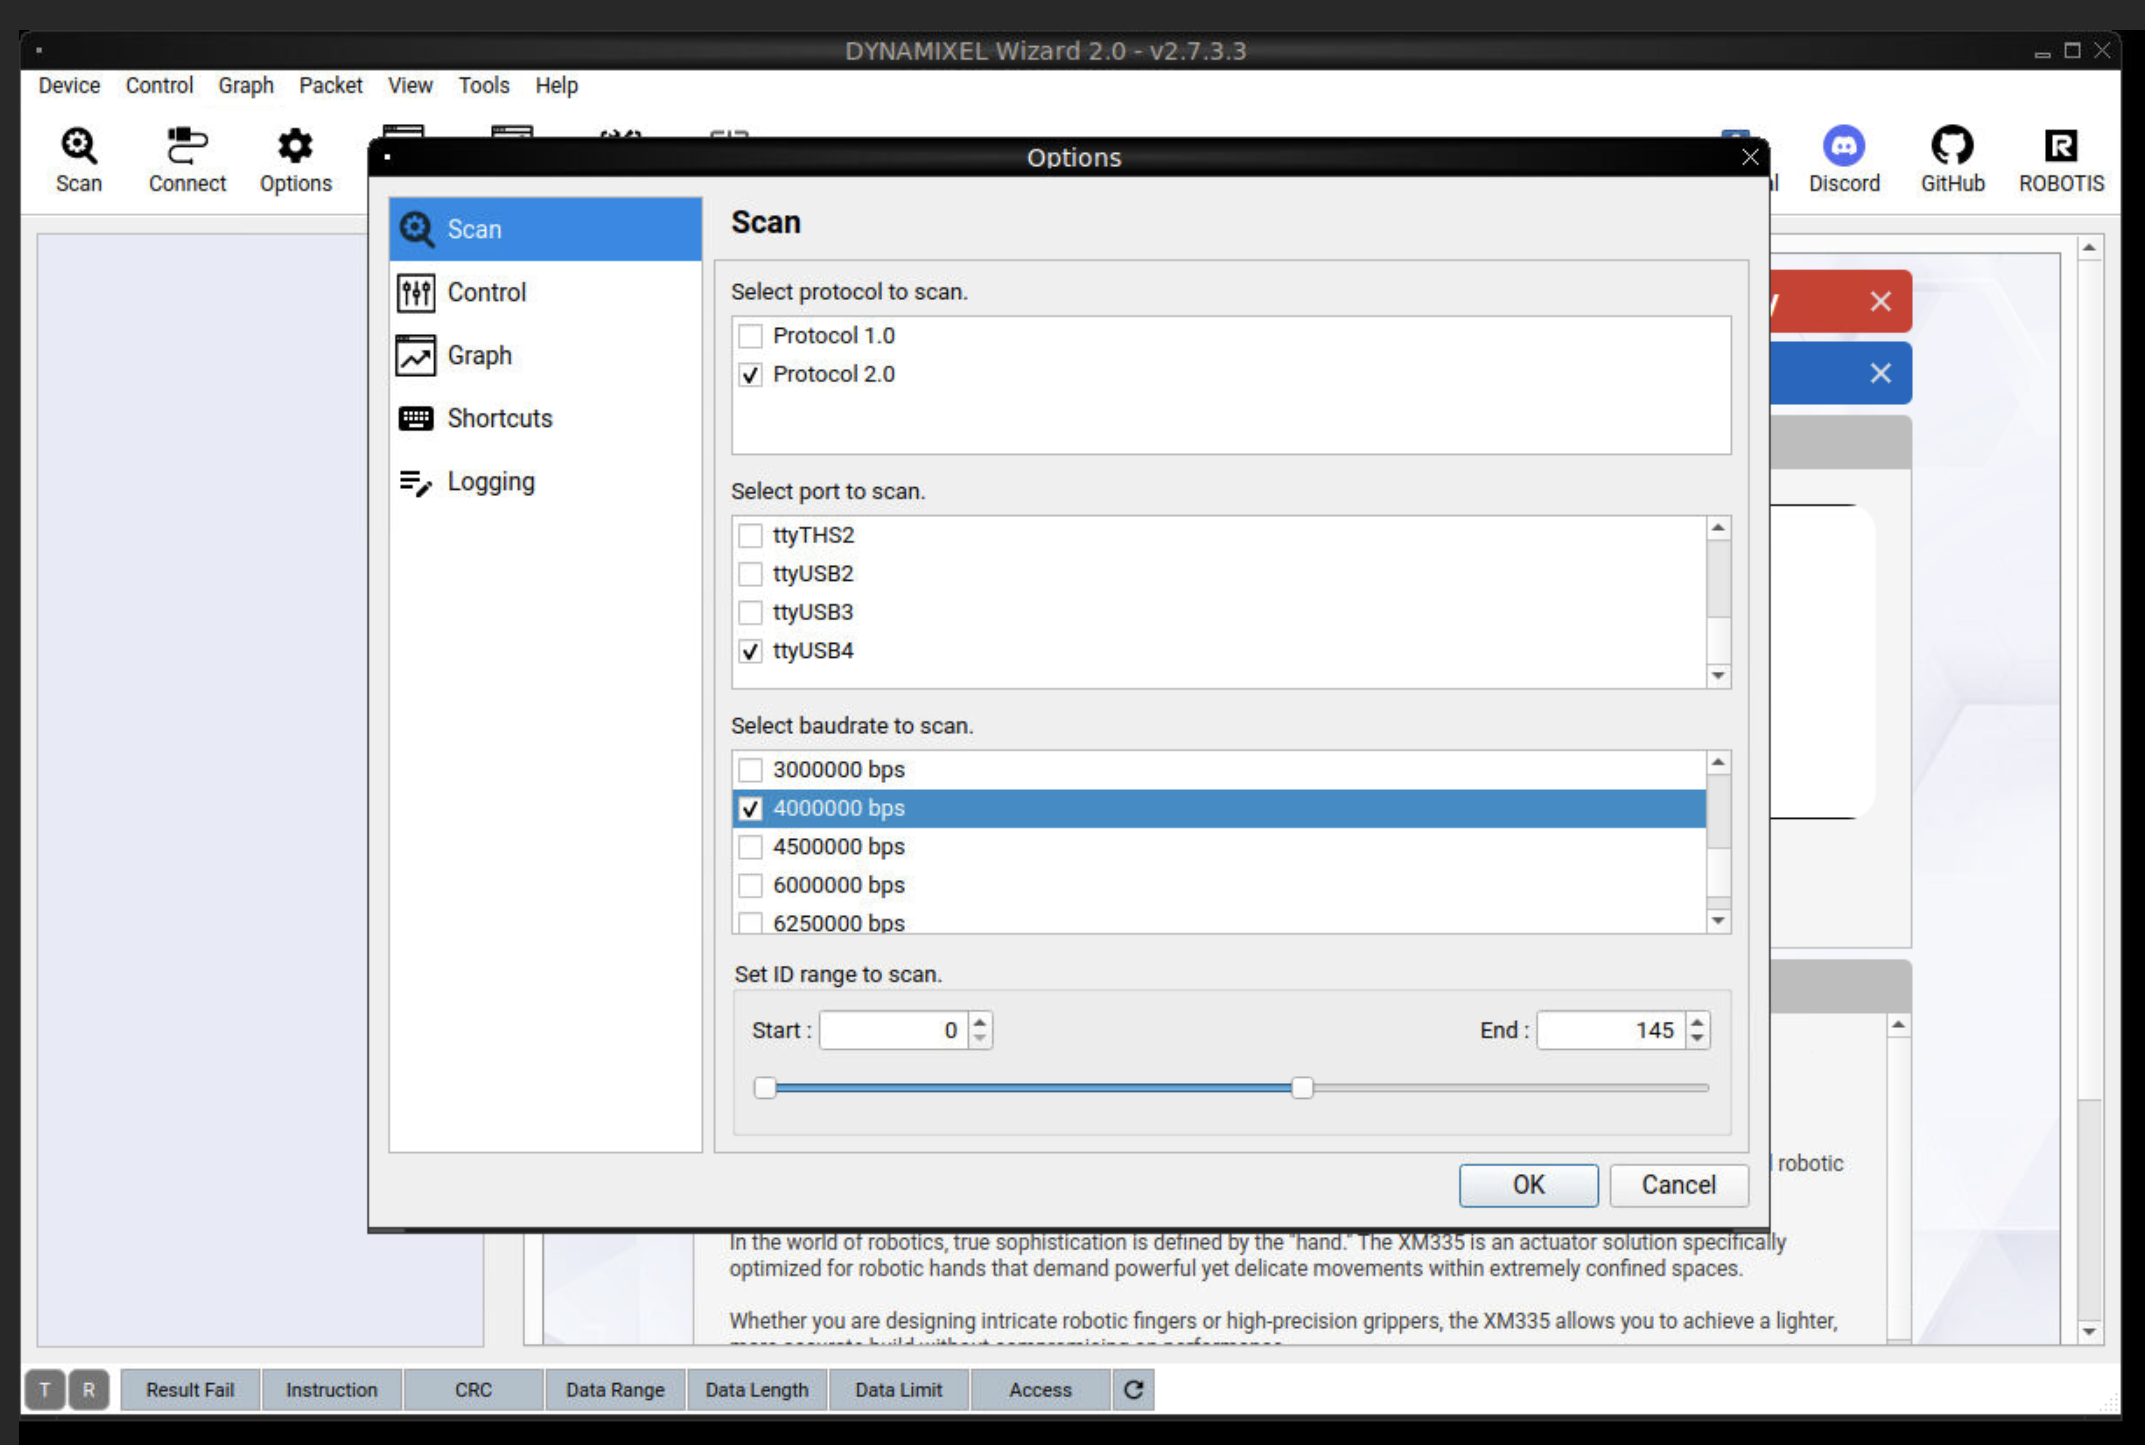
In Dynamixel Wizard 2.0, configure the following and run Scan:
- Select protocol to scan: Protocol 2.0
- Select port to scan:
/dev/ttyUSB4(When connecting an LG2 leader, scan ports fromttyUSB4tottyUSB6) - Baud rate: 4000000 bps
4. Select the Dynamixel that reported the error
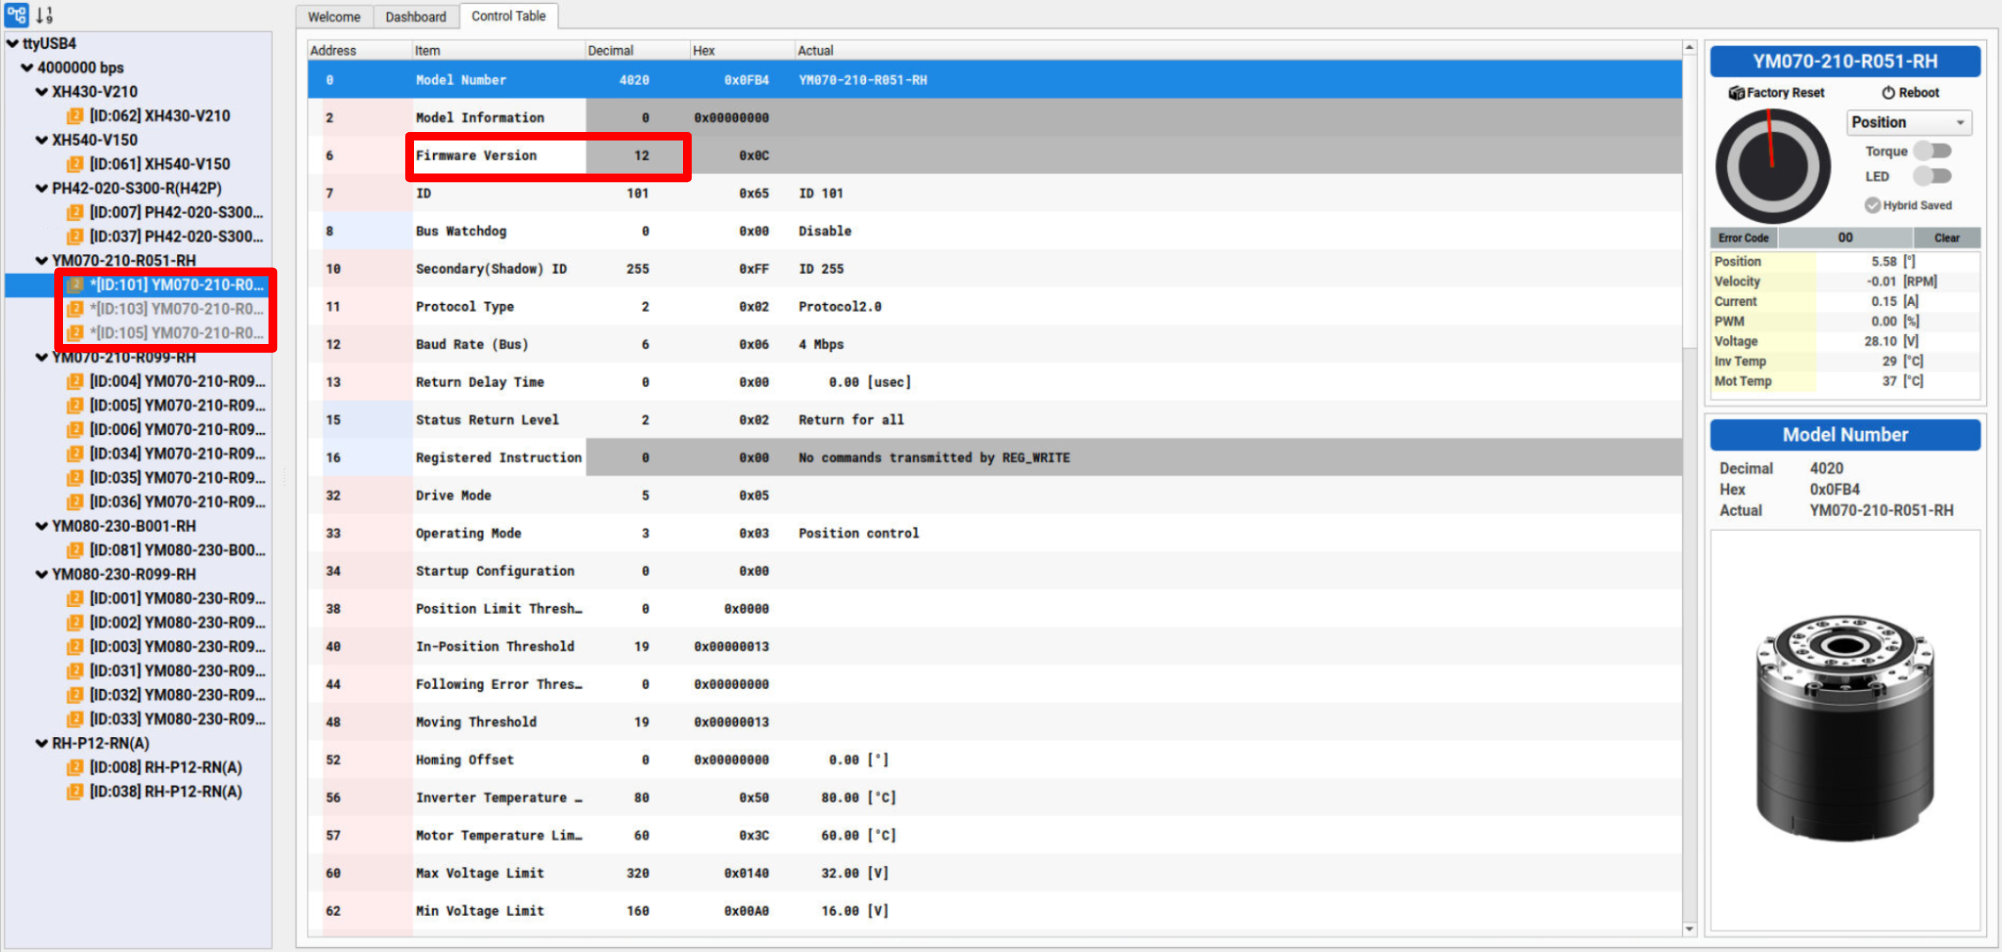
Select the Dynamixel that reported the error, then check the Firmware Version.
For DYNAMIXEL-Y, the current latest Firmware Version is 13.
The availability of a newer firmware update may be indicated as well.
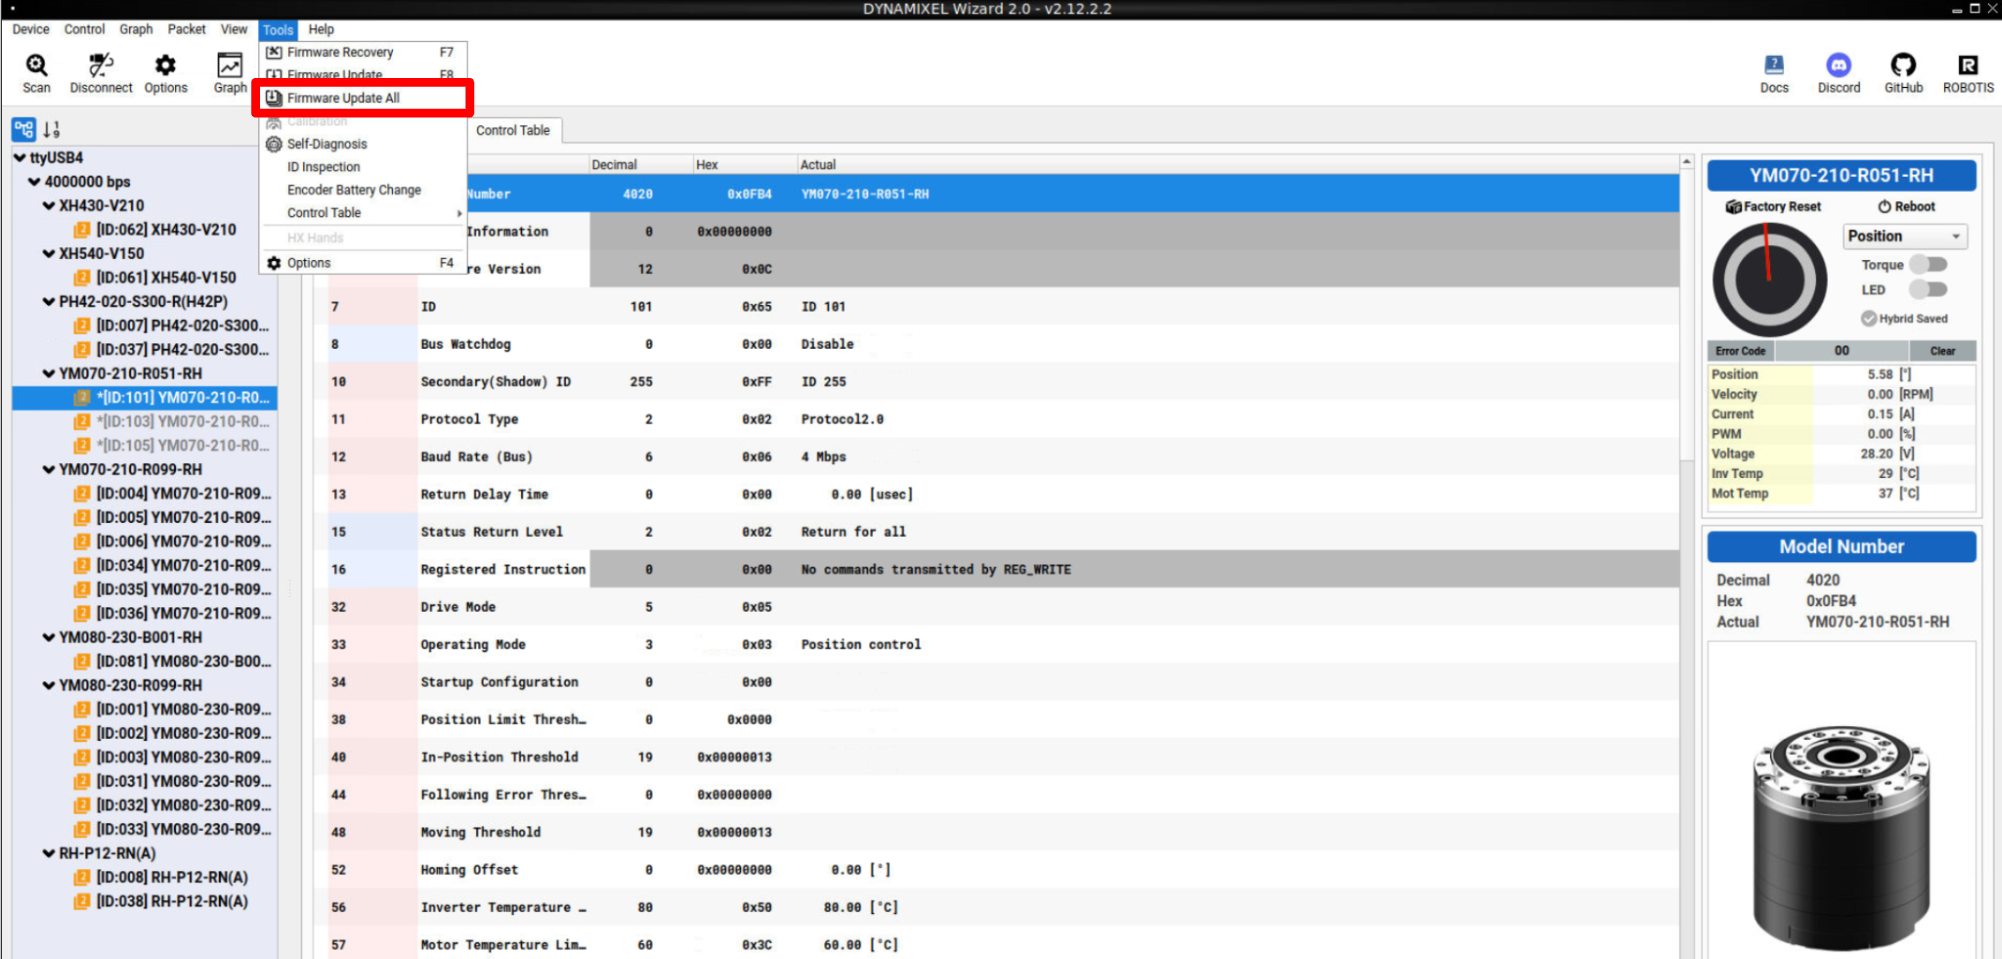
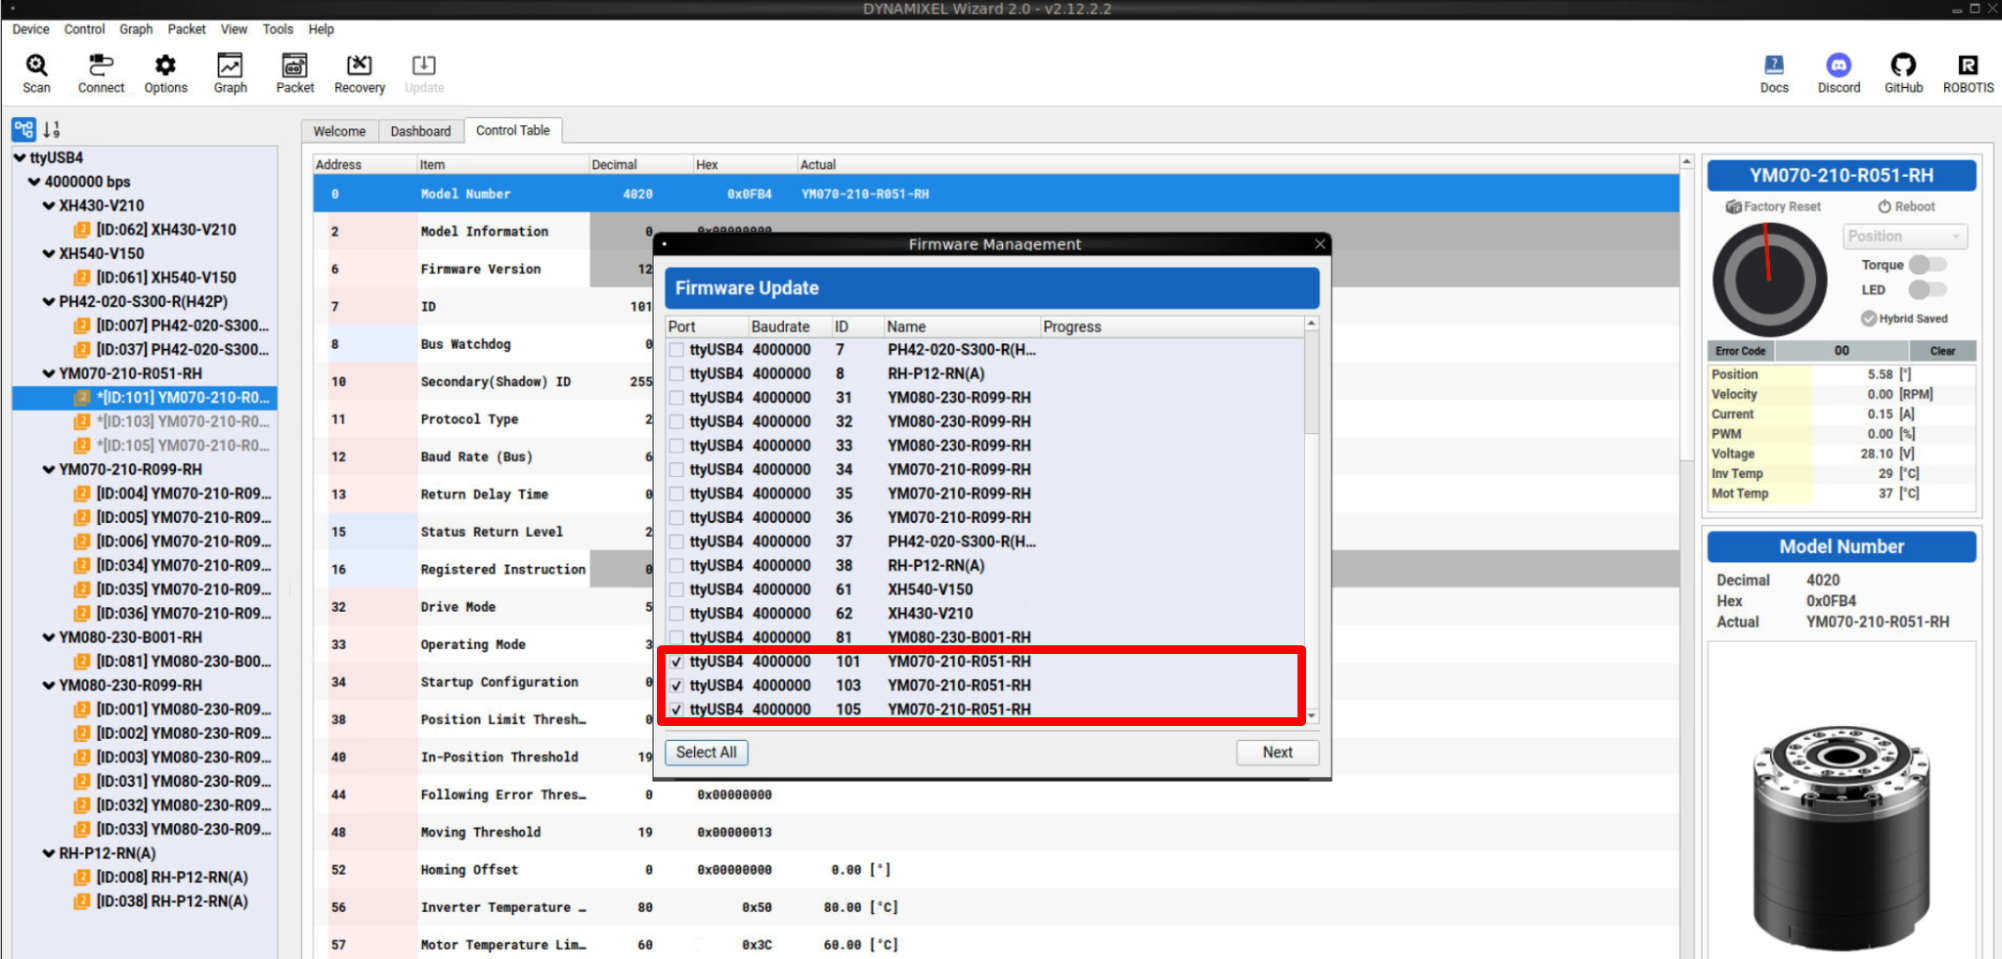
Navigate to Tools → Firmware Update All and select the actuators that you want to update.
Perform the Firmware Update.
Then, perform a Factory Reset.
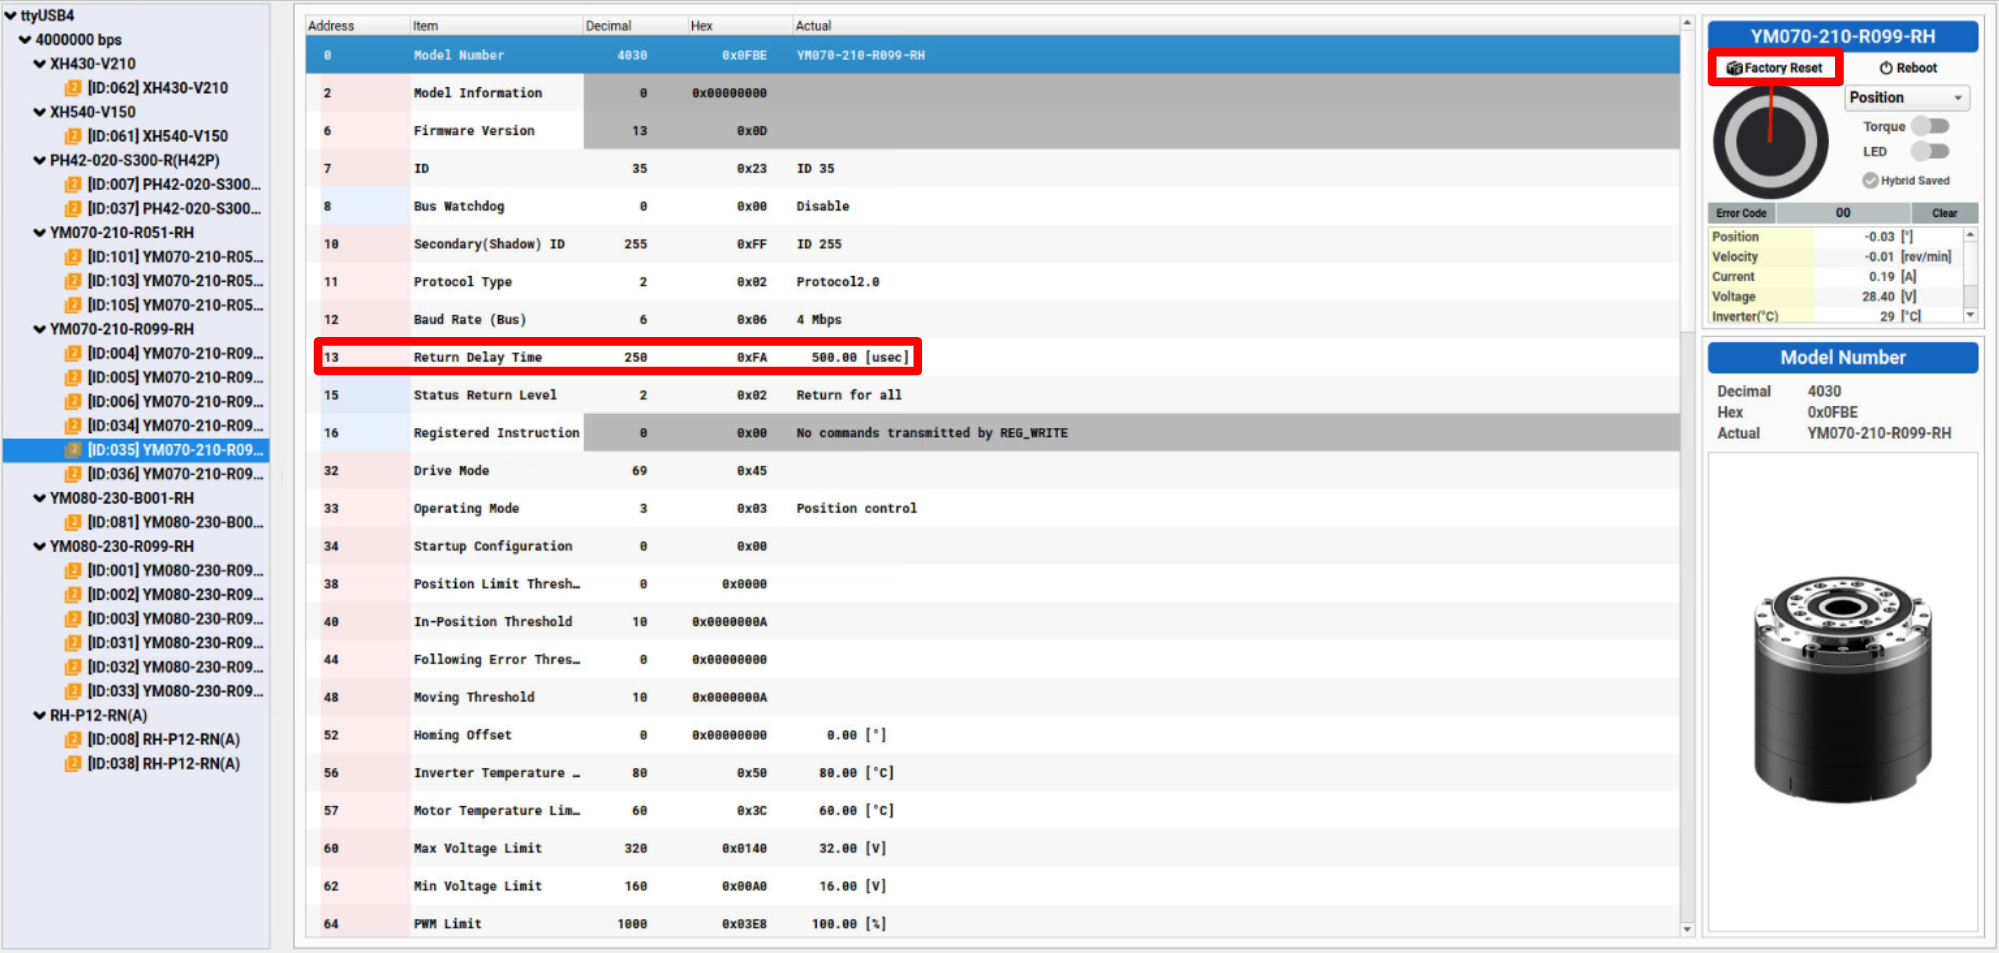
Once the Factory Reset is done, check if the Return Delay Time is a non-zero number.
Then, navigate to Tools → Encoder Battery Change from the top menu.
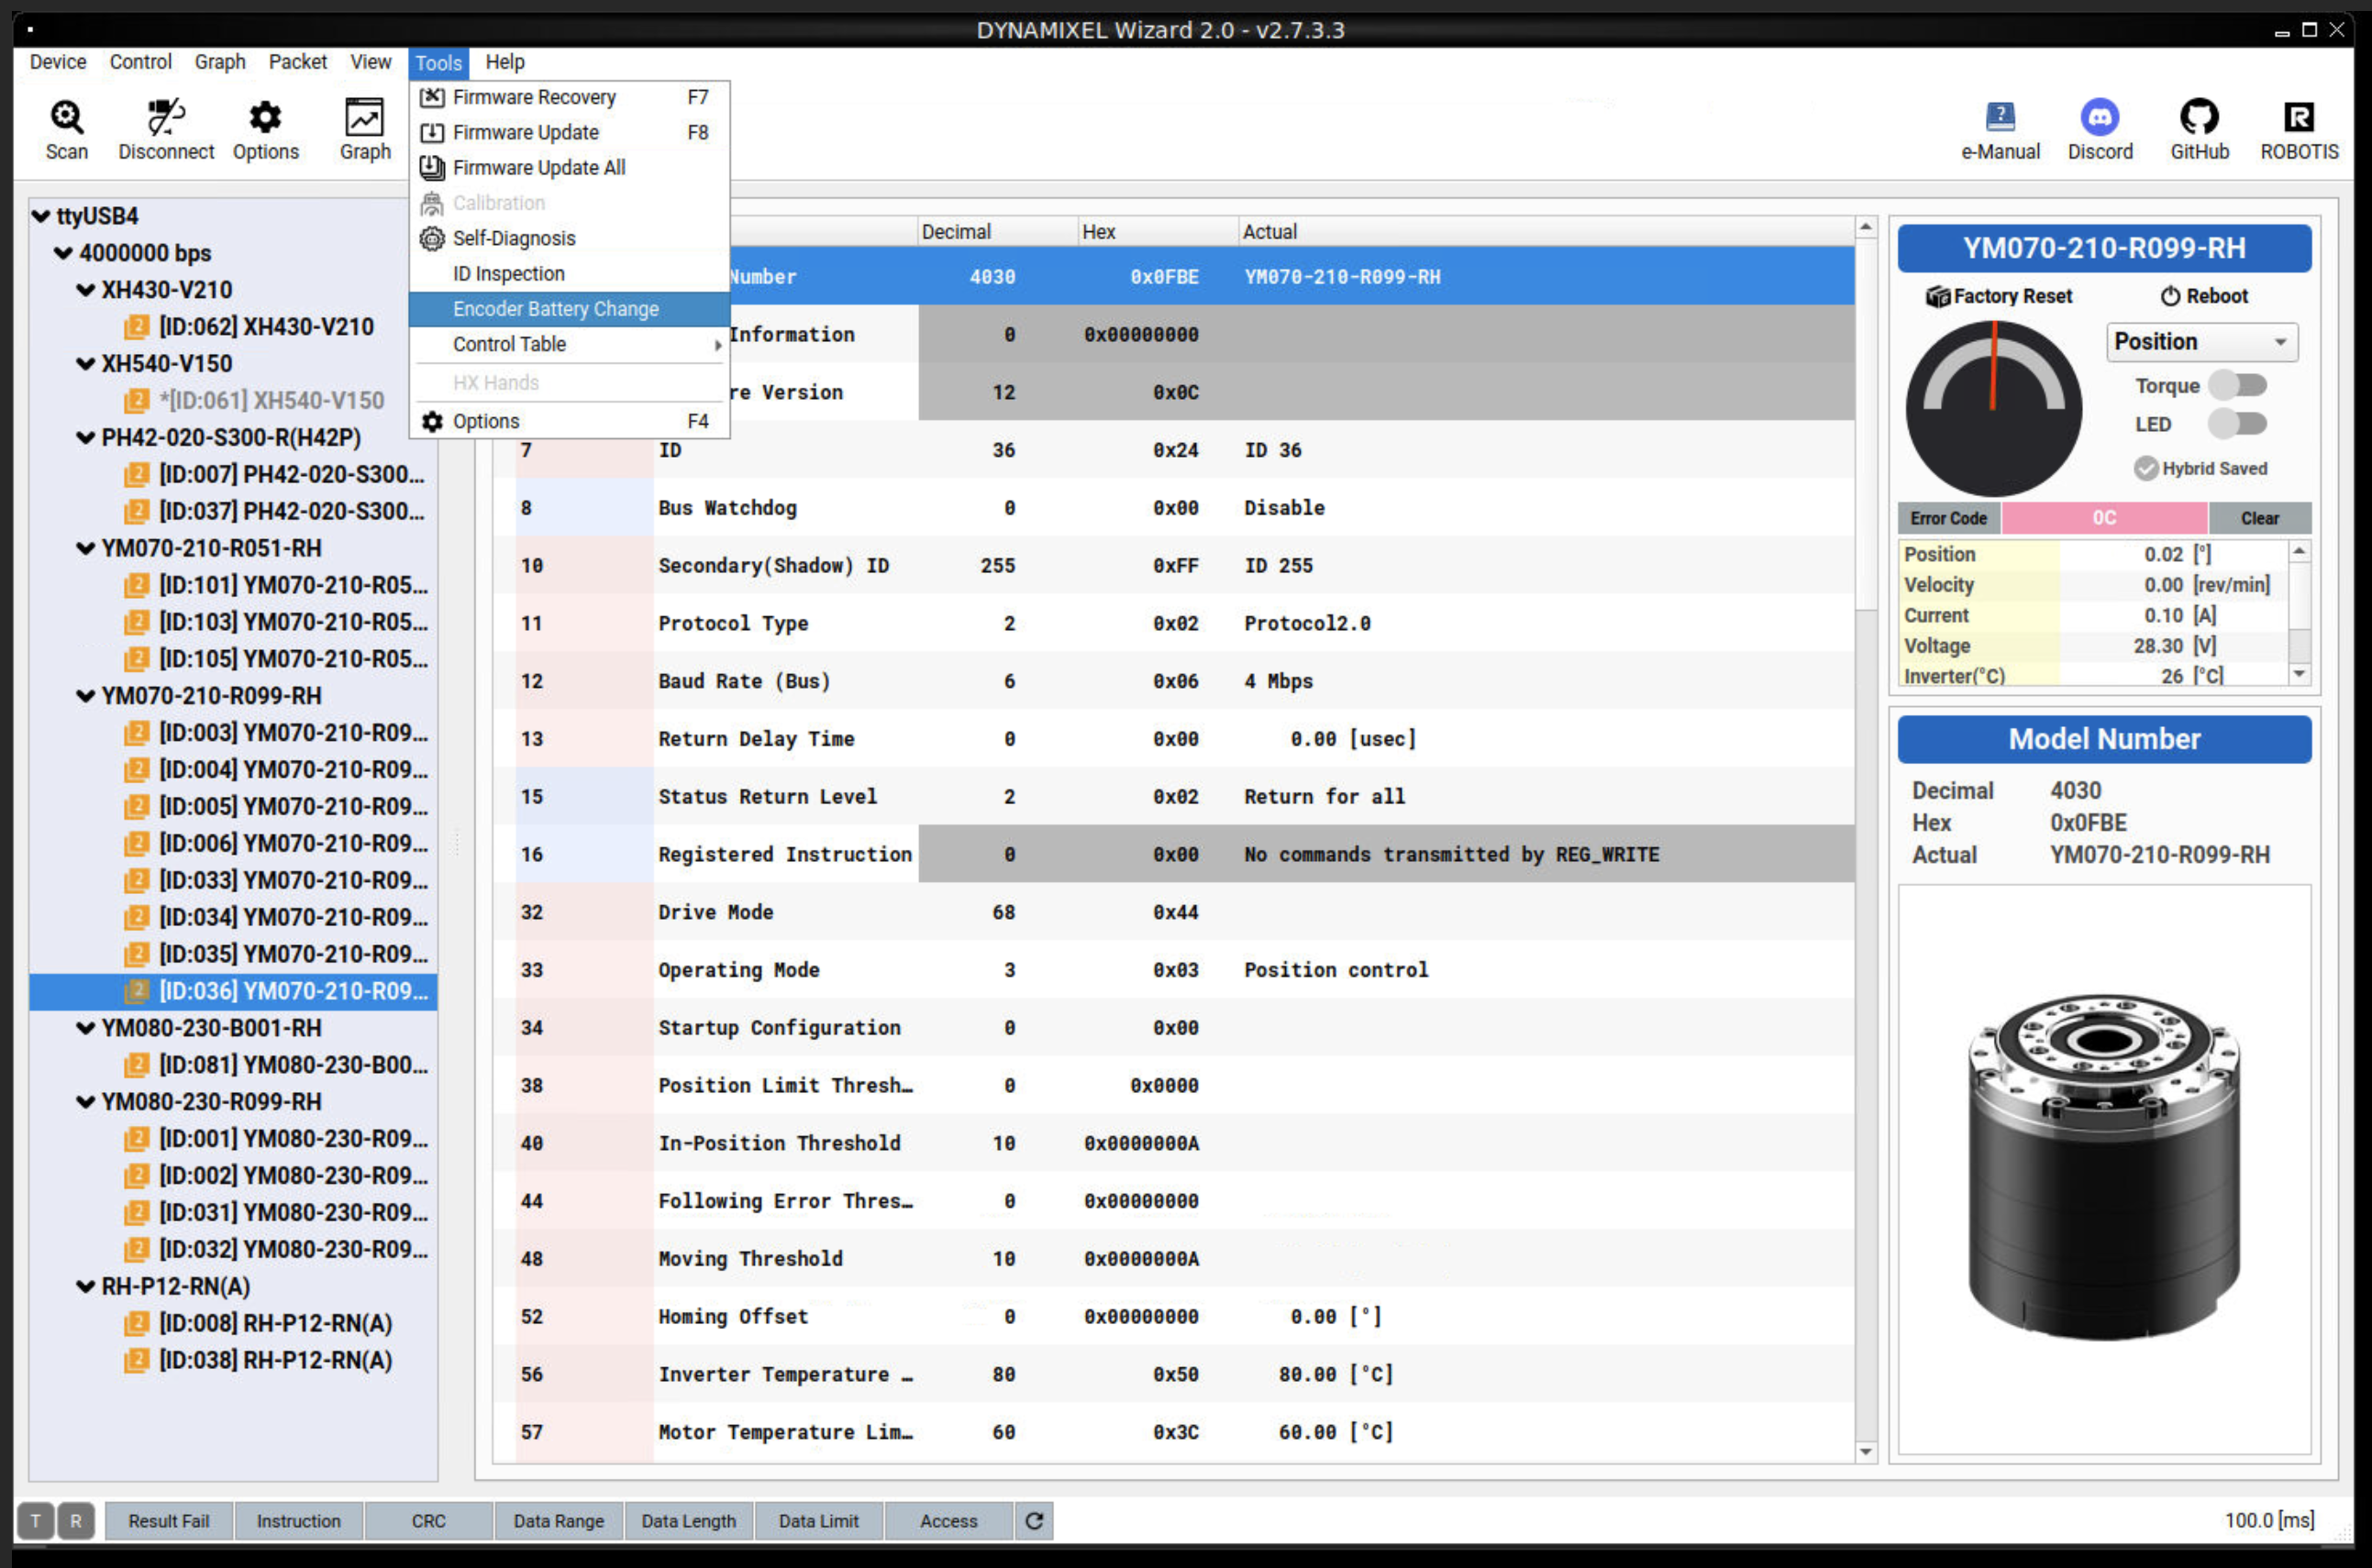
⚠️ For the lift joint (ID 81), DO NOT press the Release Brake or Engage Brake buttons.
5. Clear the multi-turn error
Proceed with Encoder Battery Change. Make sure the slit marks remain aligned during this process.
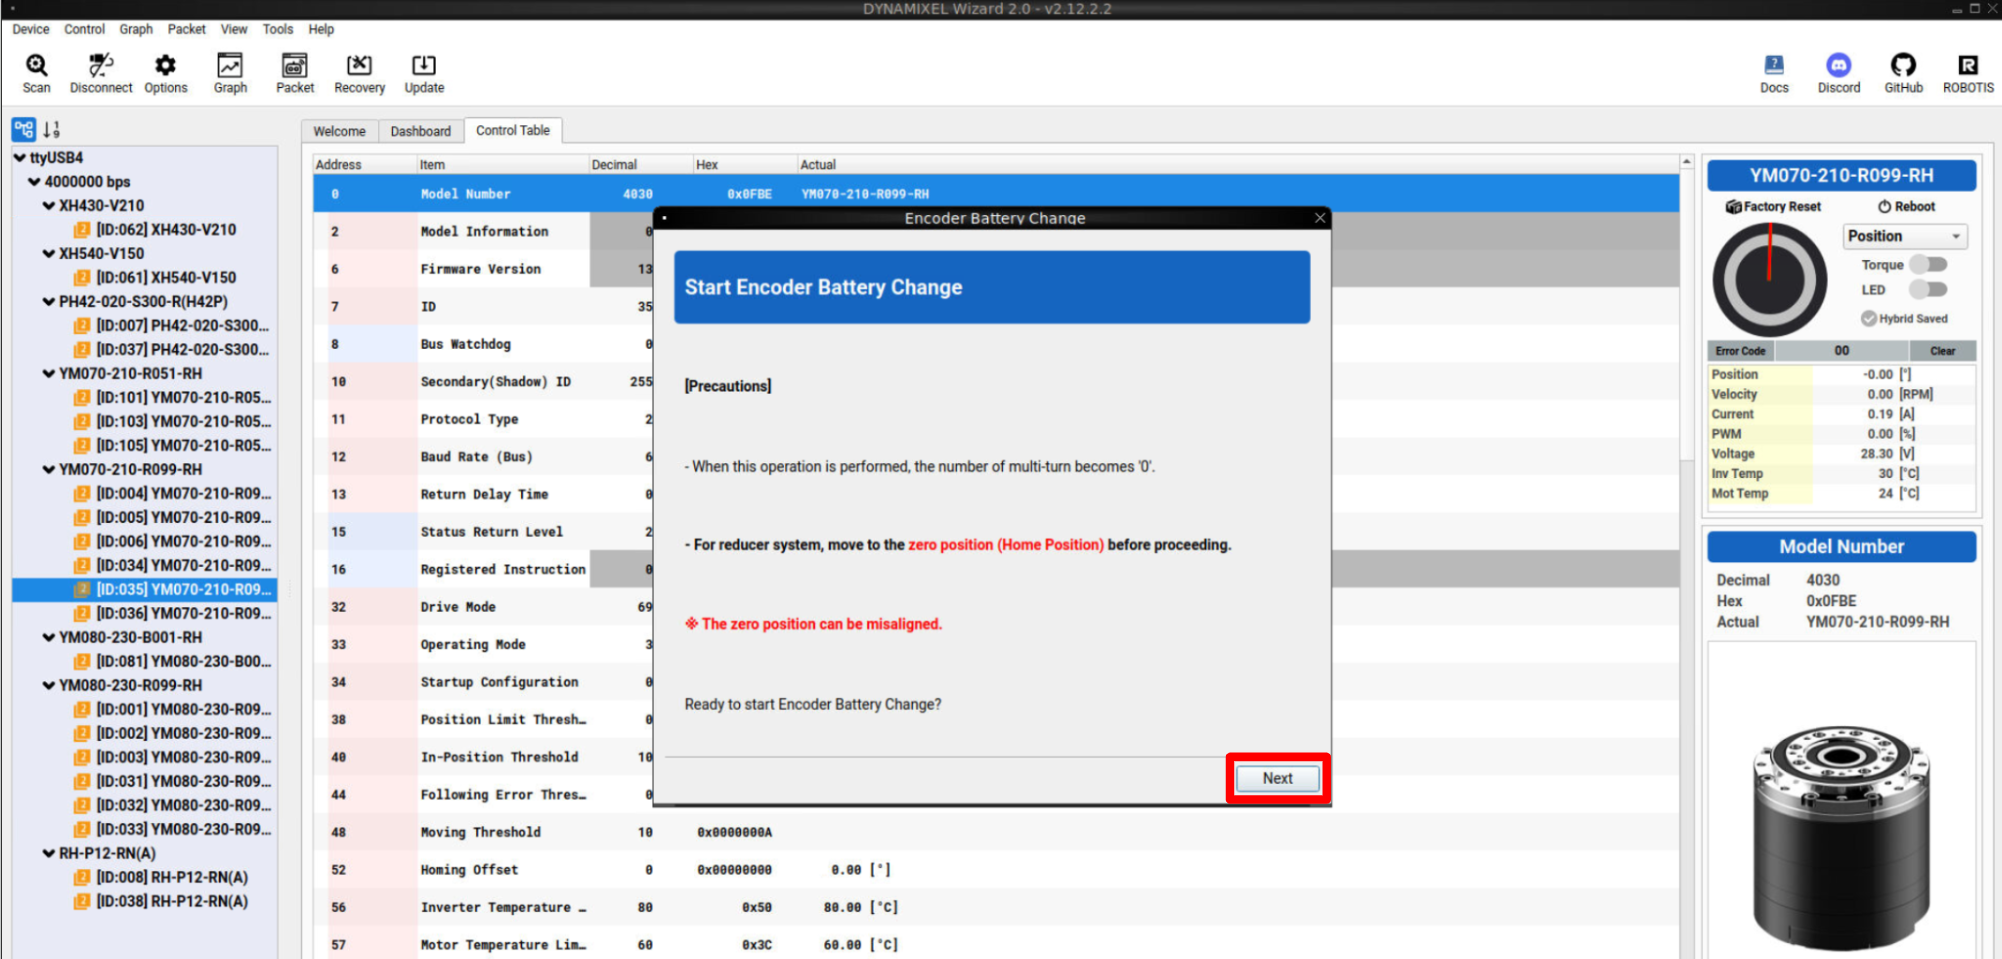
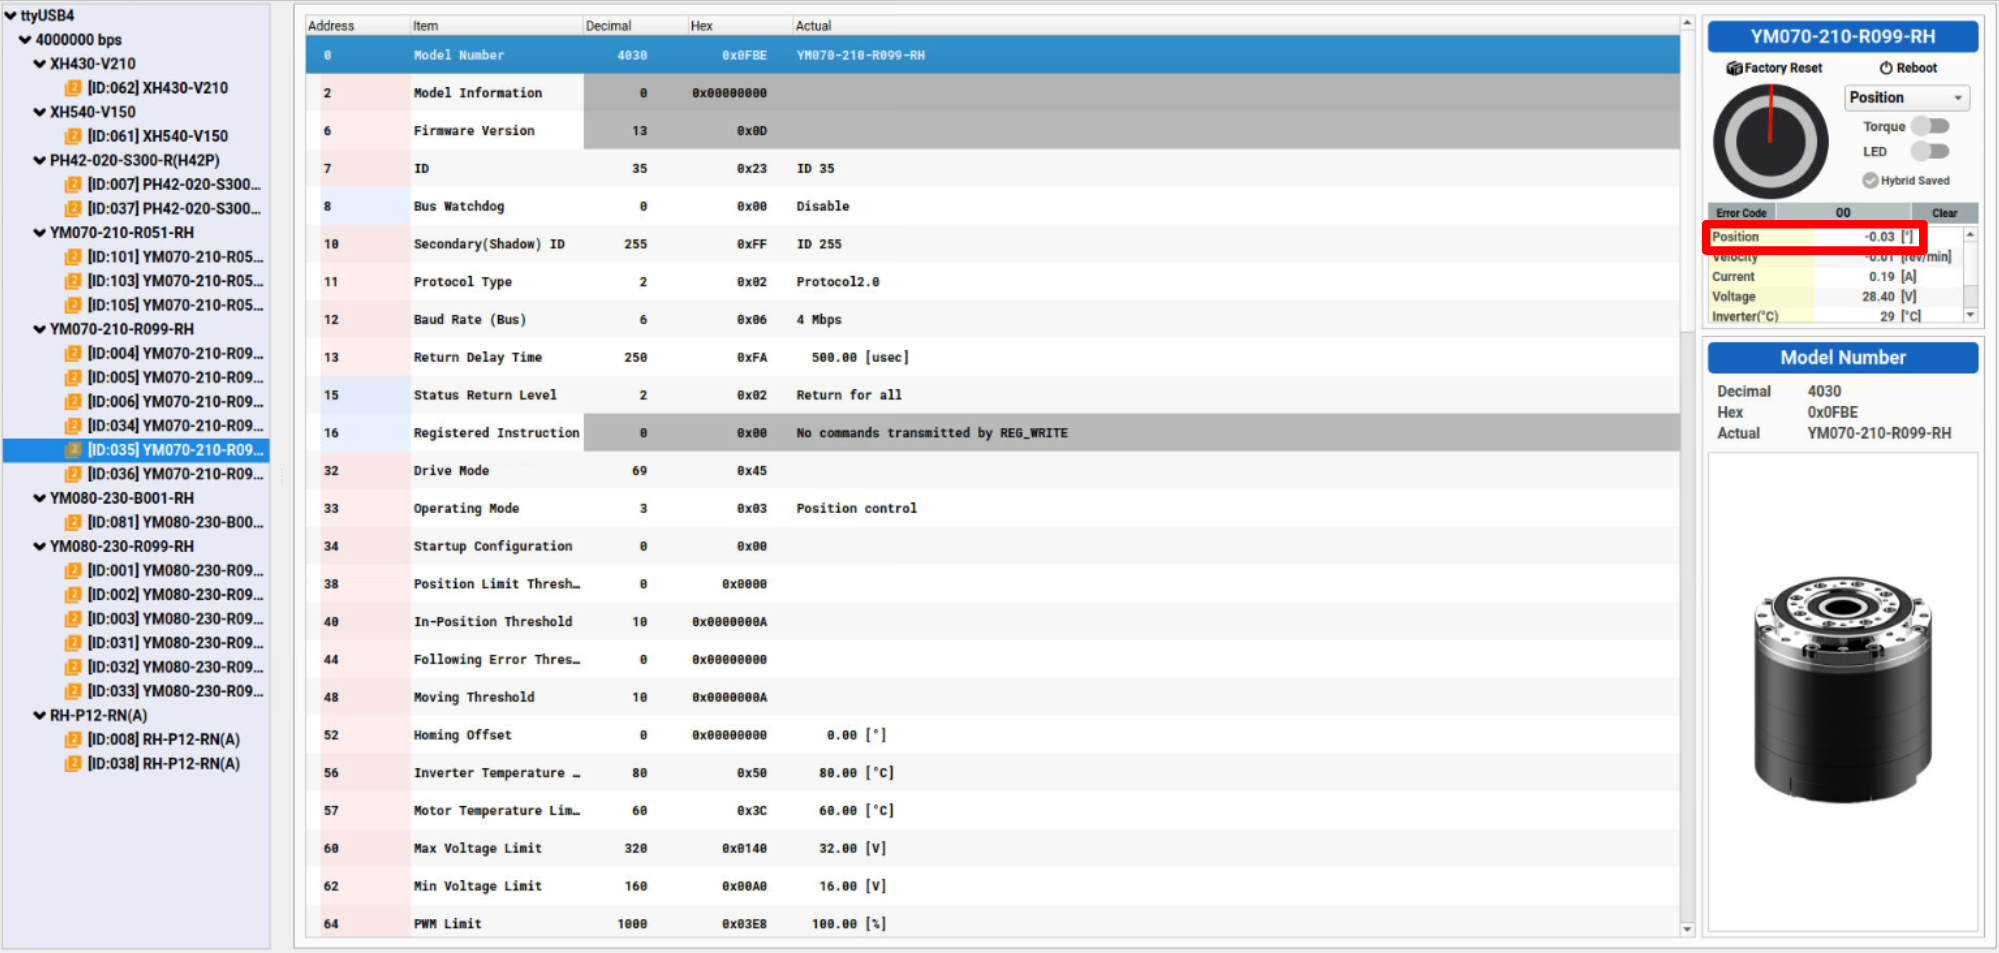
6. Verify position
Check if the position is within ±1.5° while the slits are still aligned. If it is not, double-check and re-align the slit marks, then repeat the Clear the multi-turn error process.
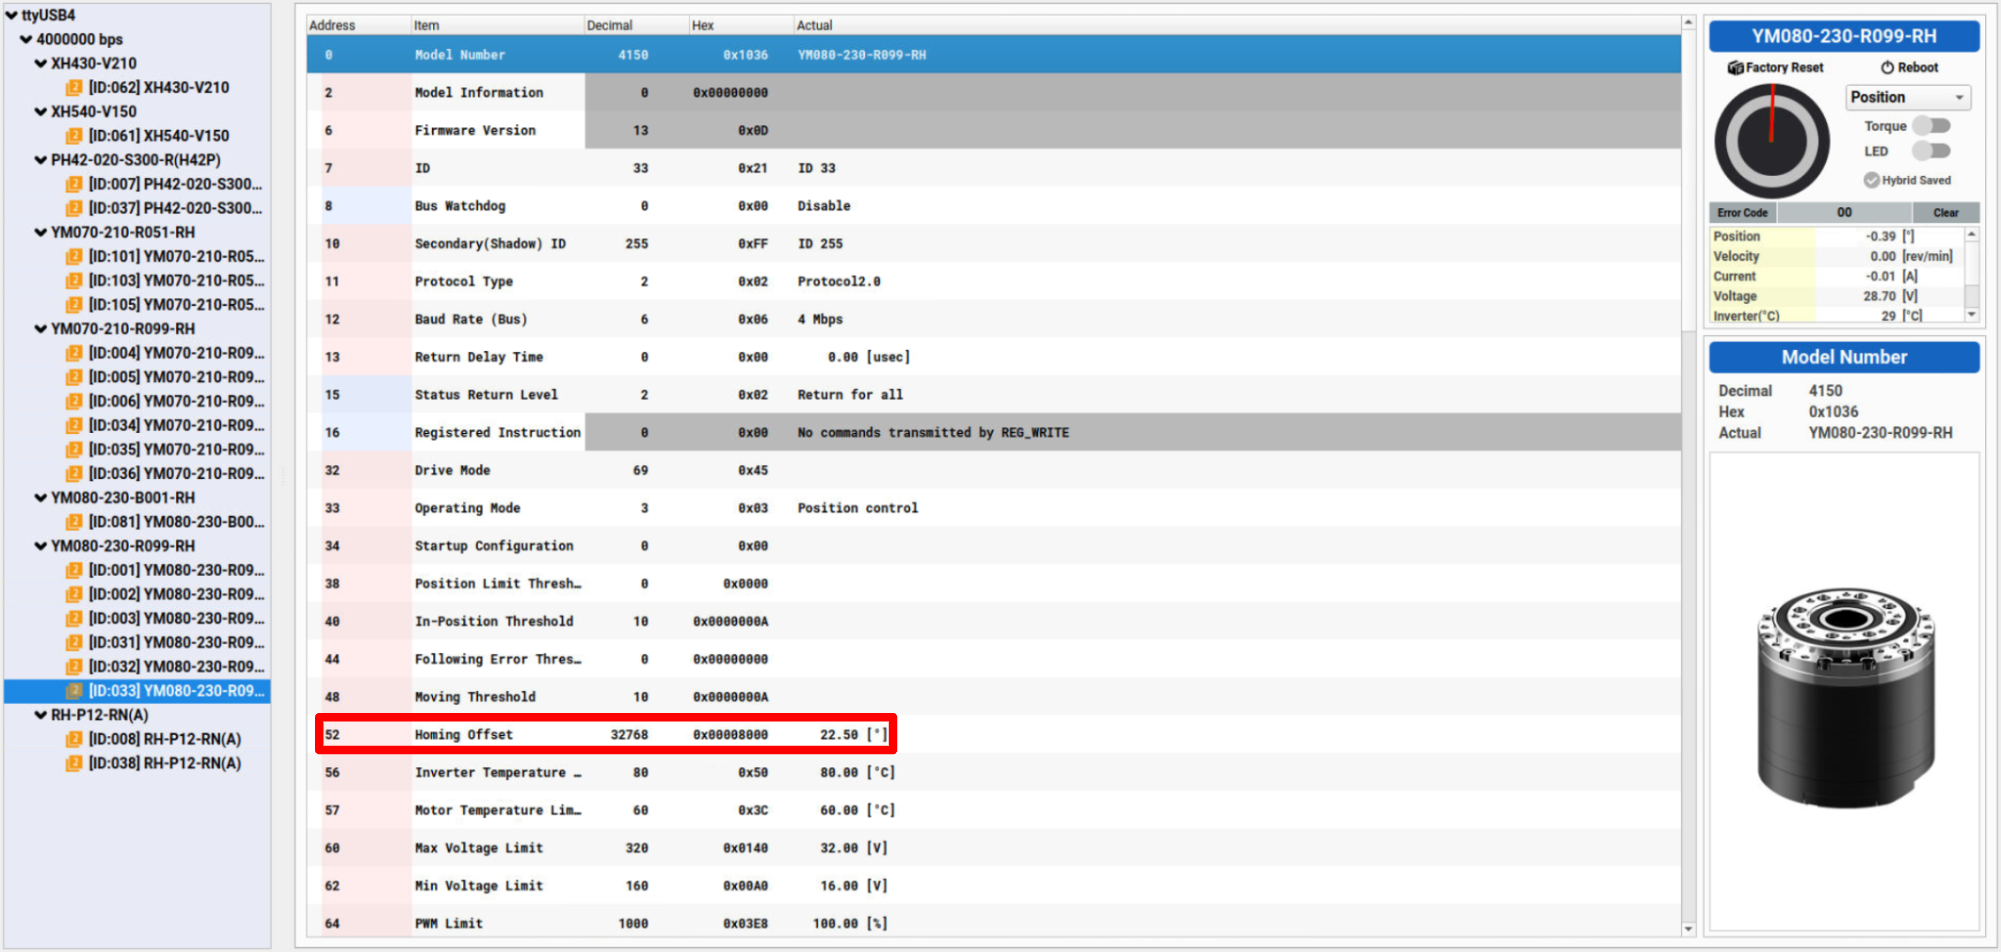
⚠️ At this point, the multi-turn error is now cleared. However, for IDs 1, 3, 31, and 33, you must set the Homing Offset value to 32768 (22.5°).
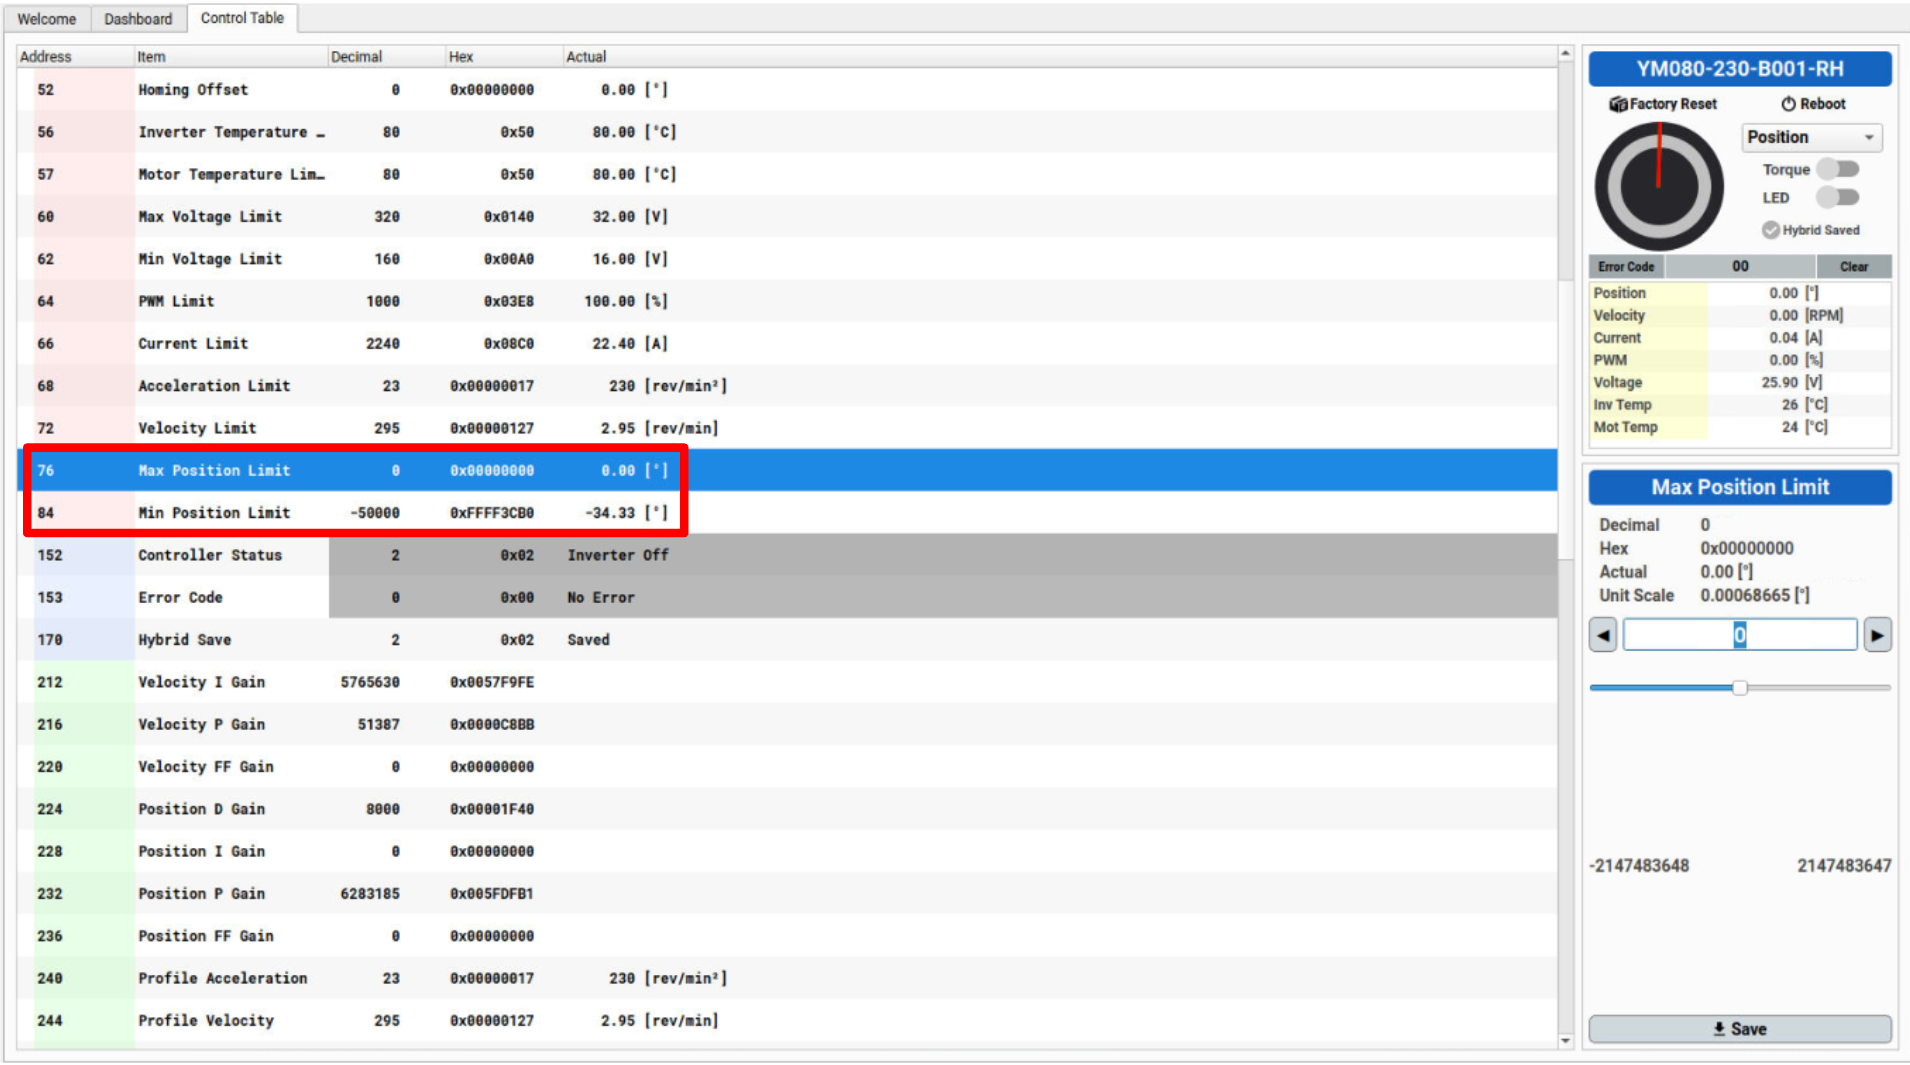
⚠️ For ID 81 (lift joint), set Max Position Limit (76) to 0 and Min Position Limit (84) to -50000.
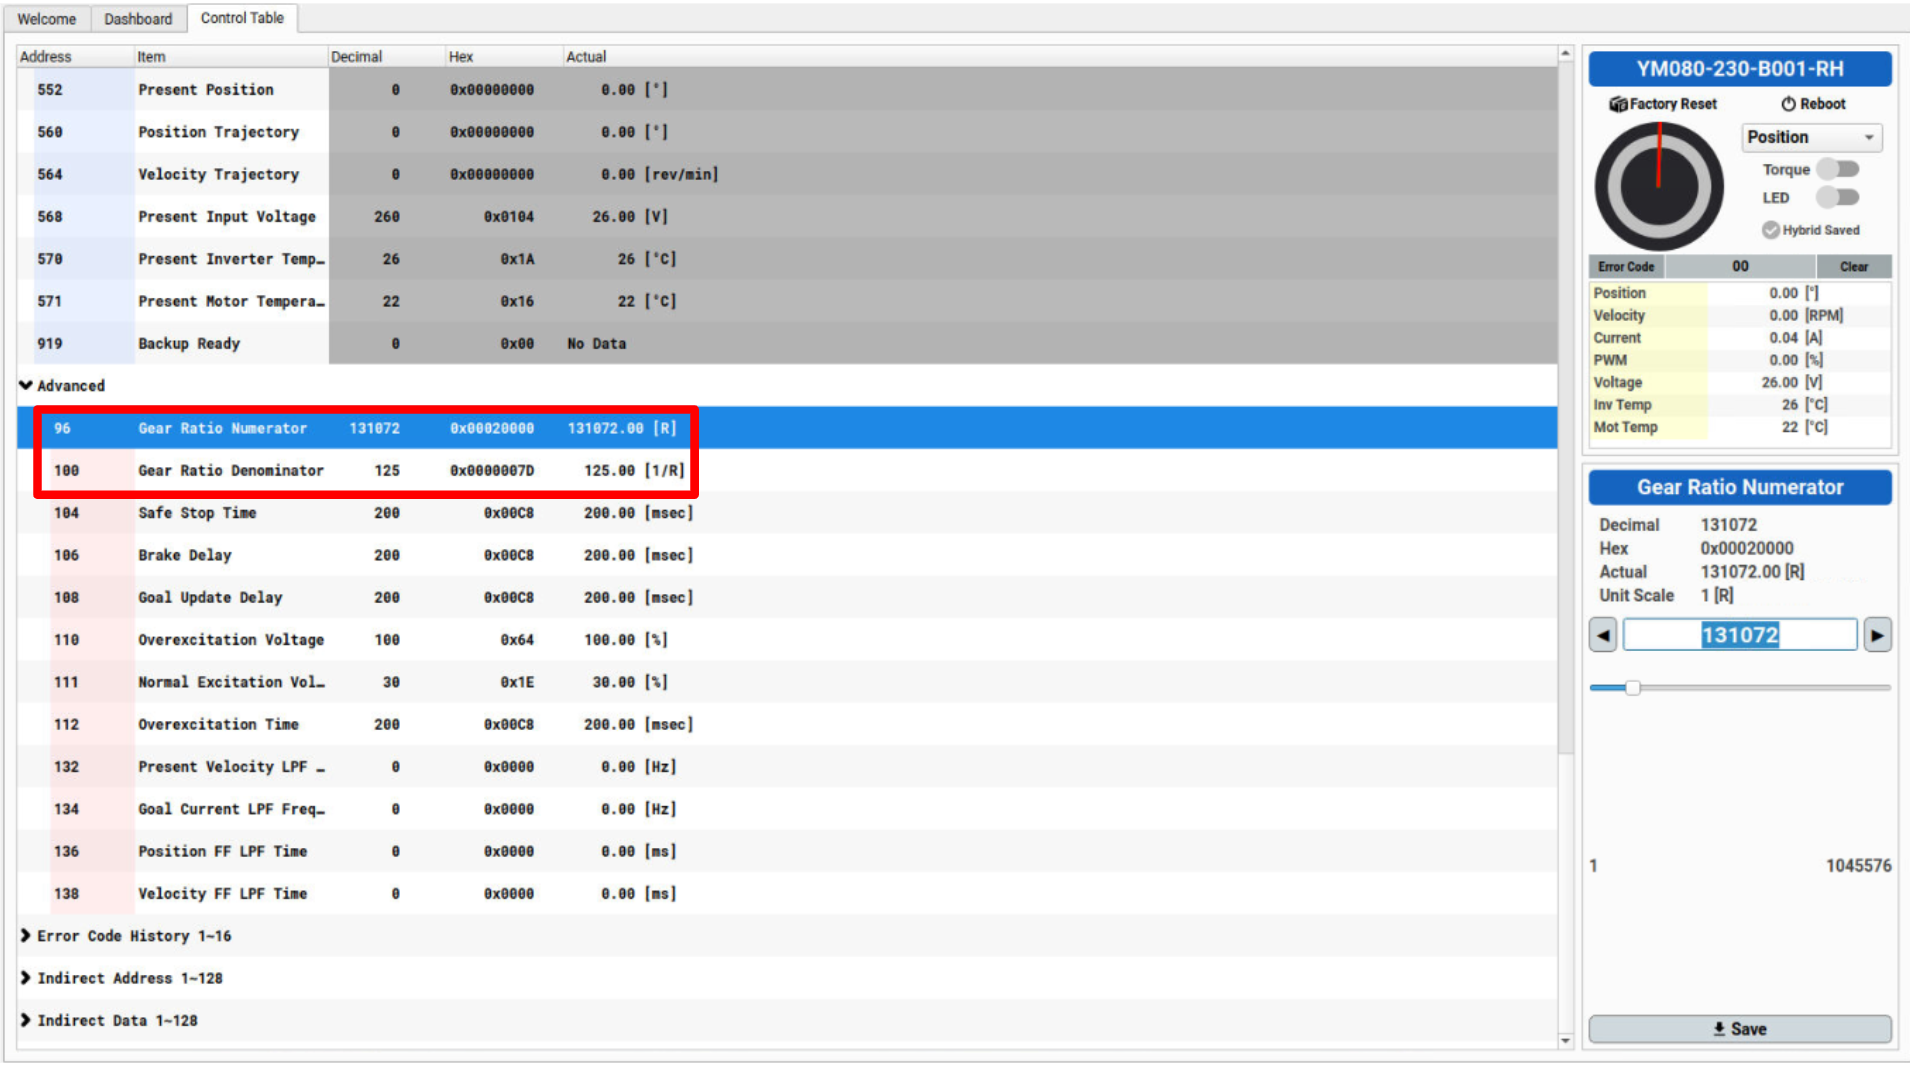
⚠️ For ID 81 (lift joint), under the Advanced section, set Gear Ratio Numerator (96) to 131072, and Gear Ratio Denominator (100) to 125.
You may now disconnect and close DYNAMIXEL Wizard 2.0.
Run bringup again and confirm that the error no longer appears.