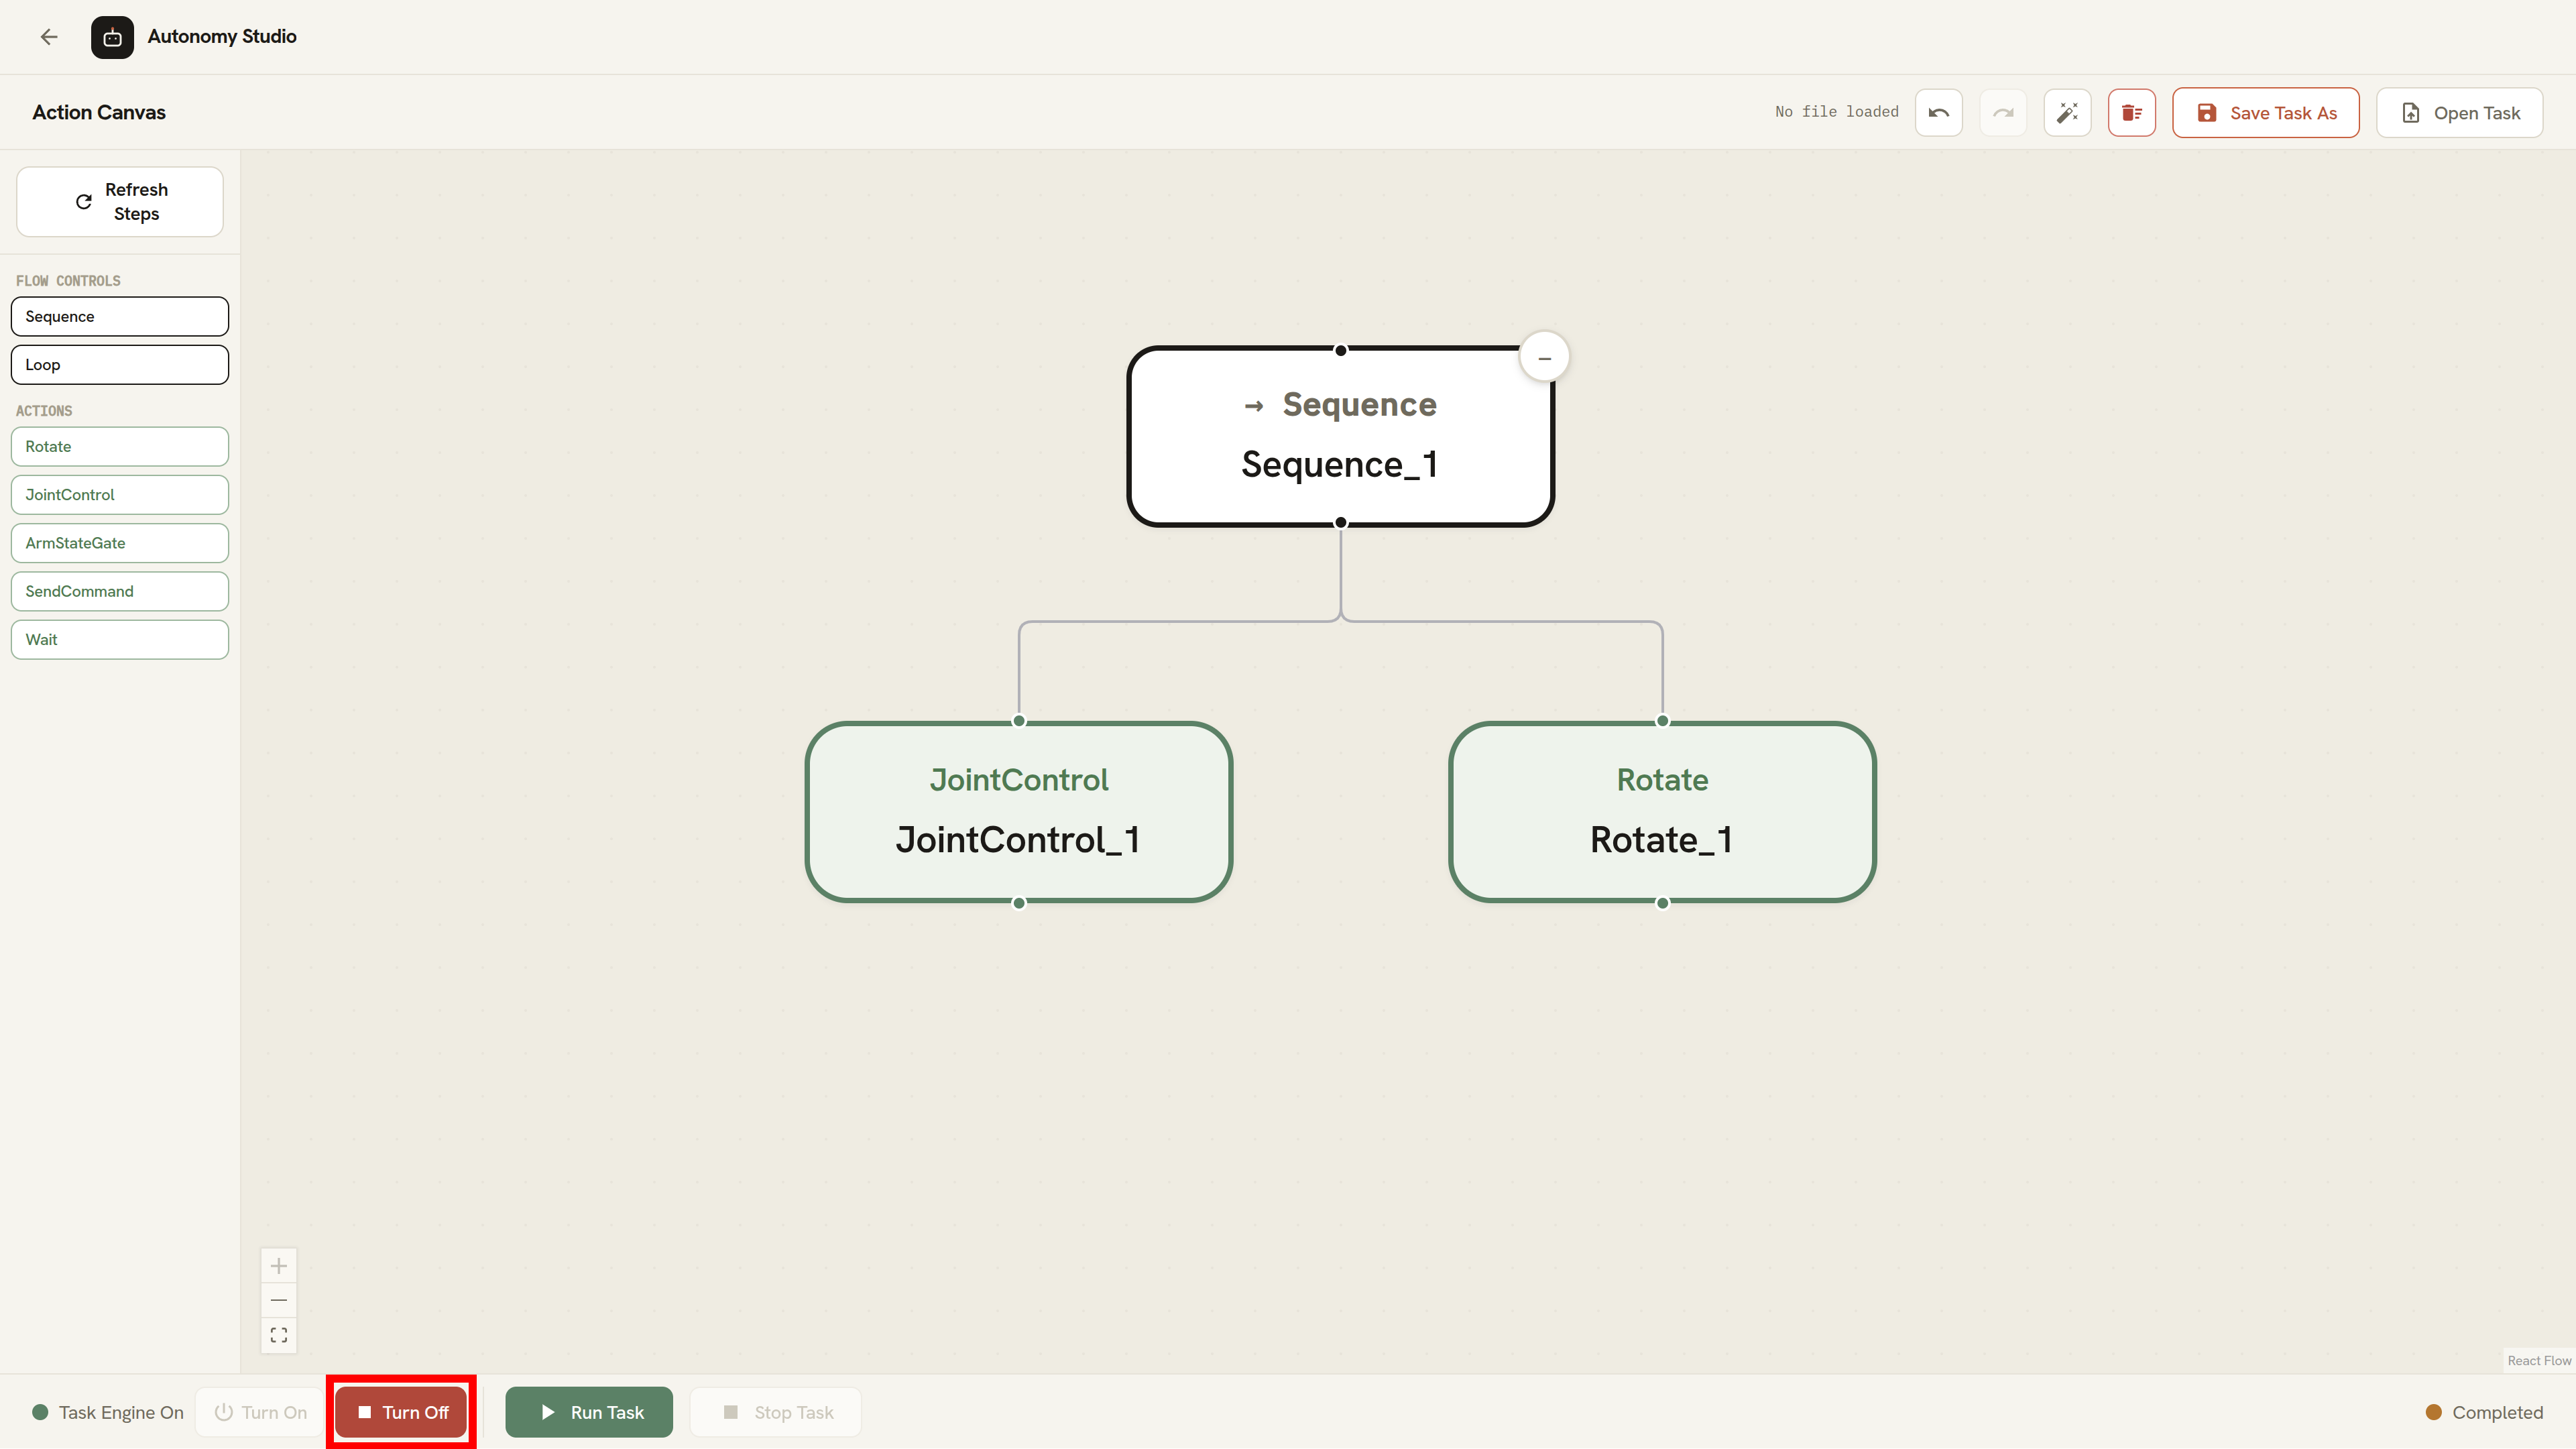
Action Canvas
Action Canvas helps you define what the AI Worker should do while working in one place. Build a Task visually by placing Steps on the canvas and connecting them in the order they should run. Each Step represents one operation, such as moving the robot into a ready position, waiting, turning, or running a trained AI model. When the sequence is ready, you can save it and run it from the same workspace.
Use Action Canvas when the work is centered on one work area and does not require the robot to follow a saved map or travel between waypoints. Typical uses include:
- Using a trained AI model to control the base, lift, head, and arms together
- Repeating the same handling or inspection routine
- Testing a Task in simulation before running it on the physical robot
Working in one area does not mean the robot must remain completely still. It can turn or make local movements as part of the Task. If the robot needs to travel between several work areas and perform a different Task at each location, use Mission Canvas instead. Put simply, Action Canvas defines what the robot does here; Mission Canvas also defines where it goes next.
Watch the following UI walkthrough before using Action Canvas. If the embedded player does not open, watch it on YouTube.
Open Action Canvas
Before opening Action Canvas, complete the Autonomy Studio setup and safety checks.
-
Open the Cyclo Intelligence web UI.
-
In the application sidebar, click Autonomy Studio.
-
Select Action Canvas.
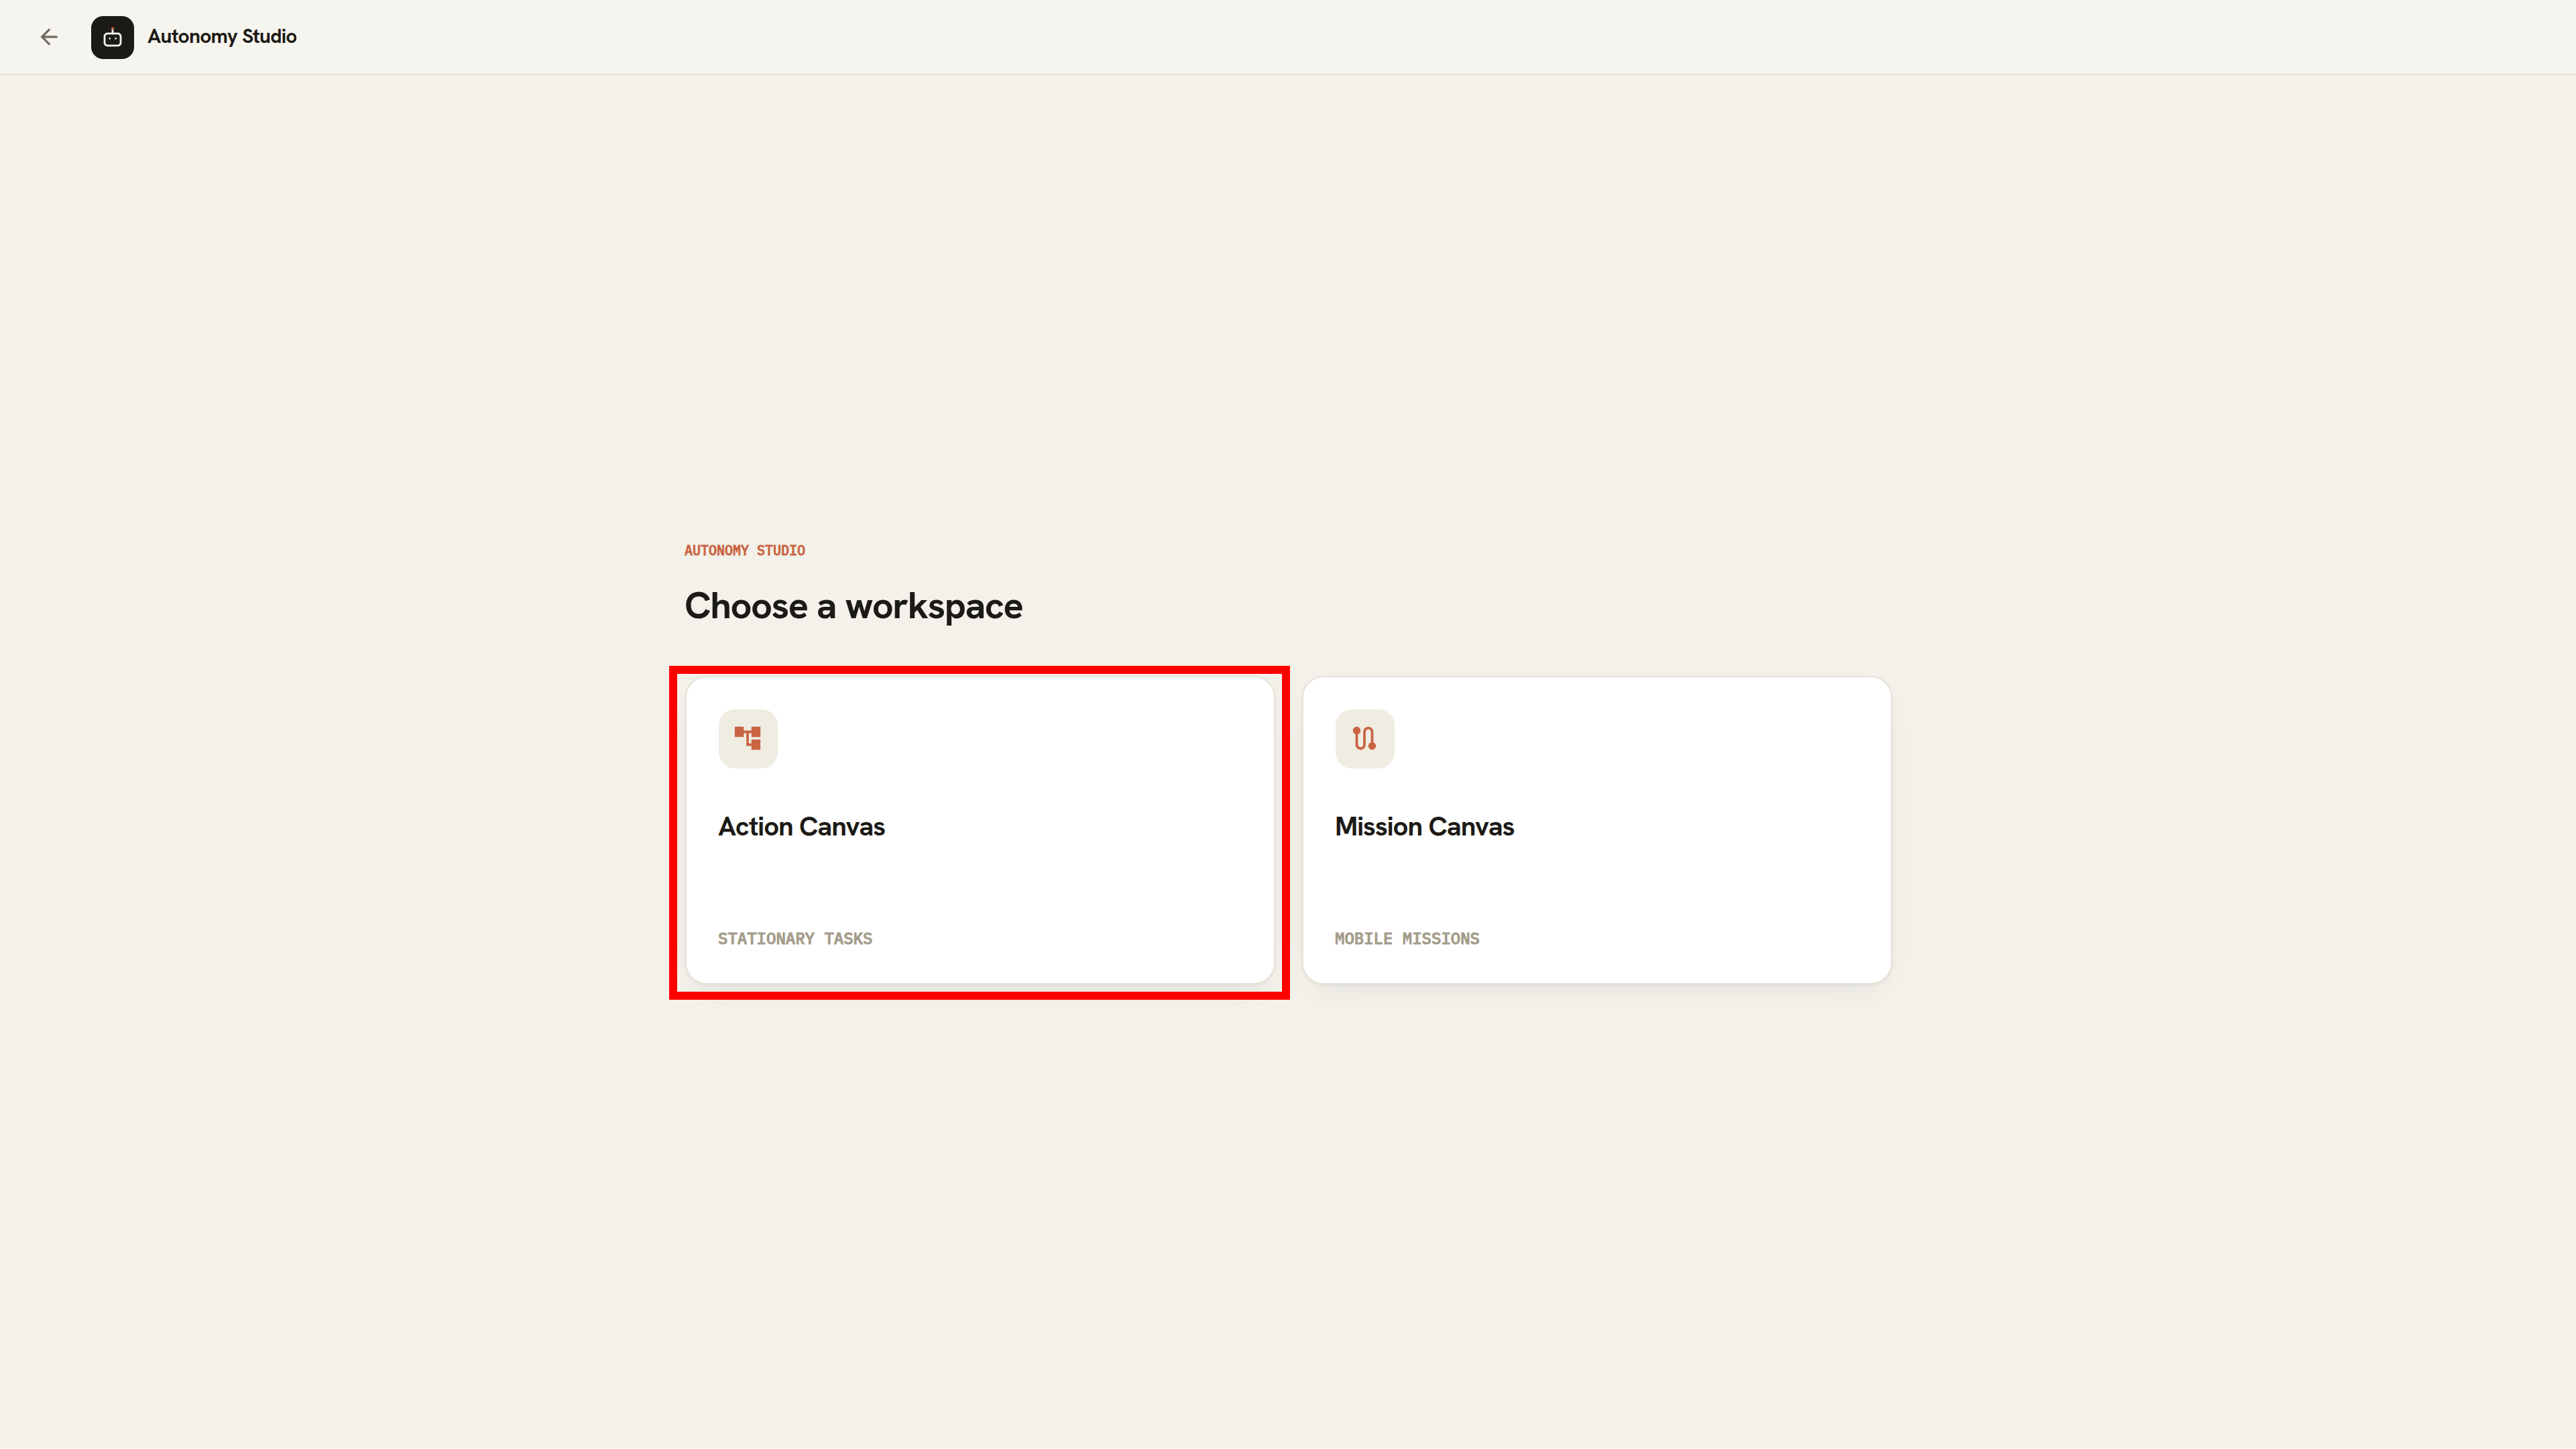
If Autonomy Studio restores the workspace that you used previously, click the back arrow in the application bar to return to the workspace chooser.
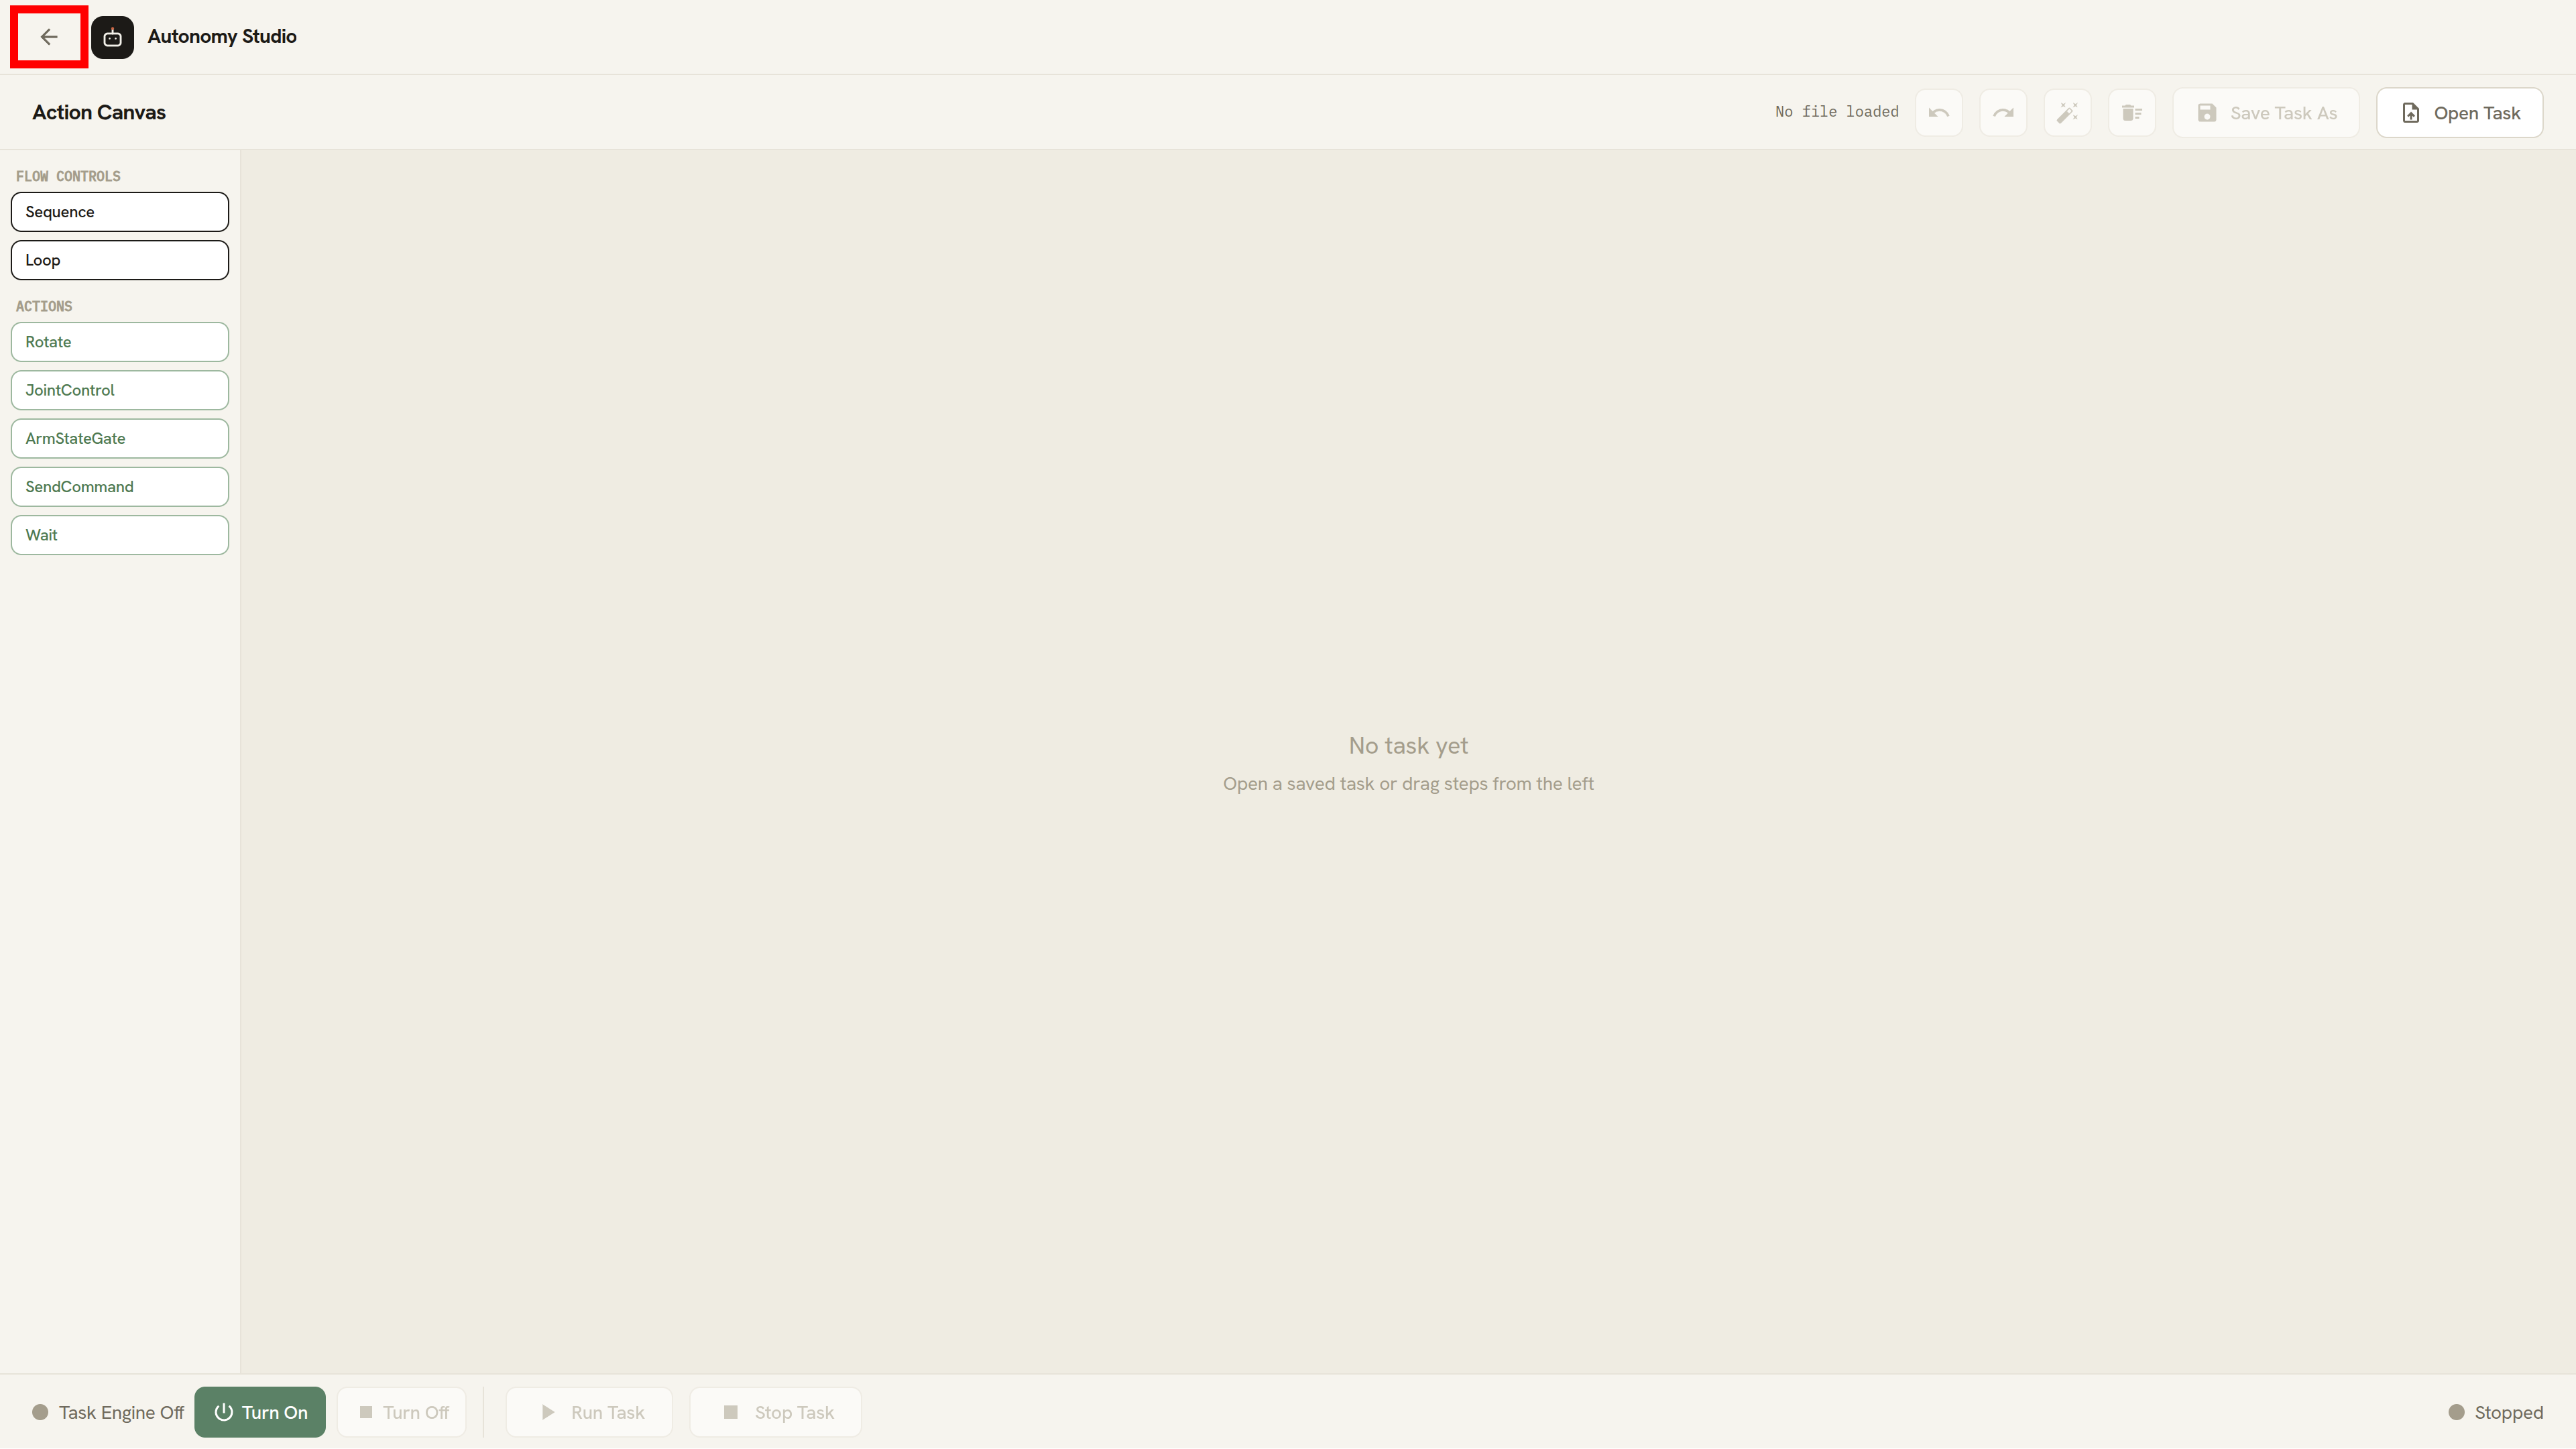
You can create and edit a Task with the standard Steps while the Task Engine is off. Turn on the Task Engine before refreshing the available Step list or running the Task.
Understand the Workspace
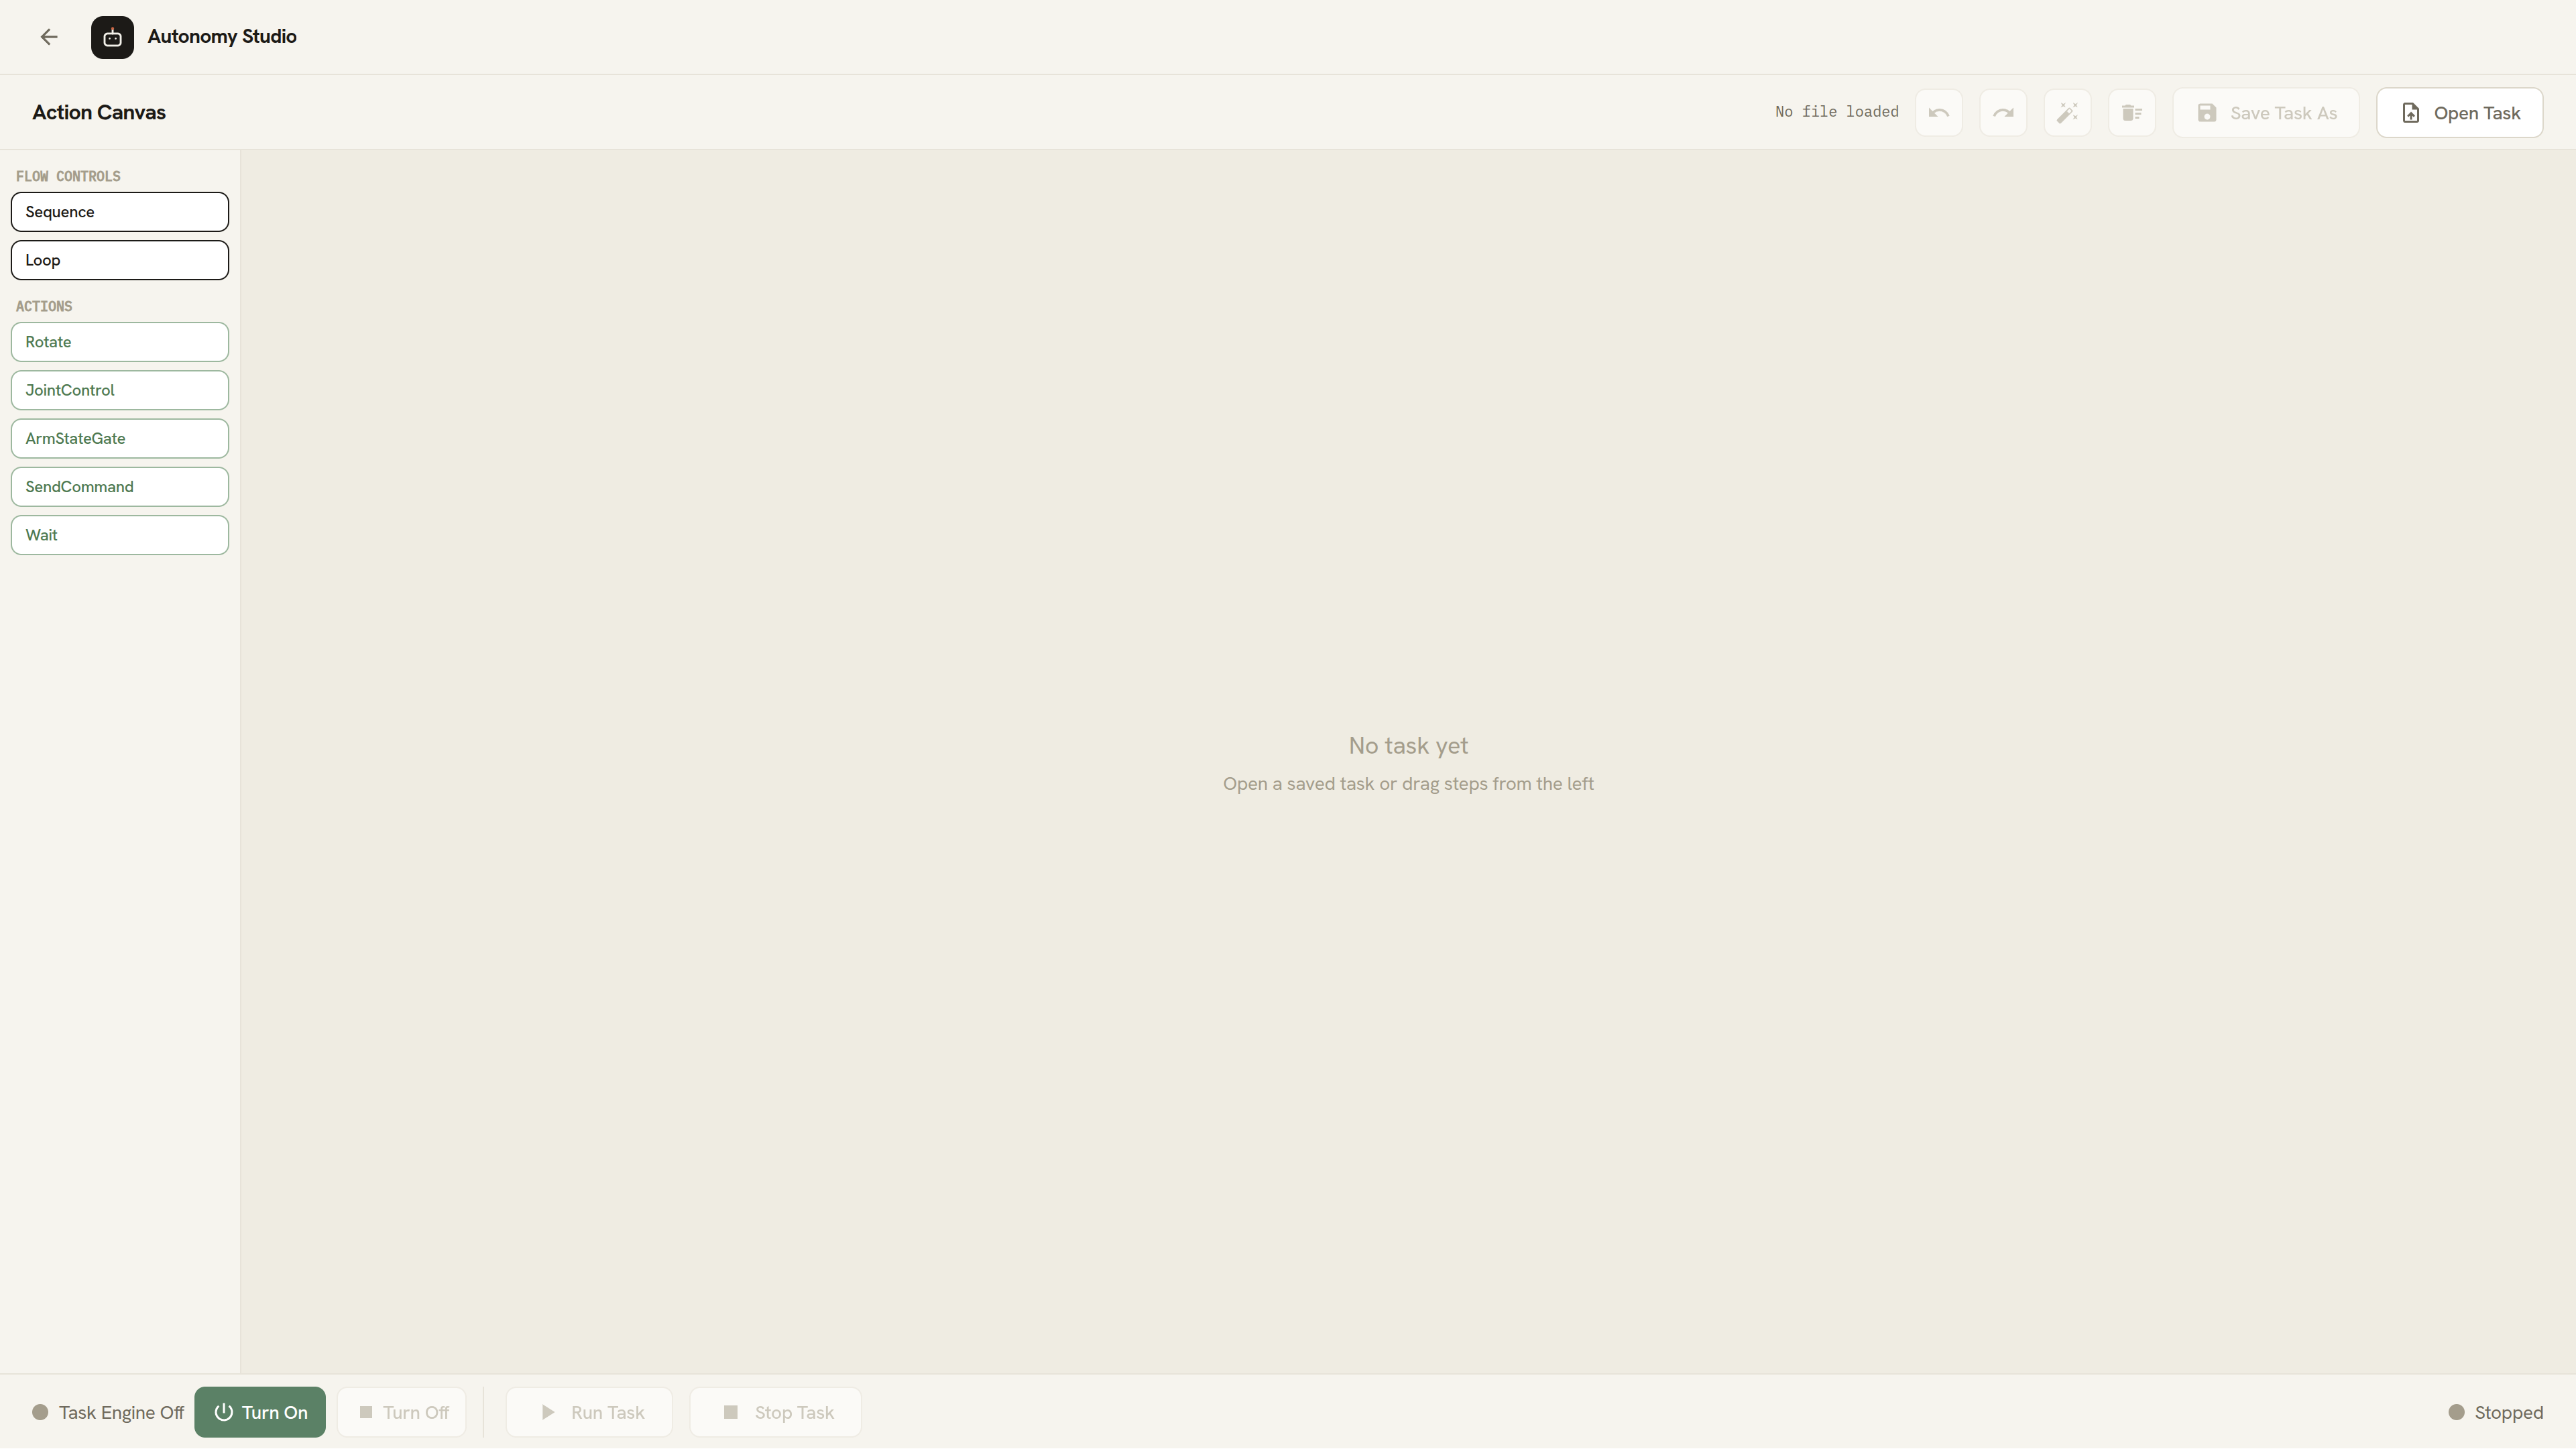
| Area | What you can do |
|---|---|
| Header | Check the last opened Task filename and use Undo, Redo, Auto Layout, Clear, Save Task As, and Open Task. A new Task shows No file loaded. |
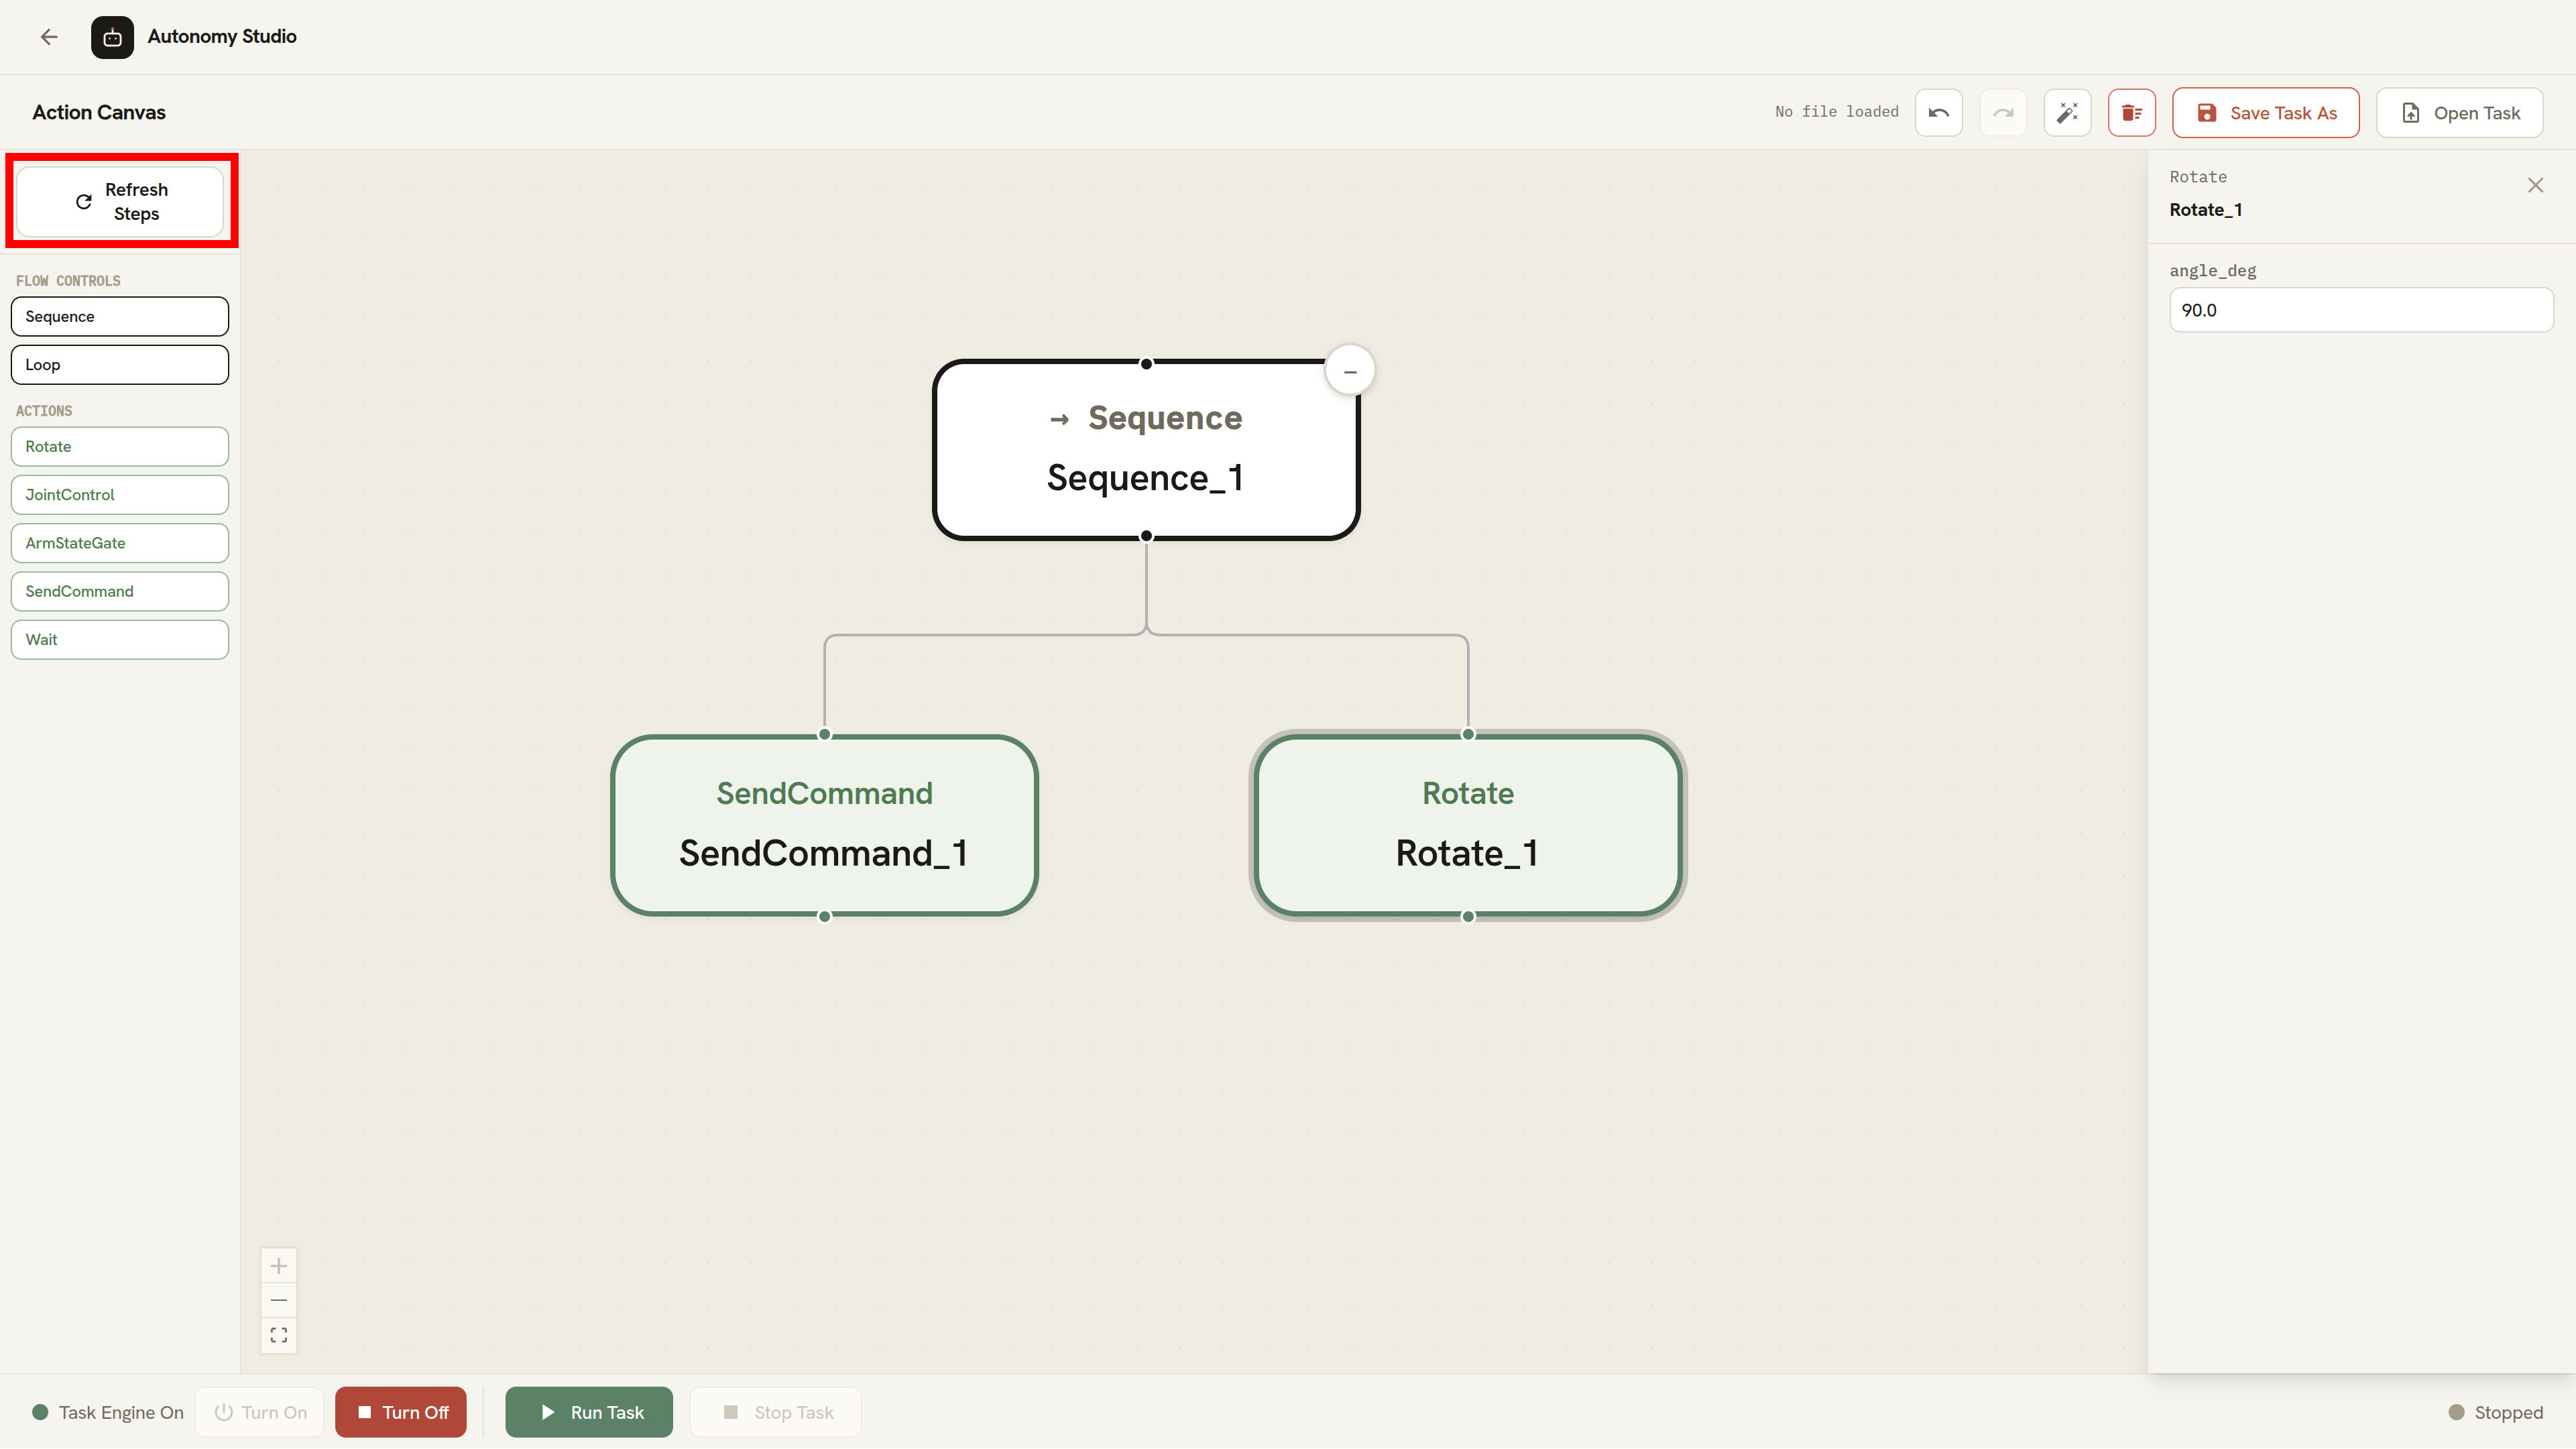
| Step palette | Choose a Step from Flow Controls or Actions. If a new custom Step has been added to the system, such as a newly developed robot action, turn on the Task Engine and click Refresh Steps to make it available in the palette. |
| Canvas | Build the task diagram by adding, moving, selecting, connecting, hiding, showing, or deleting Steps. |
| Parameter panel | Select a Step to rename it and change its settings. |
| Bottom control bar | Check the Task Engine and Task status, and use Turn On, Turn Off, Run Task, or Stop Task. |
The Task Engine status can be On, Off, or Unknown. The Task status can be Stopped, Running, Stopping, Completed, or Failed.
How Task Order Works
There are two kinds of Step:
- A Flow Control decides how the Steps connected after it are run. For example,
Sequenceruns them once from left to right, whileLooprepeats them. - An Action performs one operation, such as waiting, moving joints, rotating the base, or controlling a trained AI model.
Start the Task with one Flow Control, and connect the Actions or other Flow Controls that should follow it. When several Steps are connected to the same Flow Control, their horizontal position on the canvas determines the order: the leftmost Step runs first.
Recommended Workflow
- Click Turn On and wait until the status shows Task Engine On.
- Click Refresh Steps if a custom Step has been added or updated.
- Click Open Task to continue a saved Task, or create a new one on the canvas.
- Check that the task diagram has one starting Step and that every Step you need is connected.
- Click Save Task As to save the Task.
- Check all motion and AI settings, and clear the robot's operating area.
- Click Run Task.
- Watch the highlighted Step and the Task status.
- Click Stop Task if you need to interrupt the Task.
- After the Task stops, click Turn Off if the Task Engine is no longer needed.
Build a Task
Add Steps
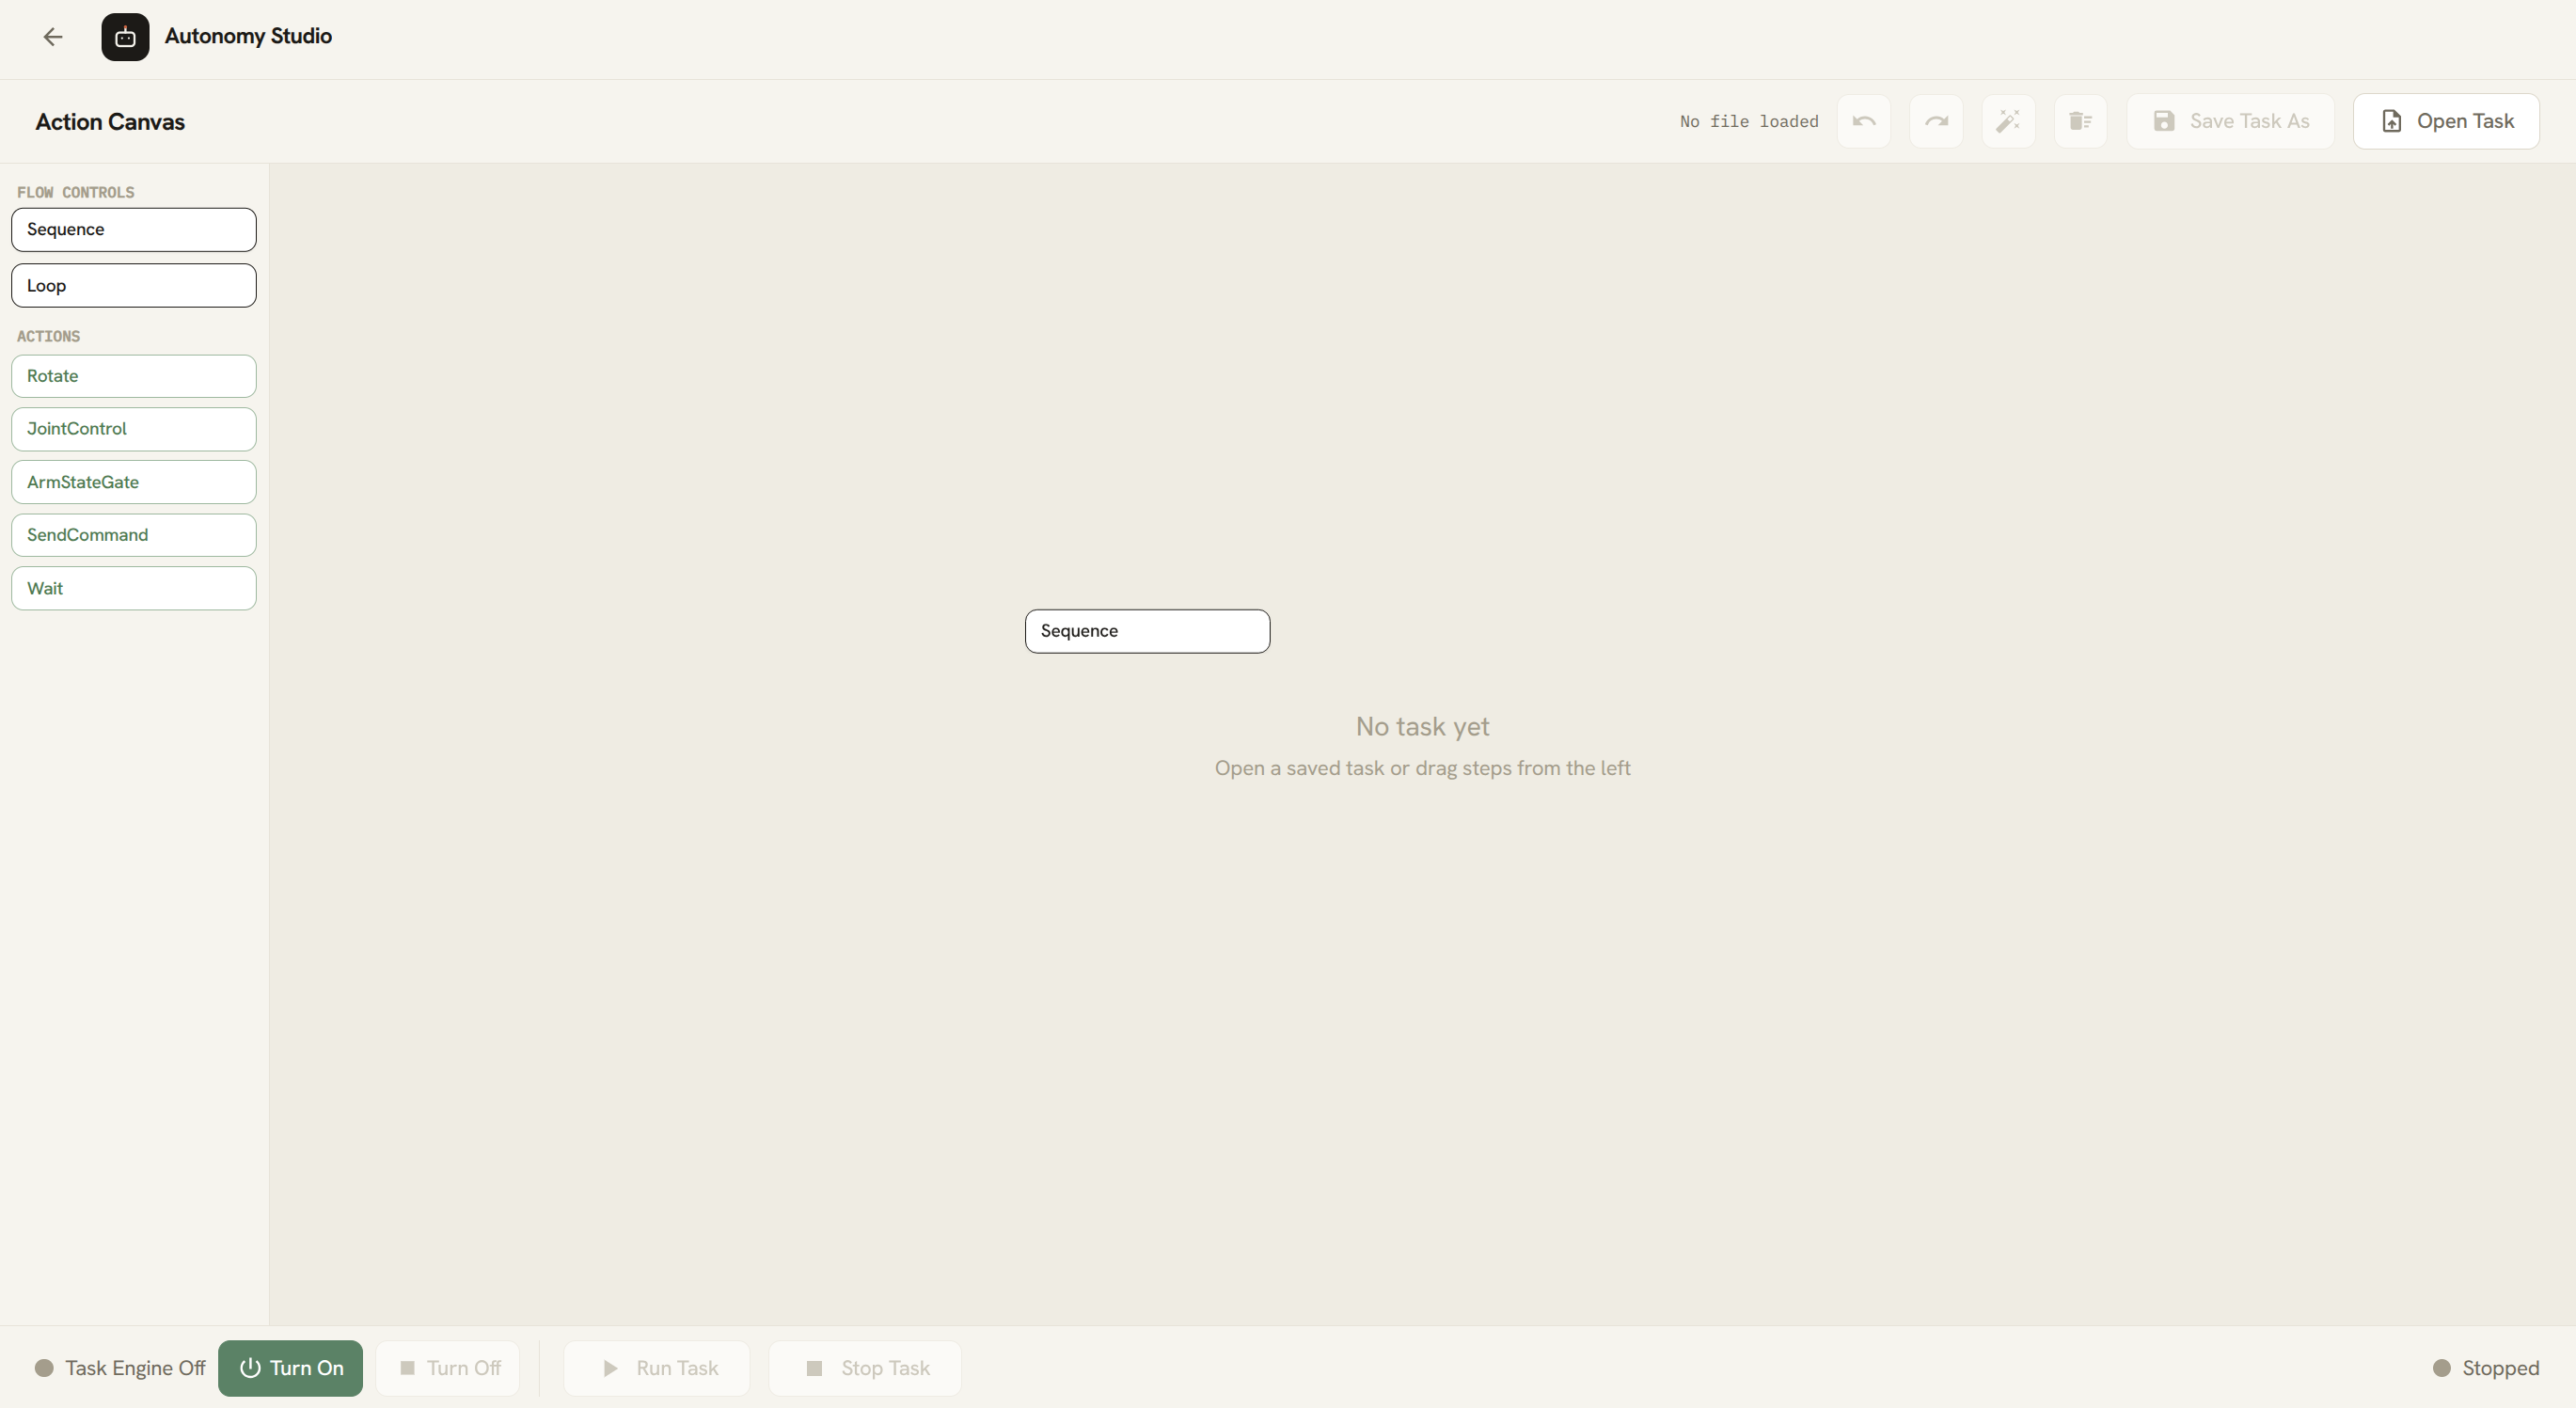
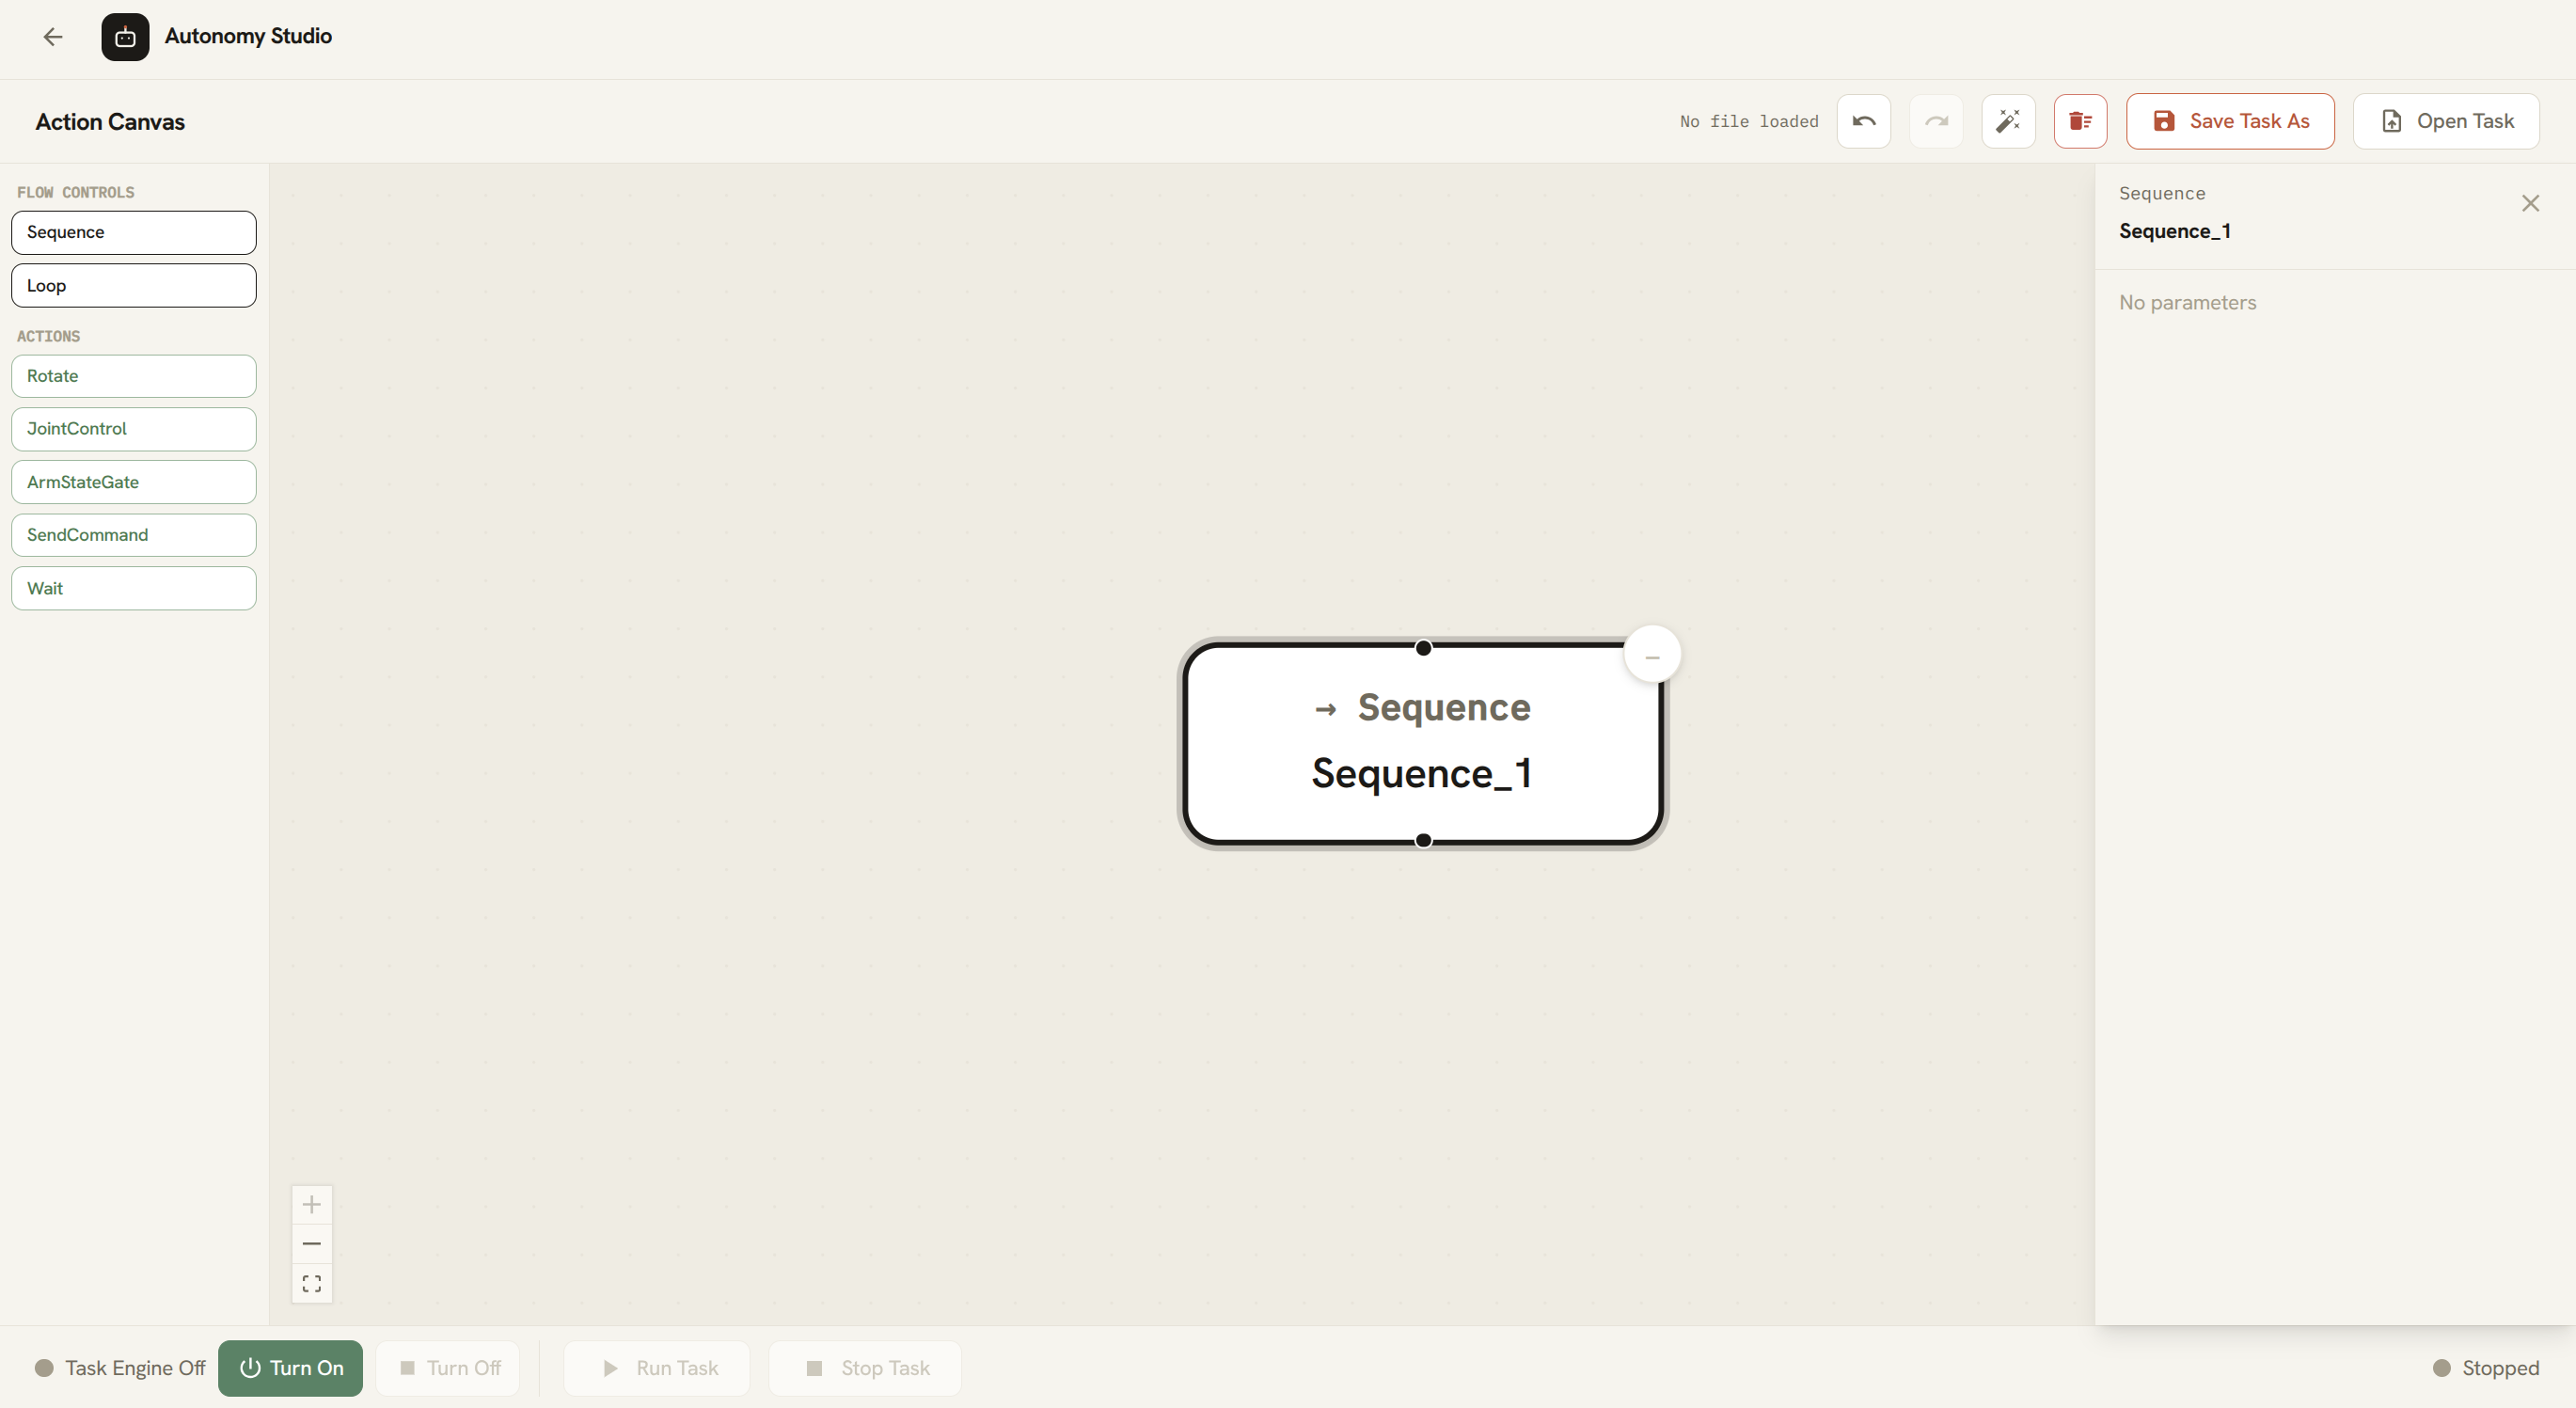
Drag a Step from Flow Controls or Actions, and drop it where you want it on the canvas. Action Canvas gives the new Step an automatic name such as Sequence_1 or Wait_1 and selects it so that you can configure it.
The standard Steps appear as soon as the page opens. If a developer adds or updates a custom Step, turn on the Task Engine and click Refresh Steps. Action Canvas then requests the latest Step list from the running system and adds the detected custom Steps to the palette.
Connect Steps
To set the order of a Task, drag from the lower connection point of a Flow Control to the upper connection point of the Step that should follow it.
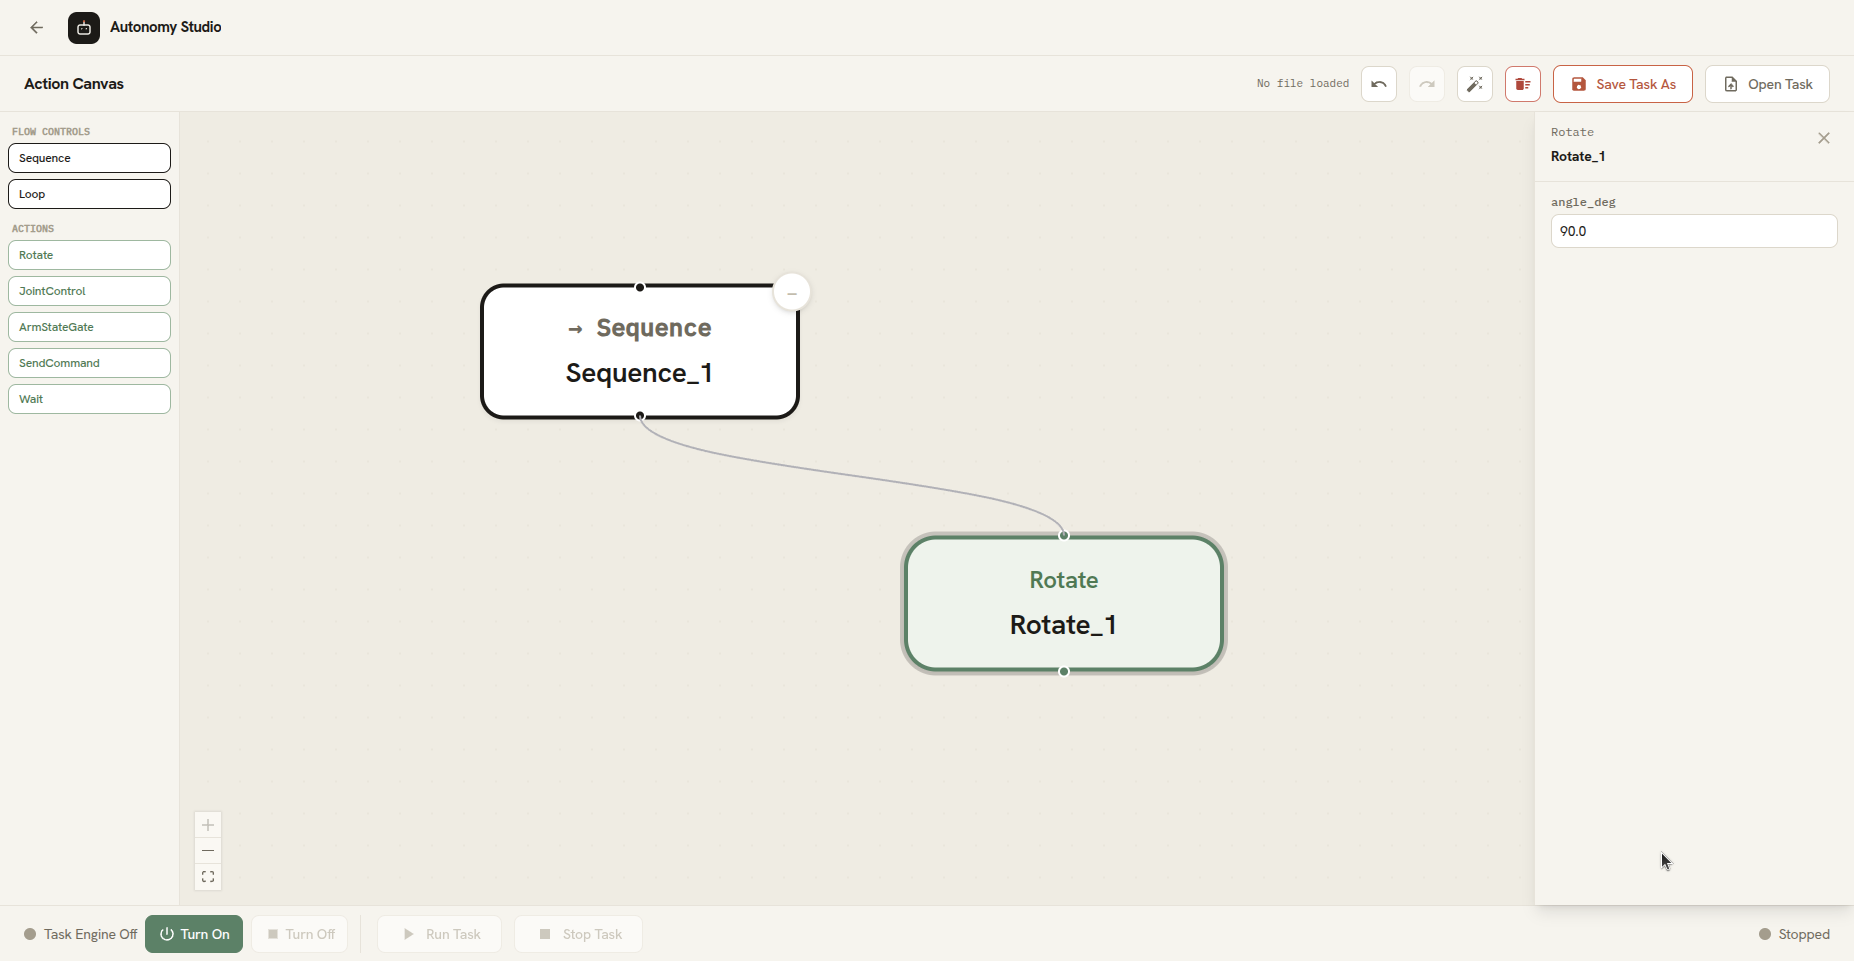
Action Canvas applies the following connection rules:
- Only a Flow Control can have Steps connected after it. An Action completes one operation and cannot contain another Step.
- Each Step can be connected from only one preceding Flow Control.
- A Step cannot connect to itself.
- A connection cannot lead backward to an earlier Step in the same path.
- Steps connected to the same Flow Control run from left to right according to their position on the canvas.
Use one connected starting Step for the complete Task. If the canvas contains several separate groups, only one group is selected as the Task to run. The other groups may remain in the saved file, but they are not executed.
Move and Arrange Steps
- Drag a Step to reposition it.
- Use the canvas controls to zoom in, zoom out, or fit the whole task diagram on screen.
- Scroll to move around the canvas, and use a pinch gesture to zoom on a touchpad or touchscreen.
- Click Auto Layout to arrange the visible task diagram automatically.
- On a Flow Control, click
-to hide all Steps connected after it, or+to show them again. This display choice is kept when the Task is saved.
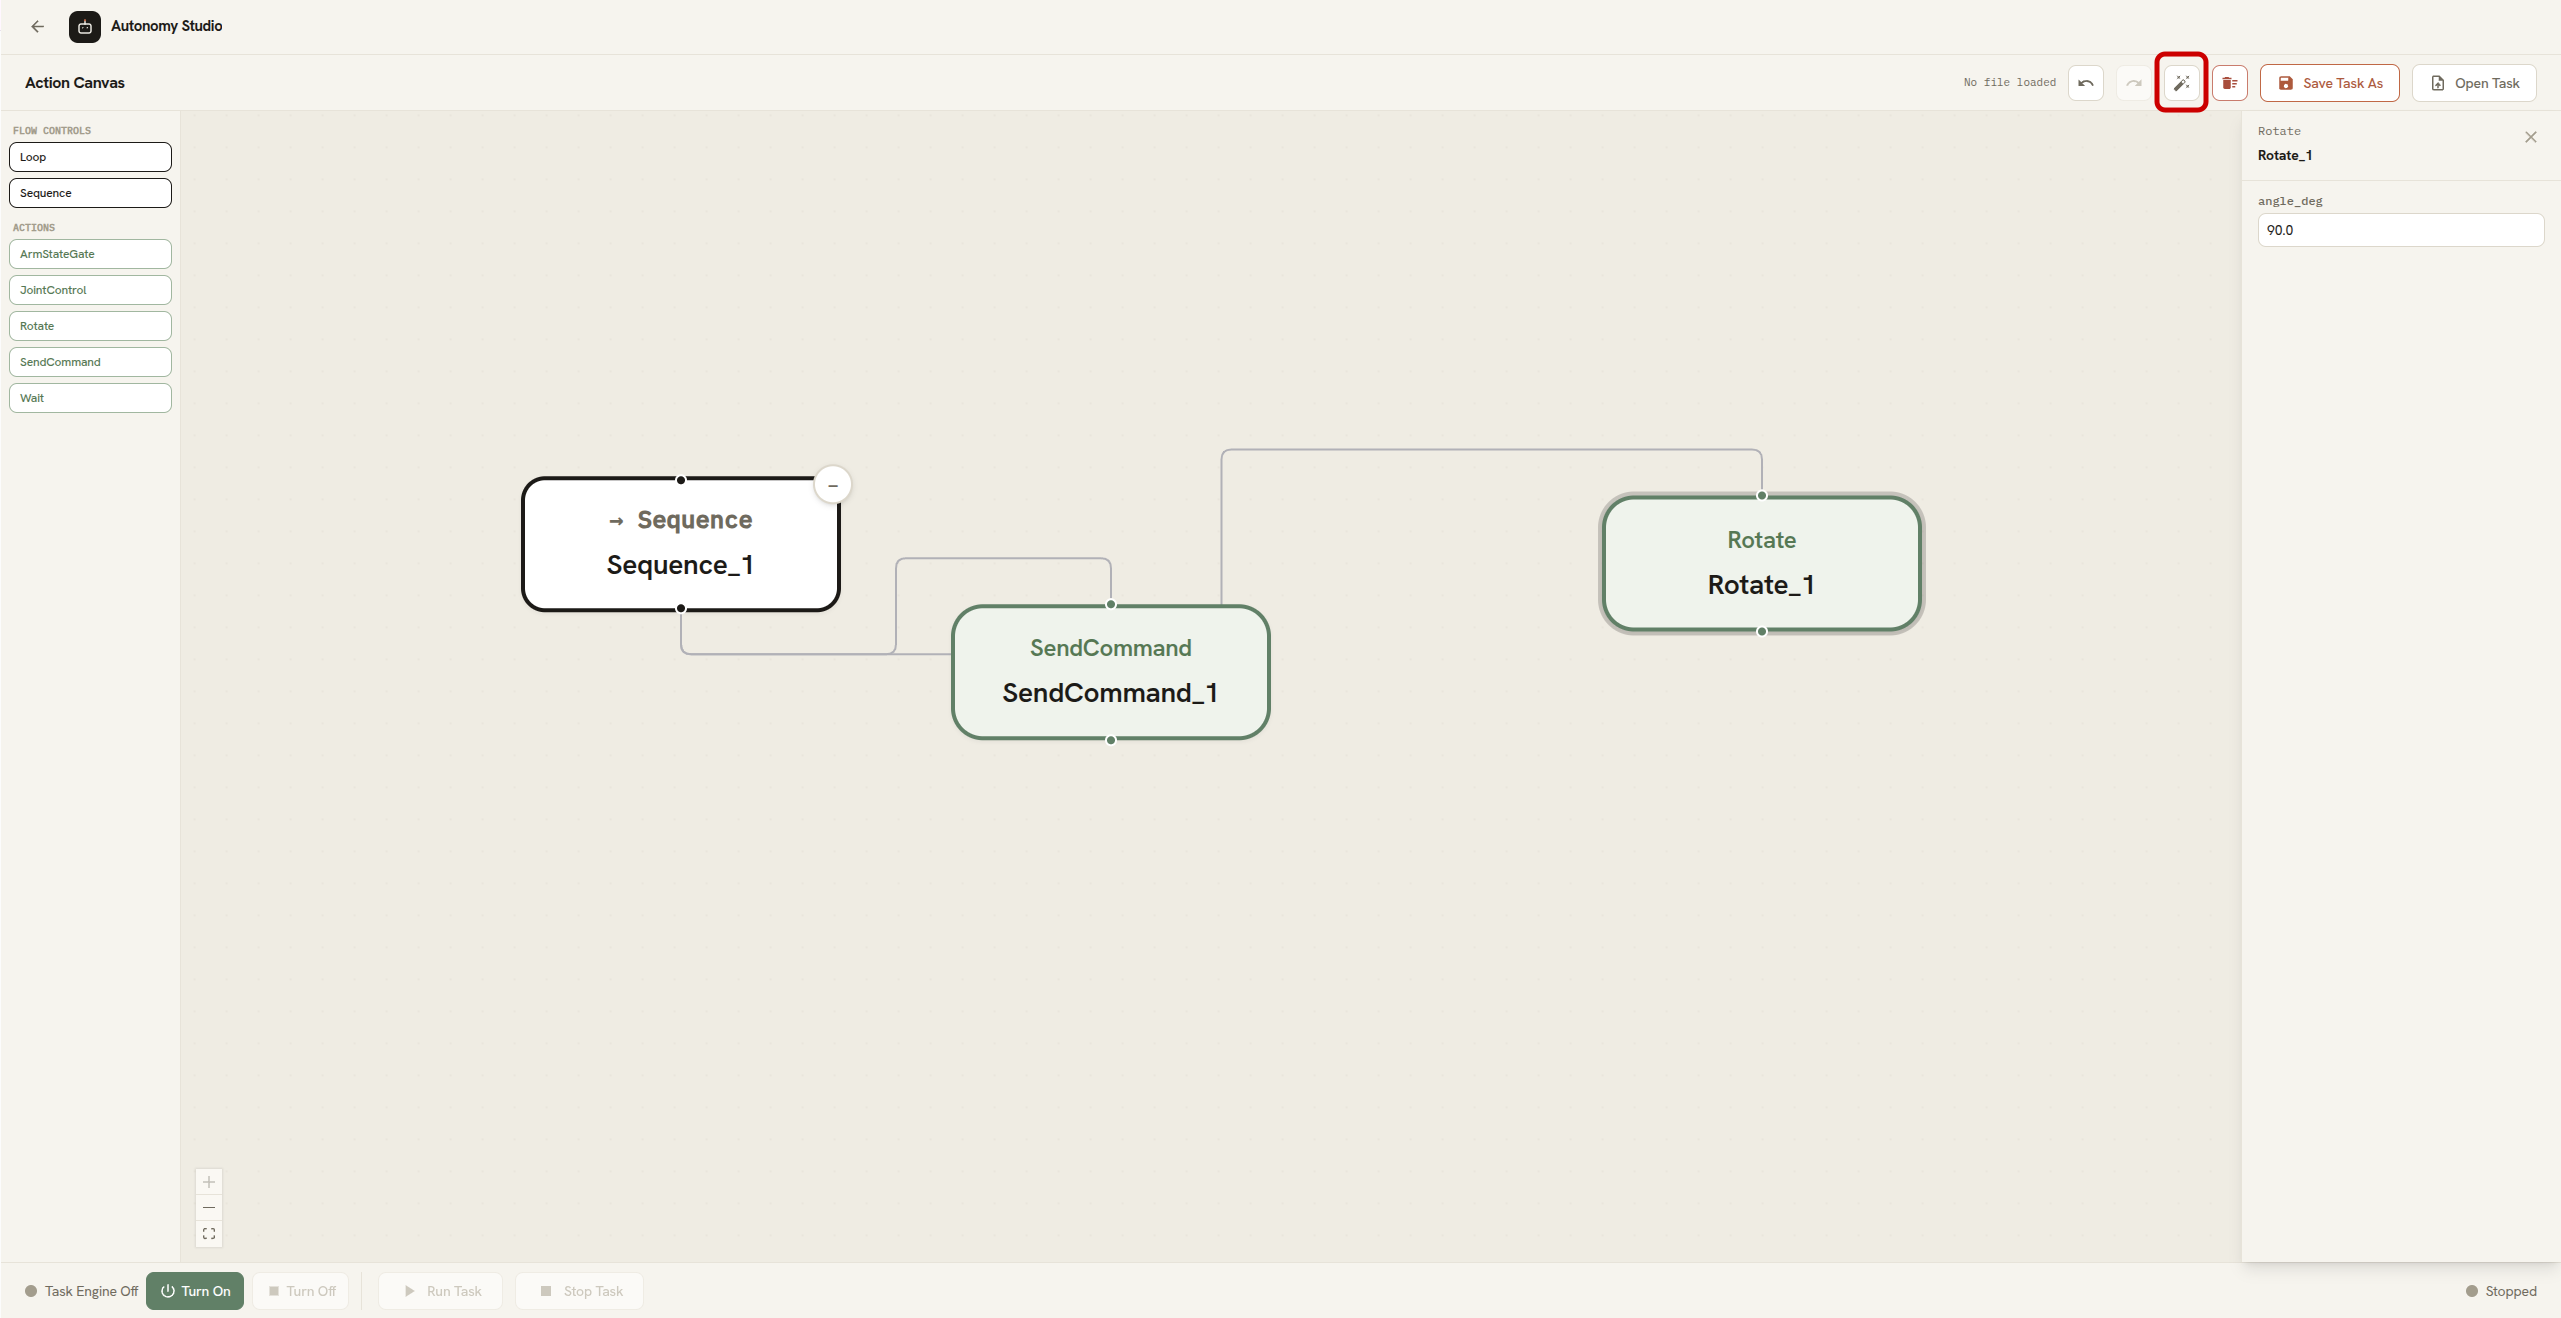
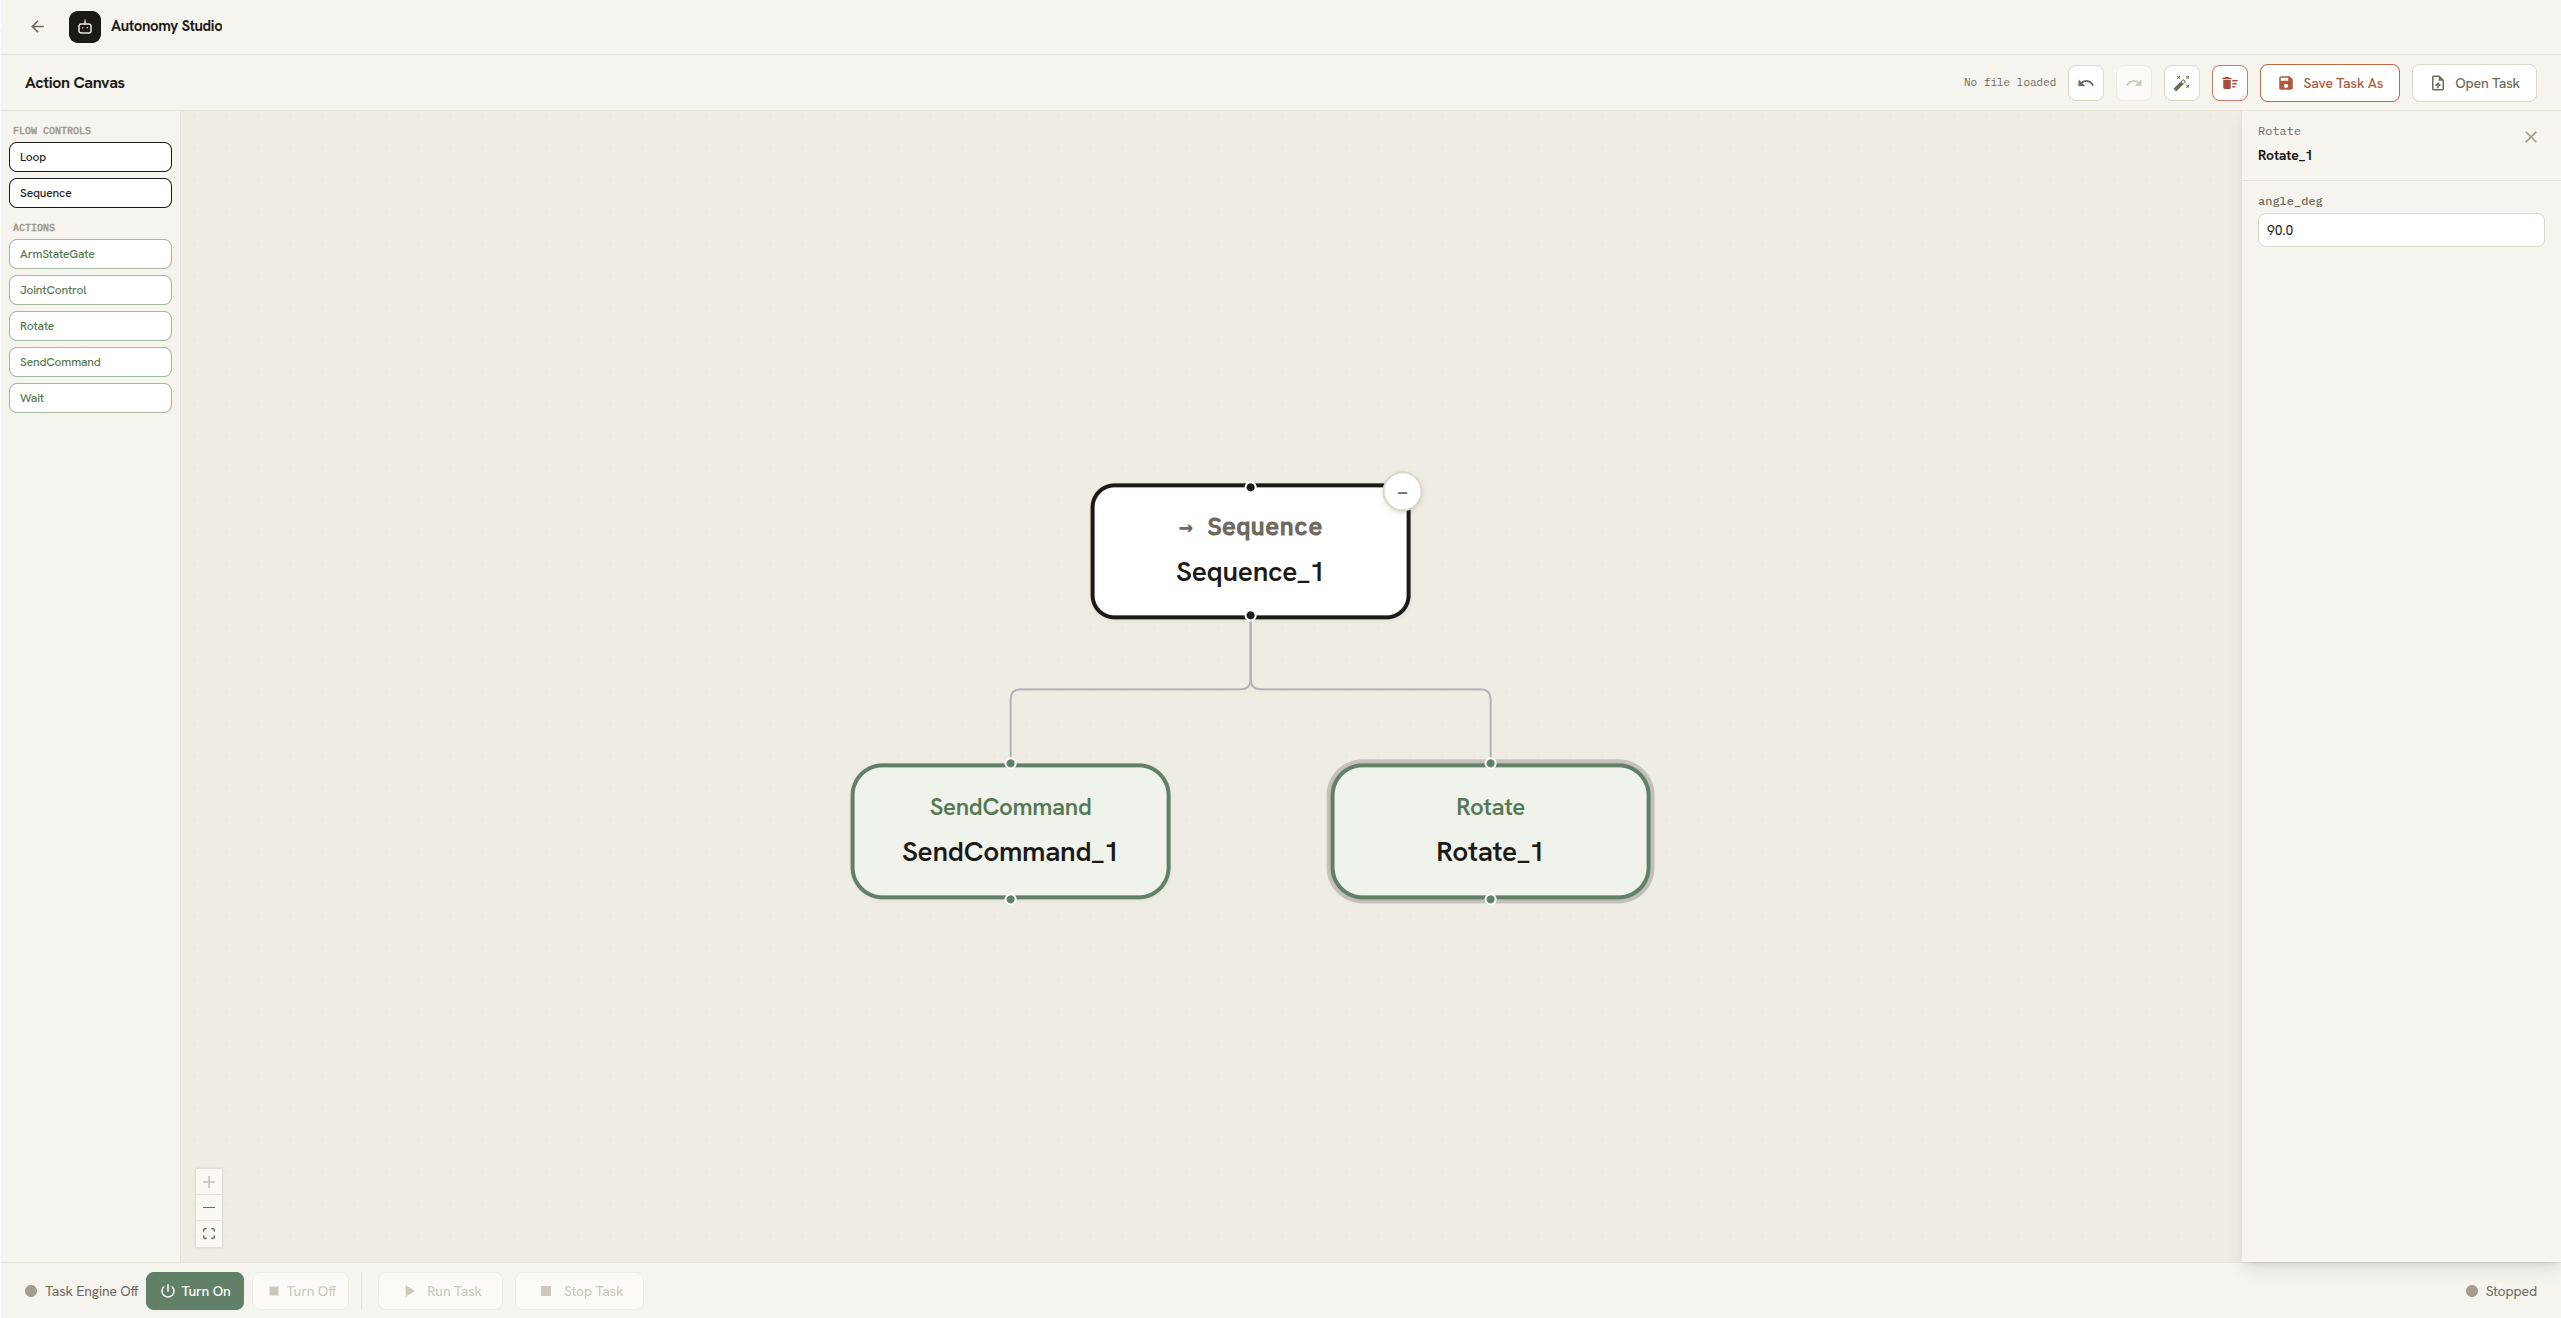
If a hidden Step is currently running, Action Canvas highlights the visible Flow Control that contains it.
Rename and Configure a Step
- Select a Step on the canvas.
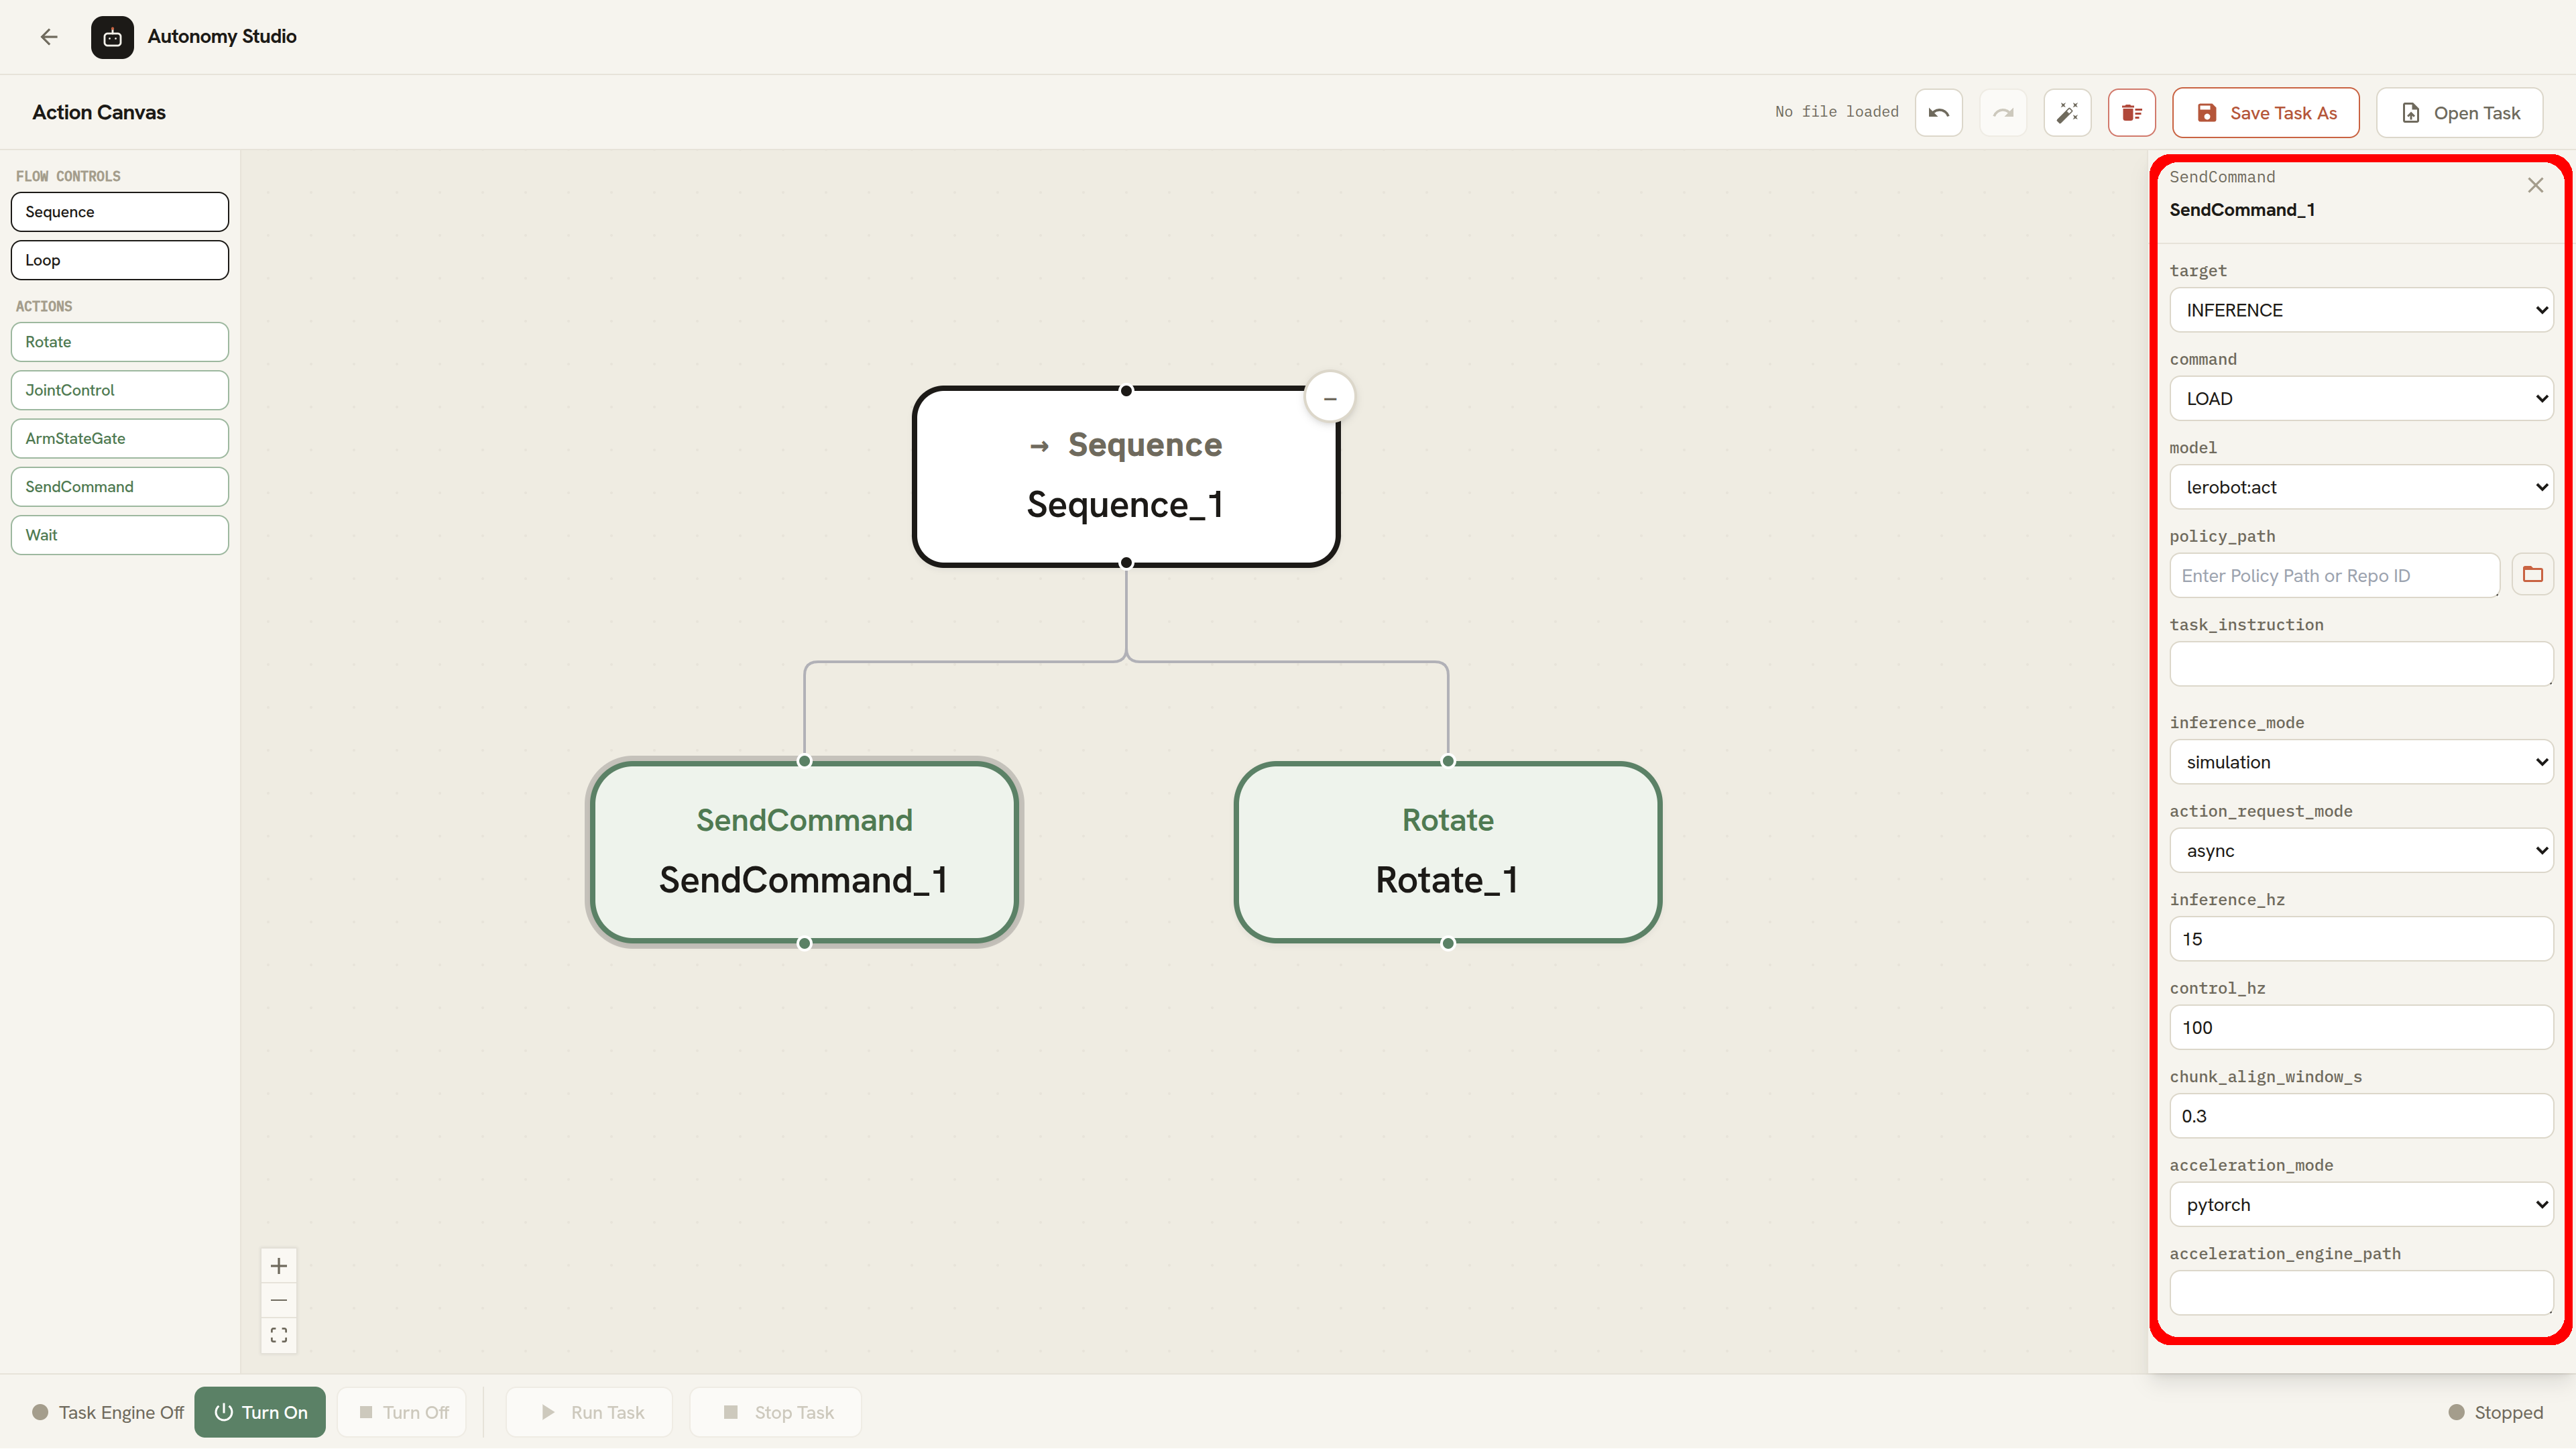
- In the parameter panel on the right, edit Name if needed. A Step name cannot be empty.
- Configure the available fields.
- Close the panel, or select another Step when finished.
The panel presents each setting in a suitable form:
- On/off settings use checkboxes.
- Settings with fixed choices use selection lists.
- Number settings use number fields.
JointControlandArmStateGateprovide SG2 joint-selection chips and matching comma-separated position values.- The folder button beside
SendCommand.policy_pathopens the folder used for the selected LeRobot or GR00T model.
Delete Steps or Connections
- Select one or more Steps or connection lines, and press
DeleteorBackspace. - Deleting a Step also deletes the lines connected to it.
Undo and Redo
| Action | Button | Keyboard shortcut |
|---|---|---|
| Undo | Undo | Ctrl+Z or Command+Z |
| Redo | Redo | Ctrl+Shift+Z, Command+Shift+Z, Ctrl+Y, or Command+Y |
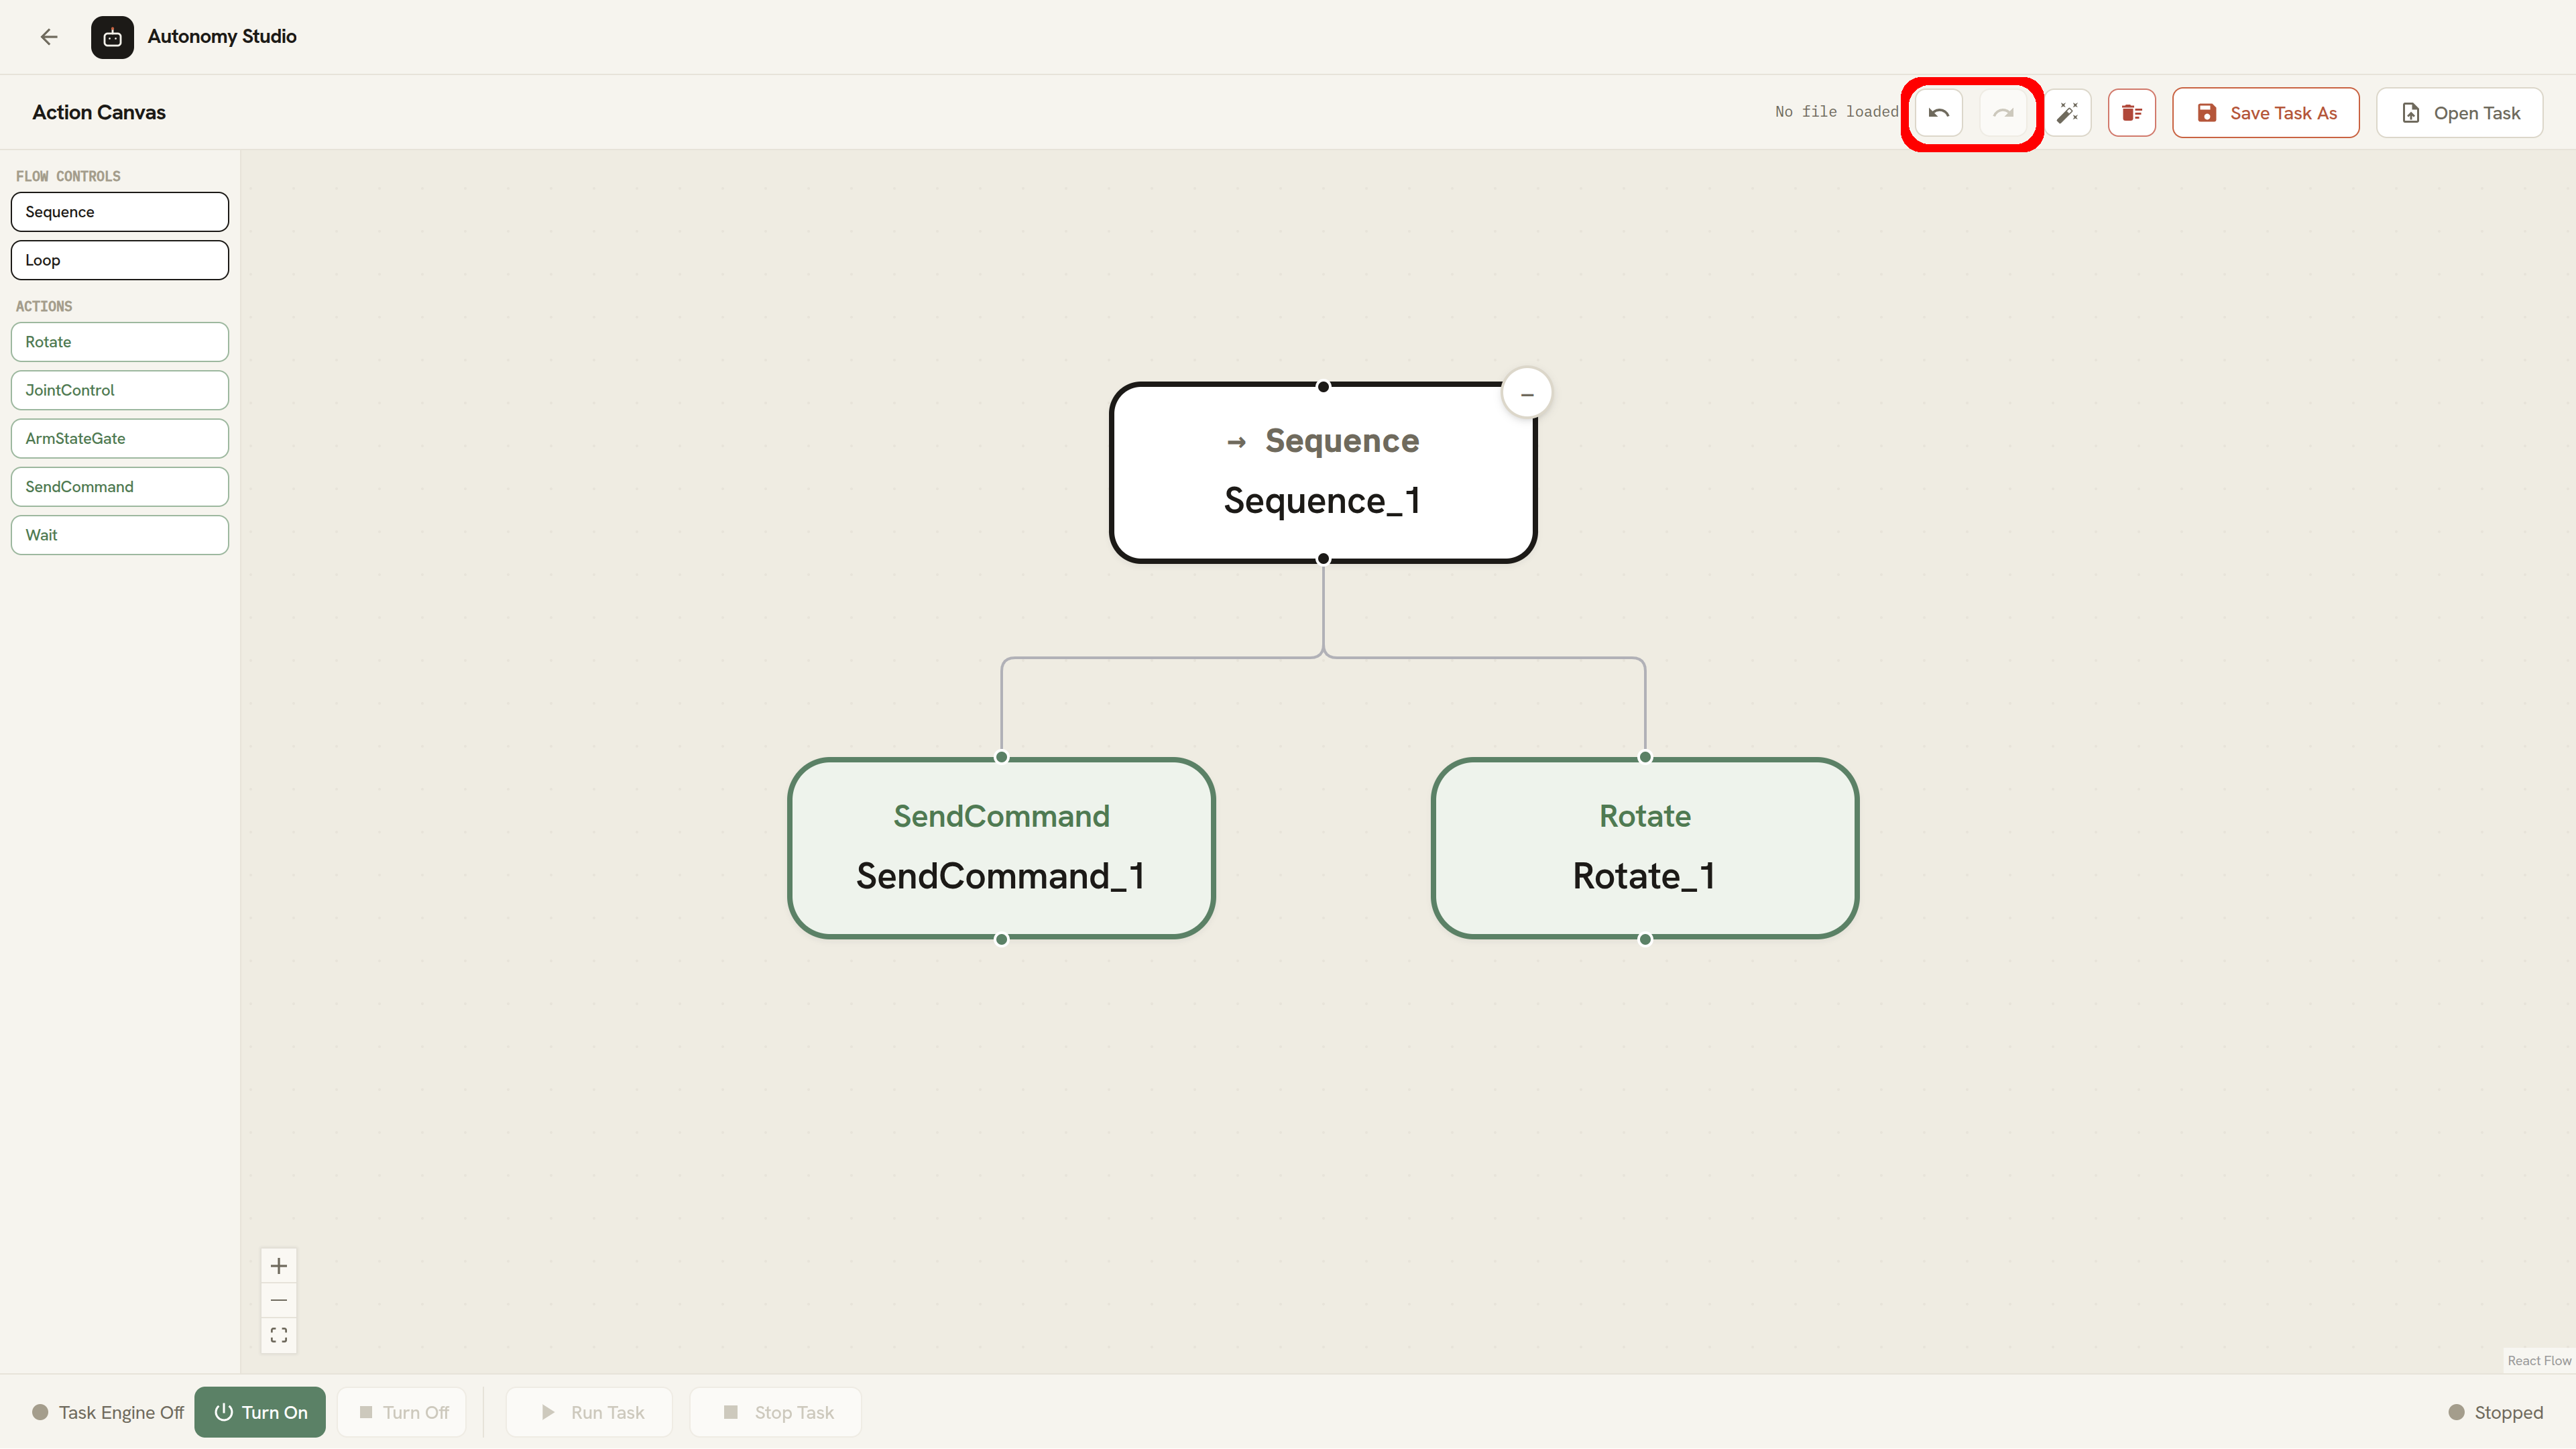
Undo and Redo cover added or deleted Steps, connection lines, positions, Step settings, hidden sections, clearing, and the current filename. Opening a saved Task starts a new editing history.
Clear the Canvas
To remove every Step and connection from the current Task, click the Clear trash can button twice within four seconds. The first click prepares the action, and the second click confirms it.
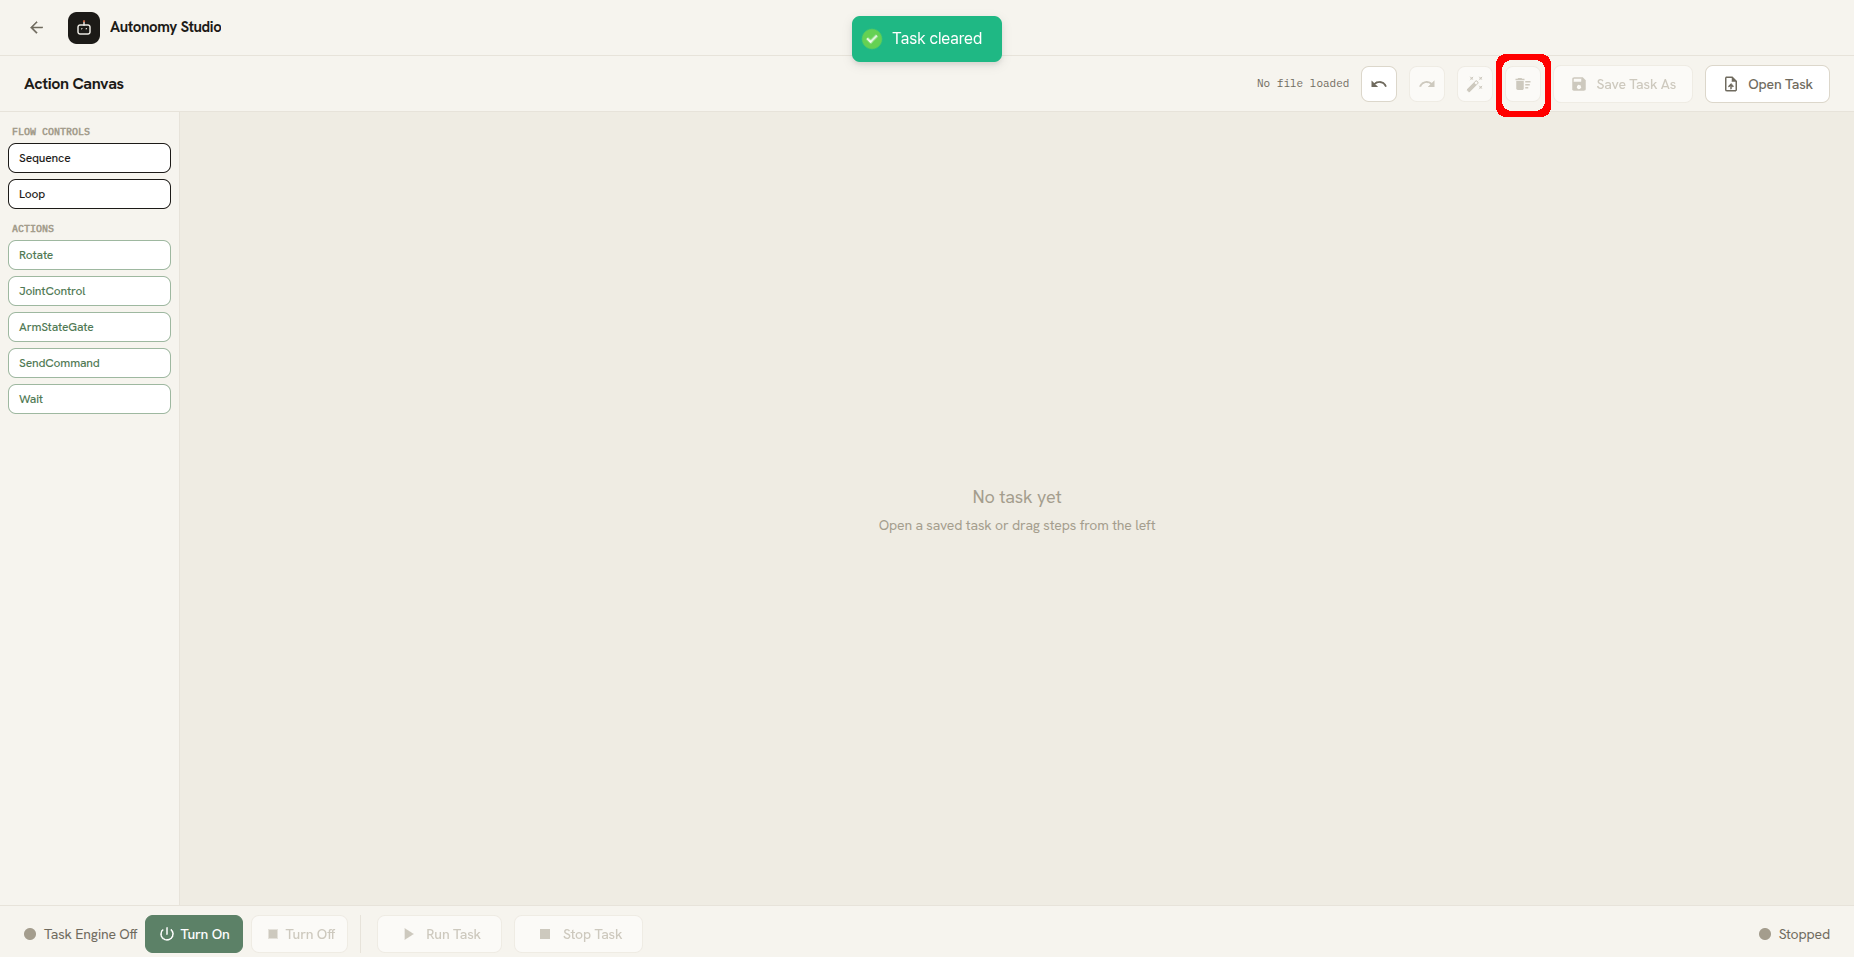
Clearing the canvas also removes the displayed filename. You can restore the cleared Task with Undo until you open another file and begin a new editing history. Clear is unavailable while the Task is running or stopping, or while another Task Engine action is in progress.
Standard Steps
The following Steps are included with Action Canvas. After the Task Engine is on, Refresh Steps can show additional Steps or updated descriptions provided by the current system.
Flow Controls
Sequence
Sequence runs its following Steps from left to right, one at a time.
- While the current Step is still running, the Sequence waits.
- If a Step fails, the Sequence stops and the Task fails.
- When every Step finishes successfully, the Sequence finishes successfully.
Sequence has no configurable parameters.
Loop
Loop runs its following Steps from left to right and starts them again after they all finish successfully. If one of the Steps fails, the Loop stops immediately.
| Parameter | Default | Description |
|---|---|---|
max_iterations | 0 | Number of complete repetitions. 0 or a negative value repeats indefinitely. A positive integer finishes after that many repetitions. |
A Loop with no limit continues until one of its Steps fails or the operator clicks Stop Task.
Actions
Rotate
Rotate turns the mobile base by the requested relative angle. It checks the base's measured movement and finishes when the target is reached within the allowed tolerance. It fails when the required movement command or movement data is unavailable.
| Parameter | Default | Description |
|---|---|---|
angle_deg | 90.0 | Relative rotation angle in degrees. Positive and negative values turn in opposite directions. |
Keep angle_deg between -180° and 180°. Rotate measures progress within this range and does not have its own time limit. A value outside the range cannot be reached and may leave the base turning until you click Stop Task.
JointControl
JointControl moves the selected head, arm, and lift groups and waits until every selected joint reaches its target position. At least one group must be enabled.
You do not need to enter target values for every arm joint and gripper. After selecting enable_arms, use the joint buttons under left_joint_names and right_joint_names to leave only the joints that the Task should move. Select a gripper joint only when the Task needs to open or close that gripper.
The matching left_positions and right_positions lists stay aligned with the selected joints. Deselecting a joint removes its target value, while selecting a new joint adds a 0.0 target. Check that there is one target value for each selected joint, in the same displayed order. Only the selected joints are included in the movement command.
| Parameter | Default | Description |
|---|---|---|
enable_head | true | Enables head movement. |
head_positions | 0.0, 0.0 | Head target positions separated by commas. Available when enable_head is selected. |
enable_arms | false | Enables left and right arm movement. |
left_joint_names | arm_l_joint1, arm_l_joint2, arm_l_joint3, arm_l_joint4, arm_l_joint5, arm_l_joint6, arm_l_joint7, gripper_l_joint1 | Left joints to move. The panel keeps this list aligned with left_positions. |
left_positions | 0.0, 0.0, 0.0, 0.0, 0.0, 0.0, 0.0, 0.0 | Left target values in the same order as left_joint_names. |
right_joint_names | arm_r_joint1, arm_r_joint2, arm_r_joint3, arm_r_joint4, arm_r_joint5, arm_r_joint6, arm_r_joint7, gripper_r_joint1 | Right joints to move. The panel keeps this list aligned with right_positions. |
right_positions | 0.0, 0.0, 0.0, 0.0, 0.0, 0.0, 0.0, 0.0 | Right target values in the same order as right_joint_names. |
enable_lift | false | Enables lift movement. |
lift_position | 0.0 | Lift target position. Available when enable_lift is selected. |
duration | 2.0 | Requested movement duration in seconds. |
The arm joint fields are unavailable until enable_arms is selected. Head and lift values are also available only when their enable checkboxes are selected.
ArmStateGate
ArmStateGate waits until the selected left and right arm joints reach their target values. It observes the current joint state and does not move the arms itself. You can also make it wait for either gripper to close and then open.
You do not need to enter target values for every arm joint and gripper. Use the joint buttons under left_target_joints and right_target_joints to select only the joints whose positions the Step should check.
The matching left_target_positions and right_target_positions lists stay aligned with the selected joints. Deselecting a joint removes its target value, while selecting a new joint adds a 0.0 target. Unlike JointControl, ArmStateGate does not move the selected joints; it only waits for them to reach the specified values.
A new ArmStateGate starts with no joints selected. Before running the Task:
- Select at least one left-arm joint and one right-arm joint.
- Enter one target value for each selected joint.
For example, if you select two left-arm joints, left_target_positions must contain two values. The Task cannot start if either arm has no selected joint or if the number of selected joints and target values does not match.
| Parameter | Default | Description |
|---|---|---|
left_target_joints | Empty | Left joints to observe. Select at least one. |
left_target_positions | Empty | Left target values in the same order as left_target_joints. |
right_target_joints | Empty | Right joints to observe. Select at least one. |
right_target_positions | Empty | Right target values in the same order as right_target_joints. |
joint_threshold | 0.01 | Maximum allowed difference between the current joint value and its target. |
detect_left_gripper | false | Waits for the selected left gripper joint to reach the closed value and then the open value. |
detect_right_gripper | false | Waits for the selected right gripper joint to reach the closed value and then the open value. |
left_gripper_joint | gripper_l_joint1 | Left gripper joint to observe when left detection is enabled. |
right_gripper_joint | gripper_r_joint1 | Right gripper joint to observe when right detection is enabled. |
gripper_closed_value | 1.0 | Joint value treated as closed. |
gripper_open_value | 0.0 | Joint value treated as open after the closed value has been observed. |
gripper_threshold | 0.05 | Maximum allowed difference for closed and open detection. |
timeout_sec | 0.0 | Time in seconds before the Step fails. 0.0 turns off the time limit. |
SendCommand
SendCommand loads, starts, pauses, or unloads a trained AI model in Cyclo Brain.
| Command | What it does | Other fields you can edit |
|---|---|---|
LOAD | Starts the selected model, waits until it is ready, and then pauses it while keeping it loaded. | All fields |
RESUME | Starts or resumes a model that is already loaded. | task_instruction |
STOP | Pauses the model without unloading it. | None |
CLEAR | Finishes the model process and unloads it. | None |
The parameter panel disables fields that the selected command does not use. If you change the command and later return to LOAD, the values still appear in the panel. Only fields used by the current command are included when the Task is saved or run.
| Parameter | Default | Description |
|---|---|---|
command | LOAD | Operation to perform: LOAD, RESUME, STOP, or CLEAR. |
model | lerobot:act | AI model and the software used to run it. |
policy_path | Empty | Folder containing the trained model. Use the folder button to browse the location for the selected model. |
task_instruction | Empty | Language instruction provided during LOAD, or a new instruction provided during RESUME. |
inference_mode | simulation | simulation calculates actions without sending movement commands to the robot. robot allows those commands to be sent. |
action_request_mode | async | How actions are requested: async or sync. |
inference_hz | 15 | Requested number of AI calculations per second. |
control_hz | 100 | Requested number of robot control updates per second. |
chunk_align_window_s | 0.3 | Time window in seconds used to align consecutive groups of AI actions. |
acceleration_mode | pytorch | Calculation method: pytorch or tensorrt_dit. |
acceleration_engine_path | Empty | Optional path to the acceleration file or folder. |
The default inference_mode is simulation. If a Task contains a LOAD Step in simulation mode, Action Canvas warns before starting and no movement commands are sent to the robot. Select robot only after checking the model, Step order, robot state, and operating area.
Wait
Wait pauses progress for a fixed time and then lets the next Step begin. Use it to add a deliberate delay or give hardware time to settle between Actions.
| Parameter | Default | Description |
|---|---|---|
duration | 5.0 | Wait time in seconds. |
Open and Save Task Files
Action Canvas keeps the Task in two places:
| Location | What it means |
|---|---|
| Working draft | The current task diagram stays in the web application while you move to another Autonomy Studio workspace and return during the same page session. It is lost when the page is reloaded or closed. |
| Saved Task file | Save Task As stores the Task in the Action Canvas Task library. Open Task retrieves it later. |
The working draft is not saved automatically. Save important work before reloading or closing Cyclo Intelligence.
Open a Task
- Click Open Task.
- Wait for the saved Task list to appear. If needed, use the refresh button in the dialog.
- Select a Task file.
- Check that its filename appears in the header, and review all Steps and settings before running it.
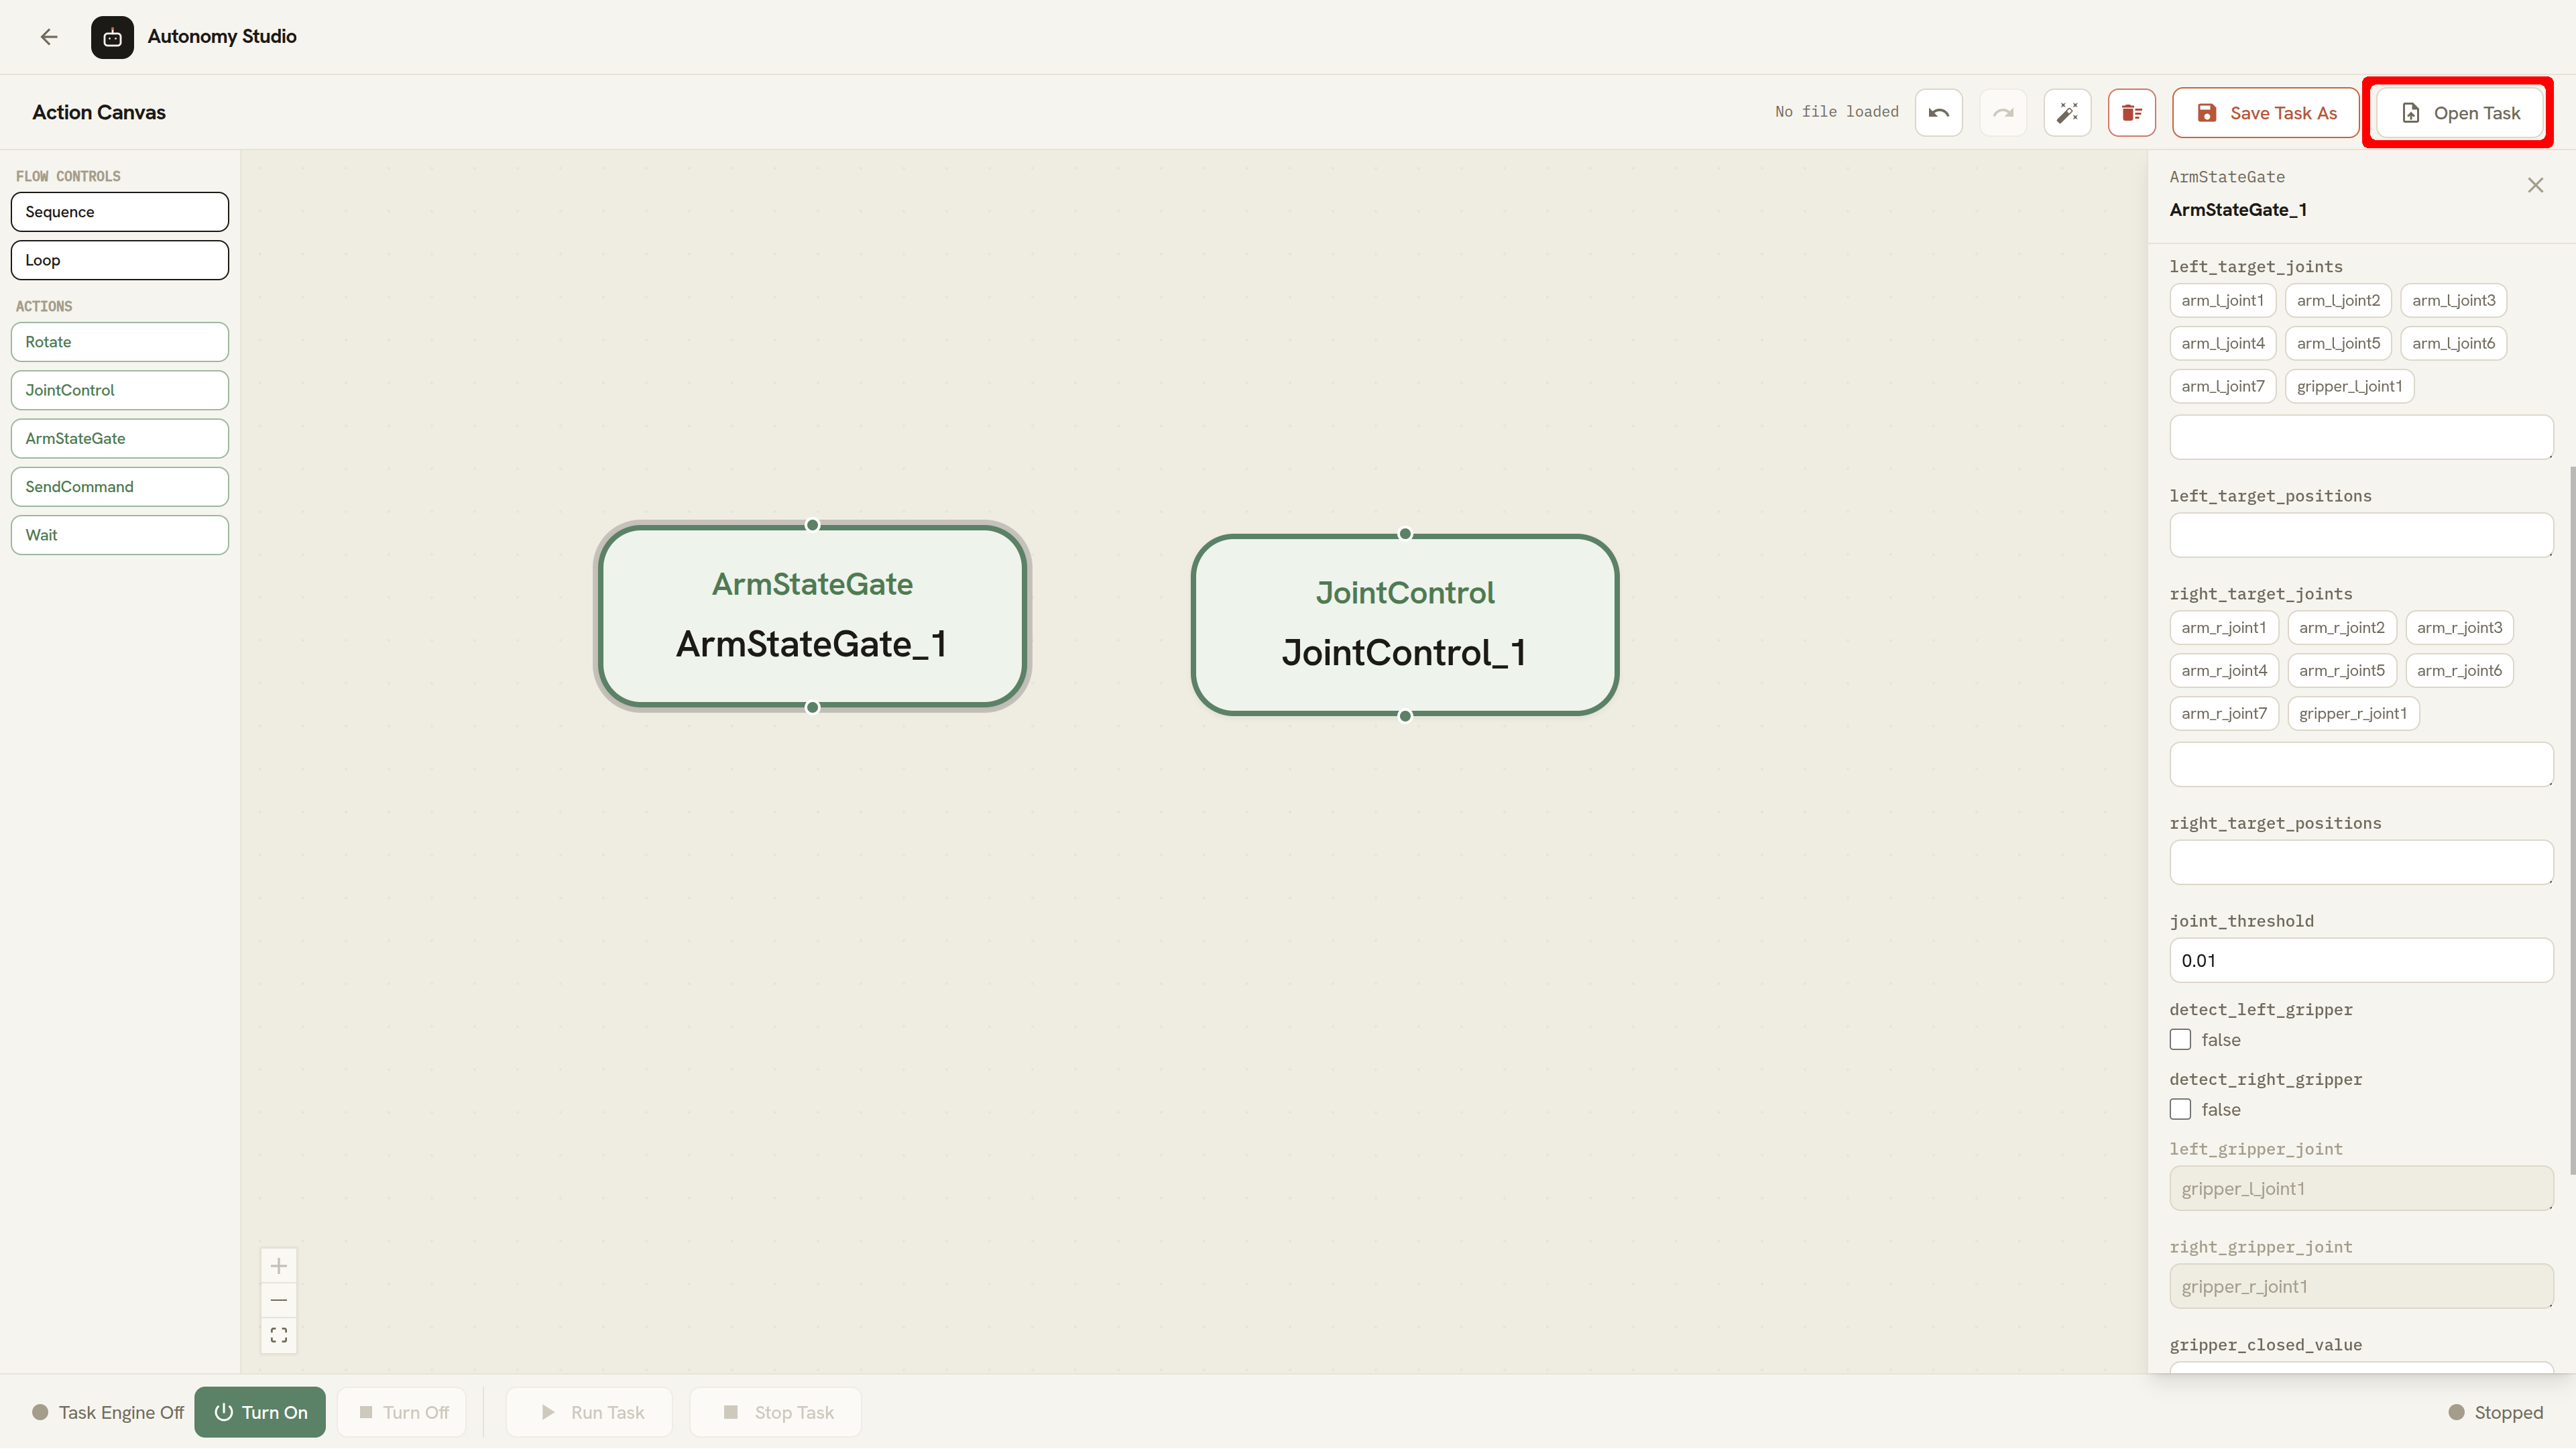
Opening a Task replaces the current task diagram without asking whether to save it. It also starts a new Undo and Redo history. Save the current draft first if you need to keep it.
Save a Task
Action Canvas uses Save Task As so that replacing an existing file always requires a clear confirmation.
- Click Save Task As.
- Enter a filename without the extension. Use letters, numbers,
_, or-. Action Canvas adds.xmlautomatically. - Click Save, or press
Enter. - If the name already exists, enter another name or click the Overwrite action that appears.
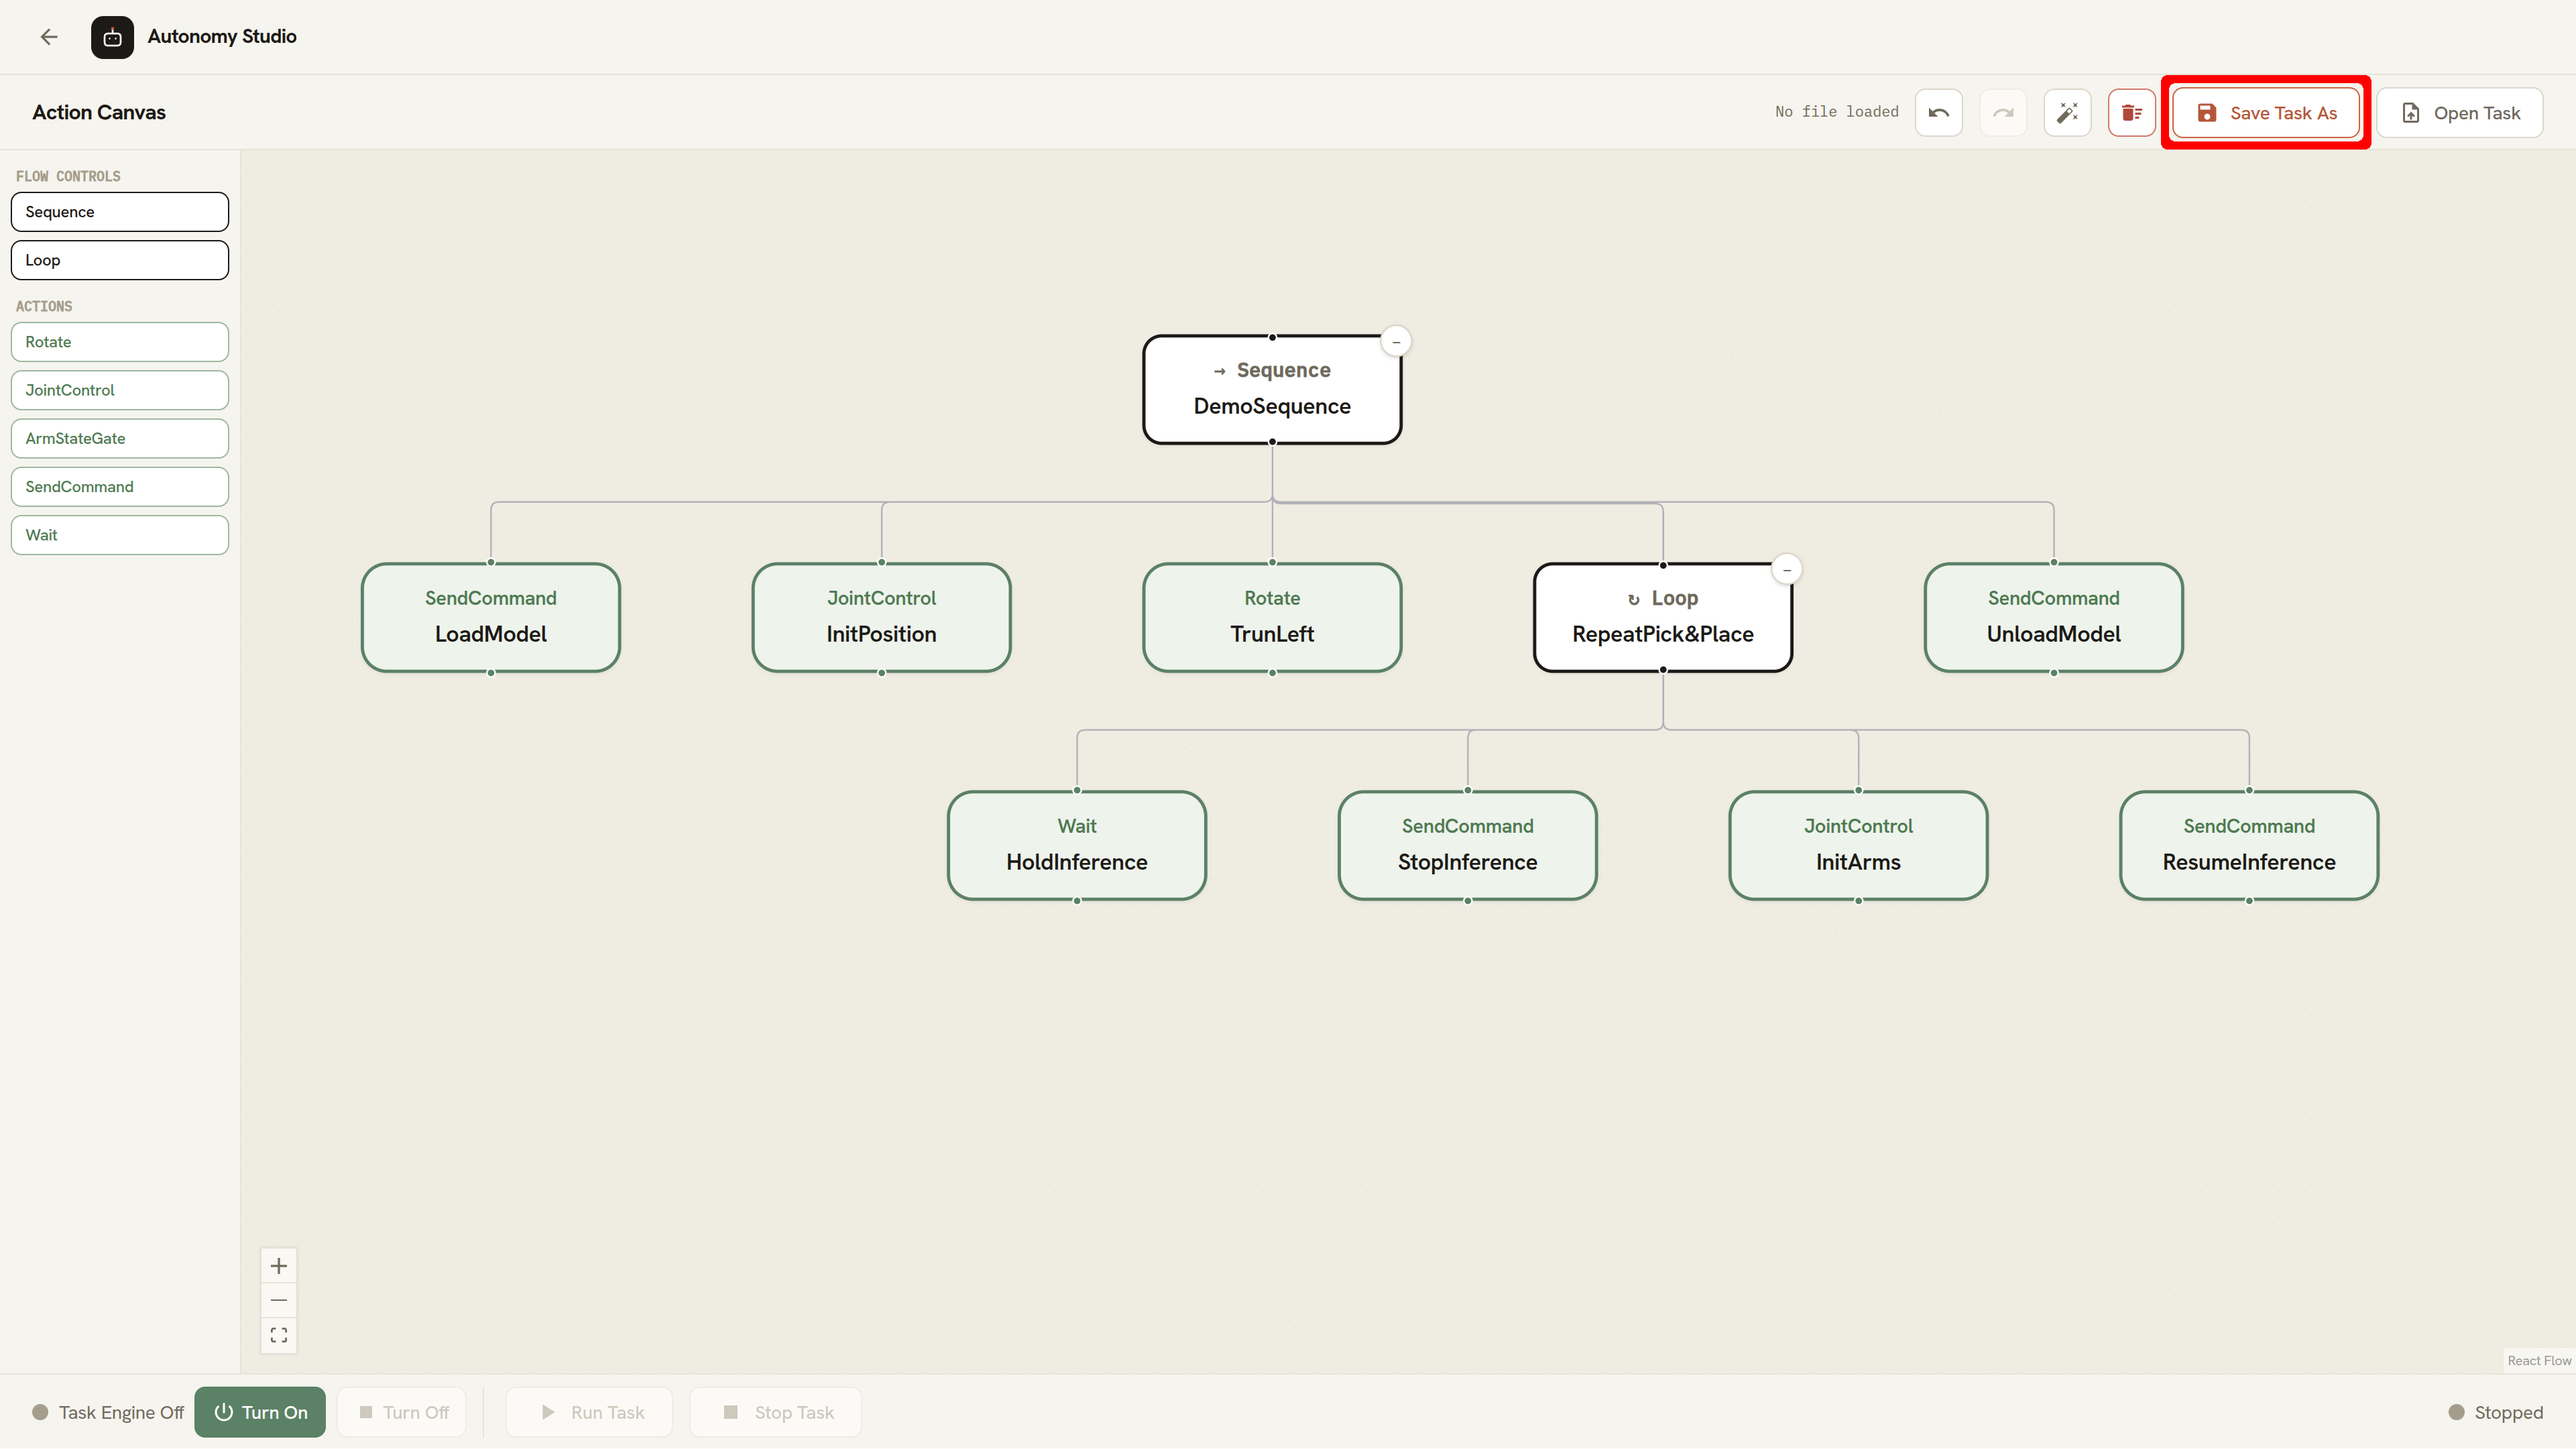
Action Canvas does not replace an existing file until you explicitly click Overwrite. Press Escape to close the dialog without saving.
The filename in the header shows the last file opened in the editor. Saving does not turn on automatic future saves. Click Save Task As again whenever you want to keep later changes.
Action Canvas files belong to the standalone Task library. They do not automatically appear in a waypoint's Task file list. Waypoint Tasks are stored separately inside their Mission and waypoint folders.
Run a Task
Turn On the Task Engine
- Confirm that the selected robot type is
ffw_sg2_rev1. - Click Turn On.
- Wait until the status changes to Task Engine On.
- Click Refresh Steps if you need to reload the current available Step list.
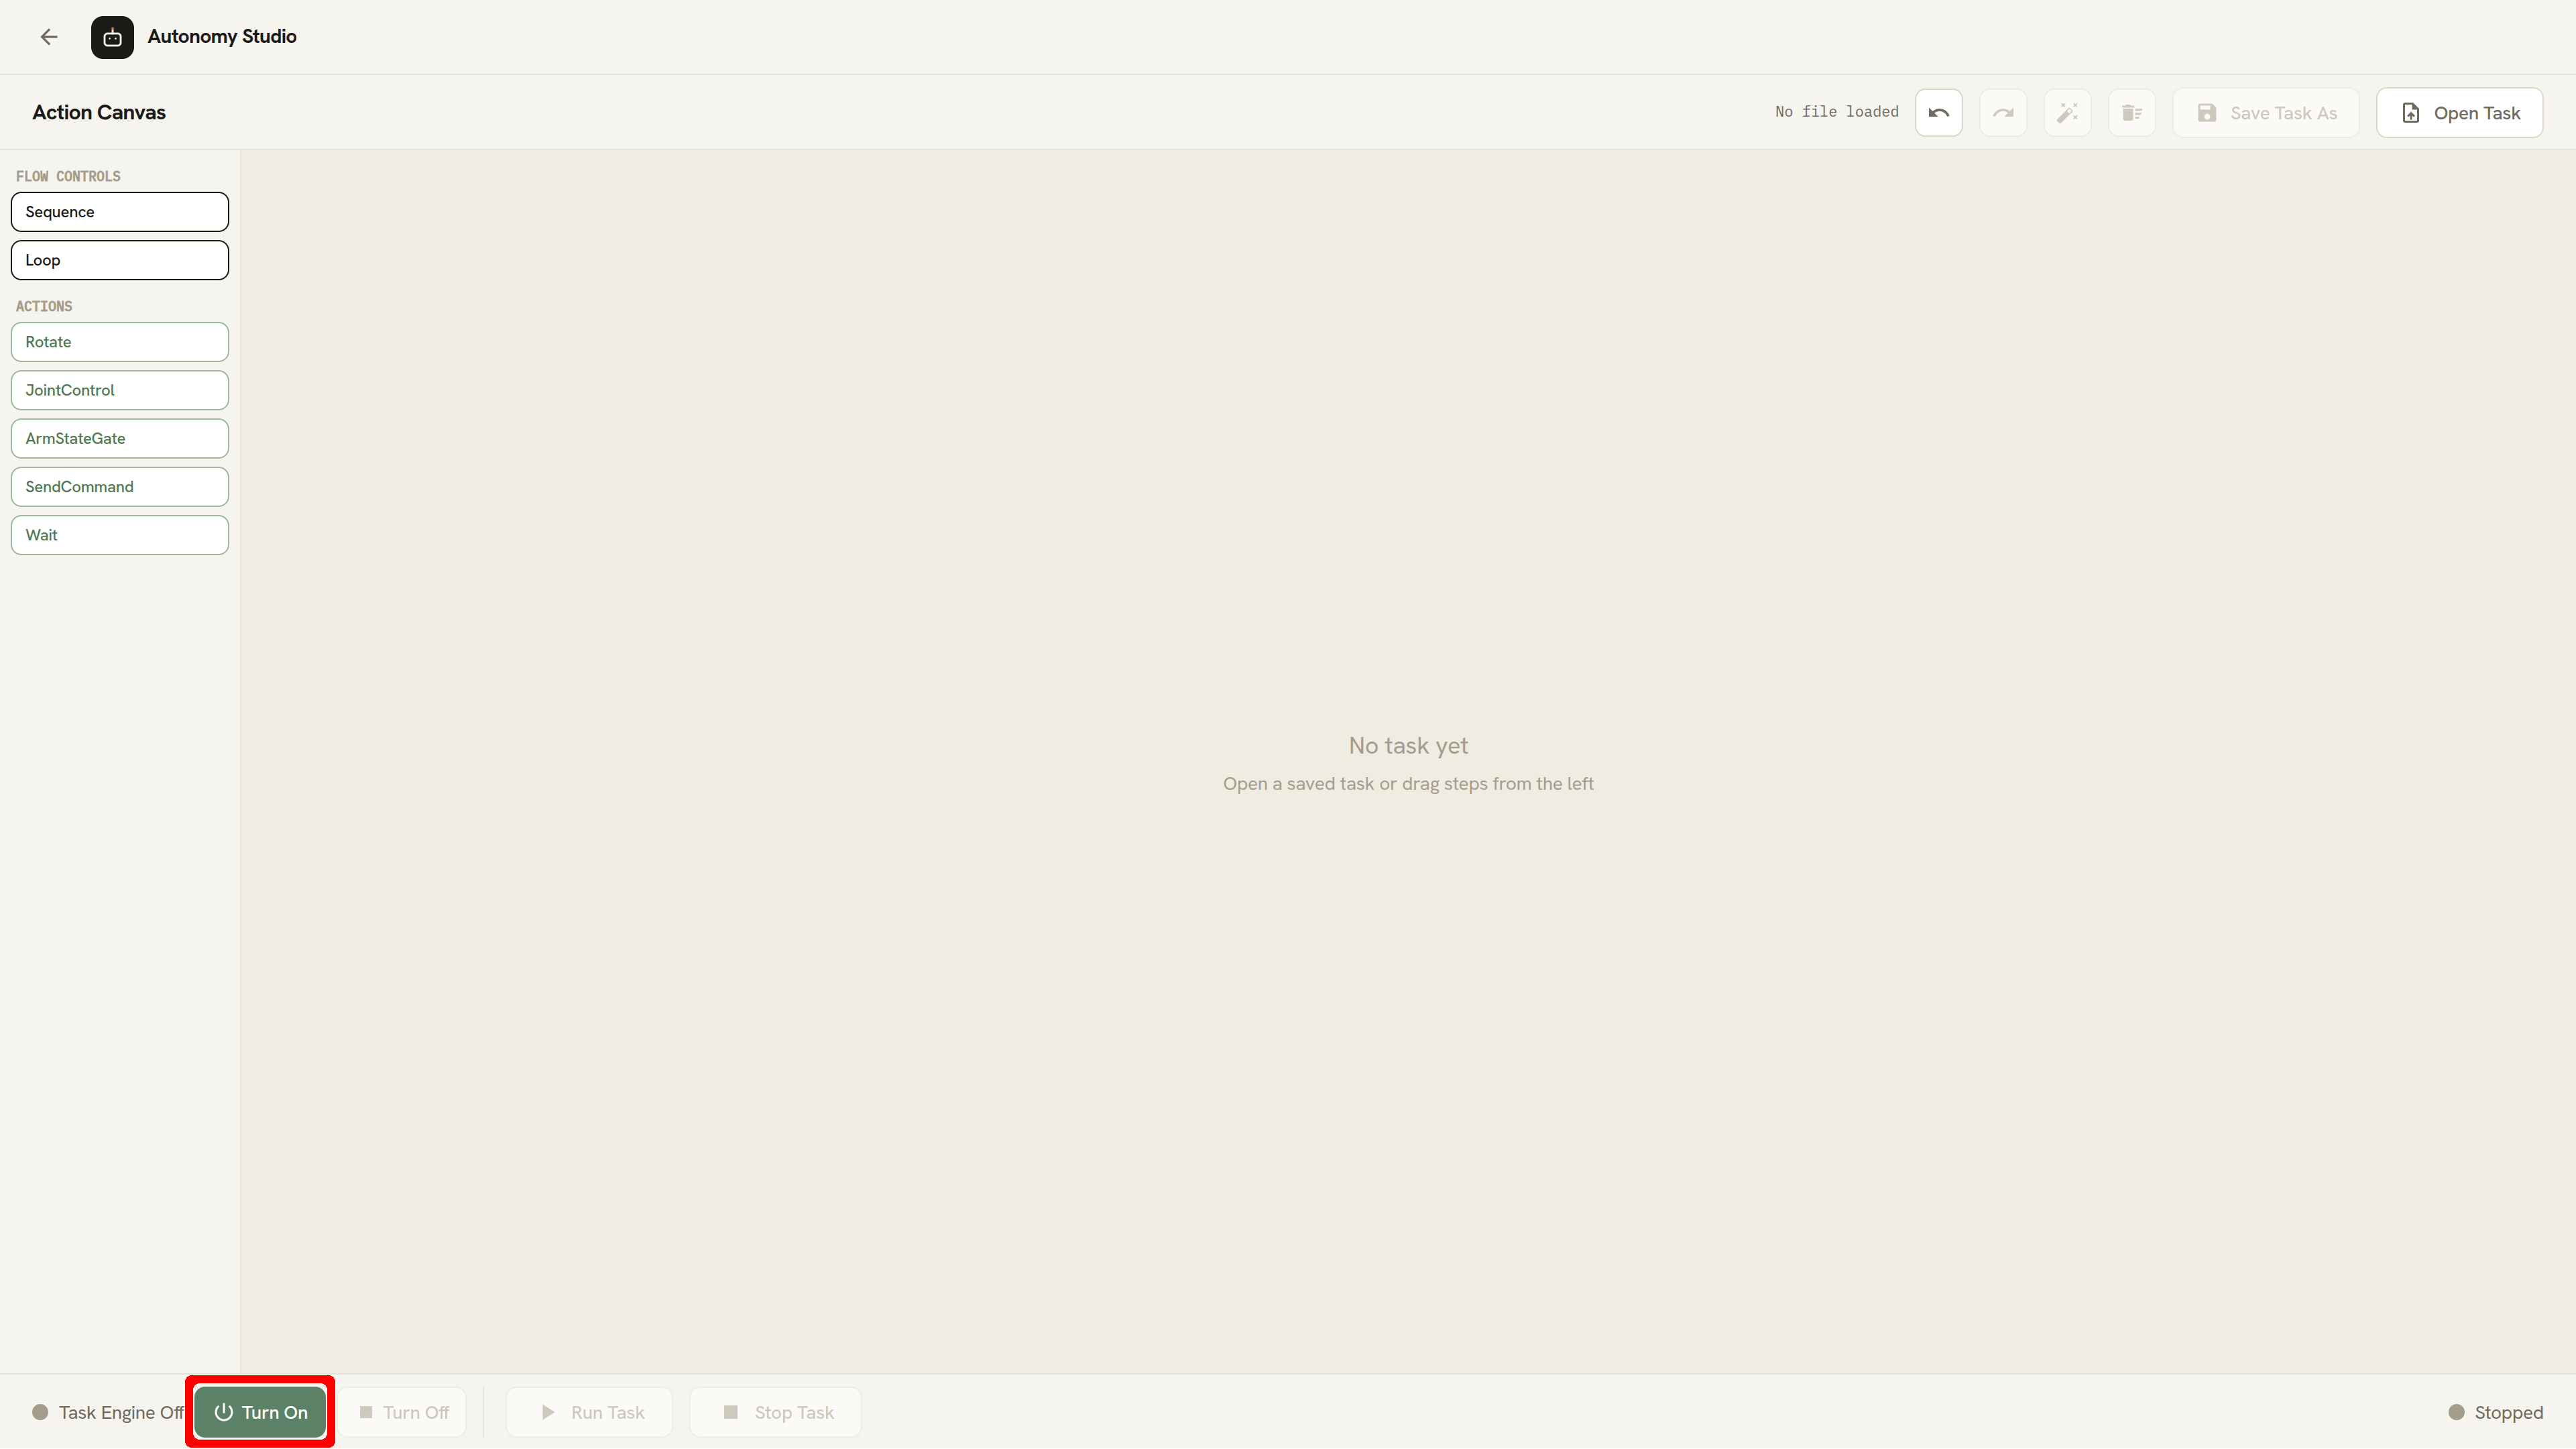
Action Canvas checks the Task Engine every five seconds. Unknown means that its status cannot currently be checked. Wait until the status is available before running a Task.
Start the Task
- Confirm that the Task is not empty and has one connected starting Step.
- Check all movement settings, AI settings, joint targets, and unlimited Loops.
- Clear the operating area and keep the Remote E-STOP within reach.
- Click Run Task.
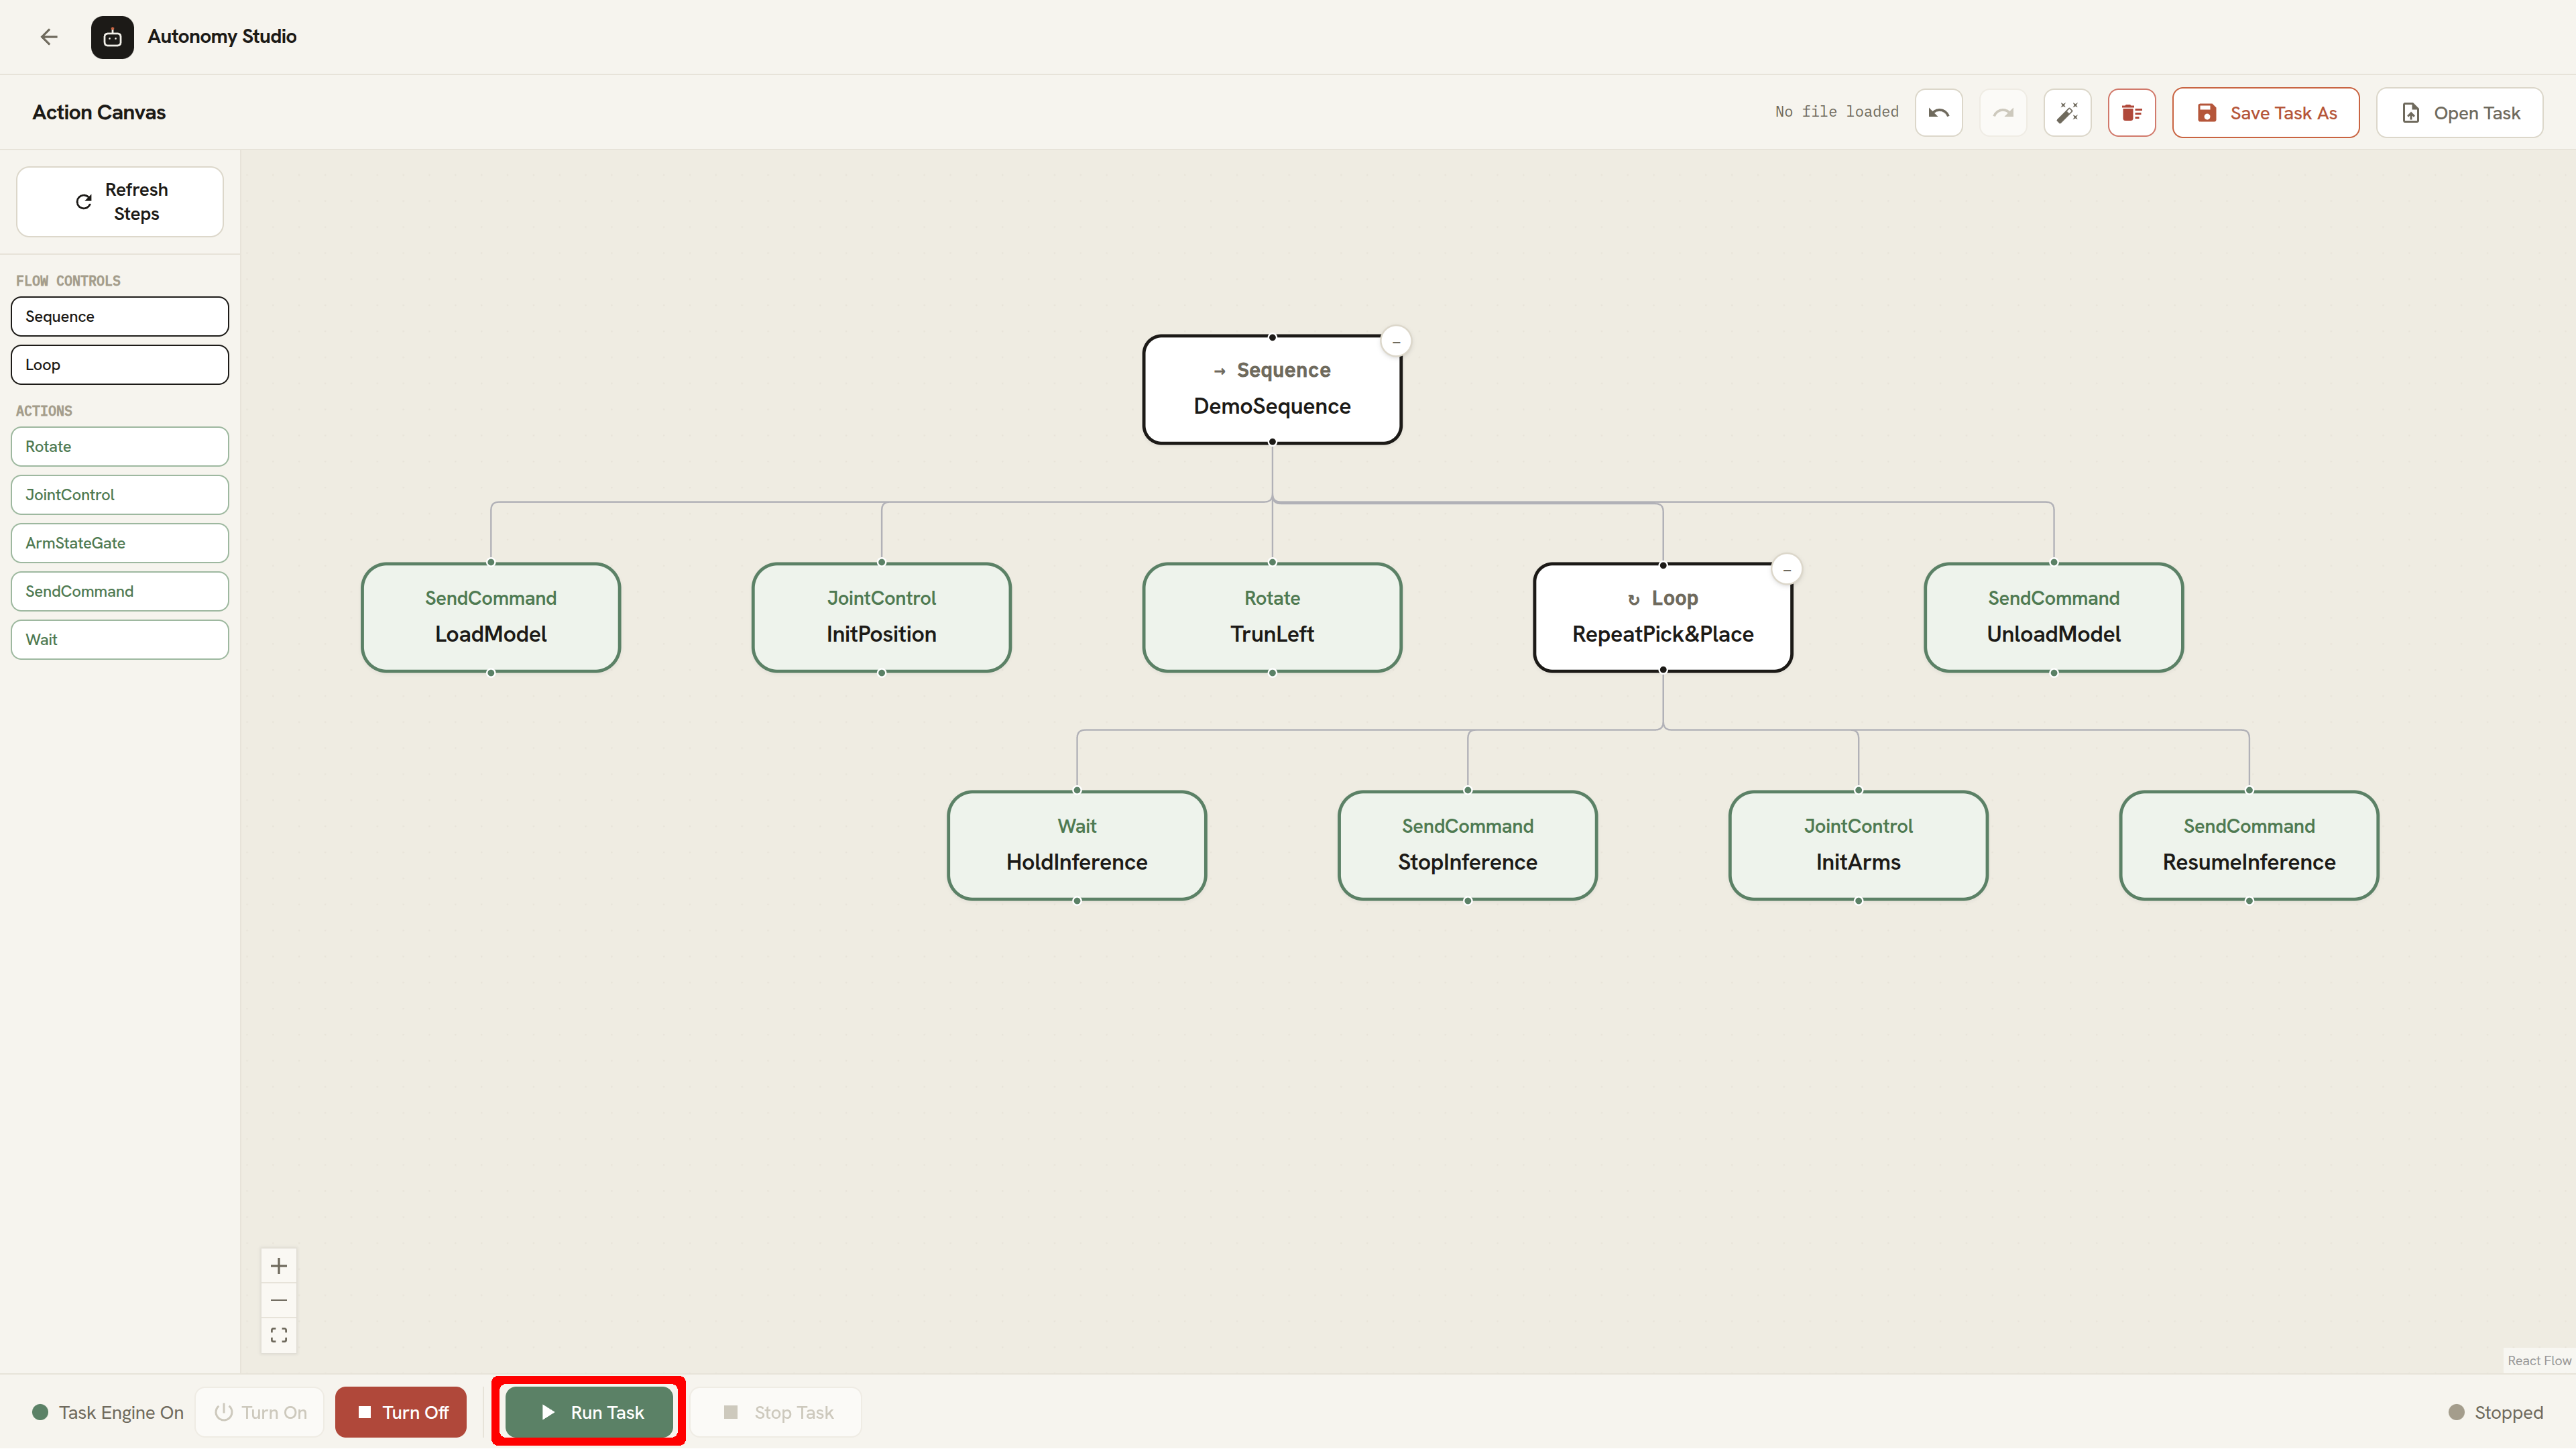
Saving first is recommended, but it is not required. Action Canvas sends a copy of the current task diagram to the Task Engine when you click Run Task. If the previous Task ended as Completed or Failed, Action Canvas clears that final status before beginning the next run.
While the Task runs:
- The status at the bottom right changes to Running.
- The currently running Step is highlighted.
- If that Step is hidden, the visible Flow Control containing it is highlighted.
- You can still see and edit the task diagram, but Clear and Task Engine shutdown are unavailable.
The running Task uses the copy that was sent when Run Task was clicked. Changes made on the canvas while the Task runs apply only to the next run.
Tasks can move the robot and send AI-generated commands. Verify the Step order and settings, keep the surrounding area clear, and be ready to use the Remote E-STOP before clicking Run Task.
Stop the Task
Click Stop Task while the status is Running. Action Canvas asks the Task Engine to stop, removes the running-Step highlight, and changes the Task status to Stopped.
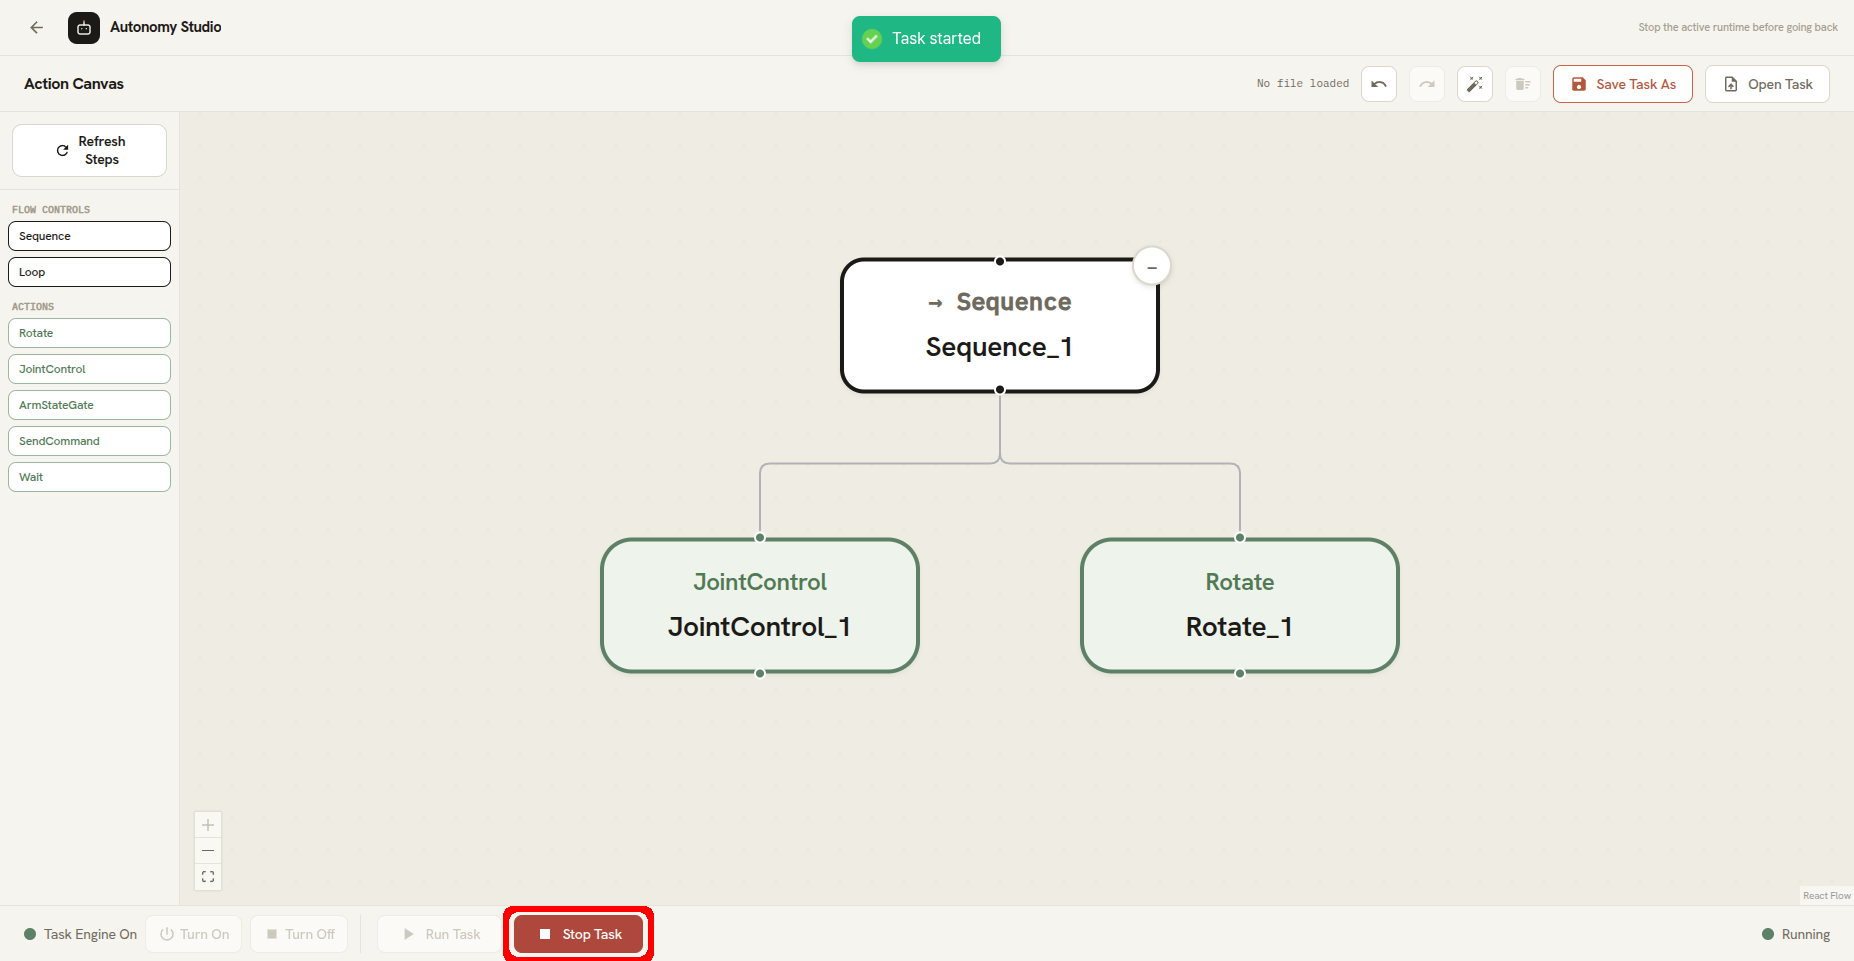
You cannot use the Autonomy Studio back action while a Task is running or while Action Canvas is processing another Task Engine command. Stop the Task and wait for the command to finish before returning to the workspace chooser.
Turn Off the Task Engine
Turn Off is available only when the Task Engine is on and the Task is Stopped, Completed, or Failed. If the Task is still running, click Stop Task first. Action Canvas clears a completed or failed run before shutting down the Task Engine.