ROBOTIS Hand Installation
If your application requires a multi-functional grip, you can replace the RH-P12-RN gripper with a ROBOTIS Hand. Follow these steps to perform the exchange:
-
Remove the
RH-P12-RNGripper: Carefully unscrew the mounting bolts and disconnect the communication cable from the current gripper. -
Reorient the Mounting Bracket: Unscrew the mounting bolts on the
FRP42-A110Kbracket and rotate it by 90°. Align the bracket and fasten the bolts into the highlighted holes as shown in the image above.

- Enable terminating resistor:
Unscrew and remove the back cover of the HX5-D20 Hand.
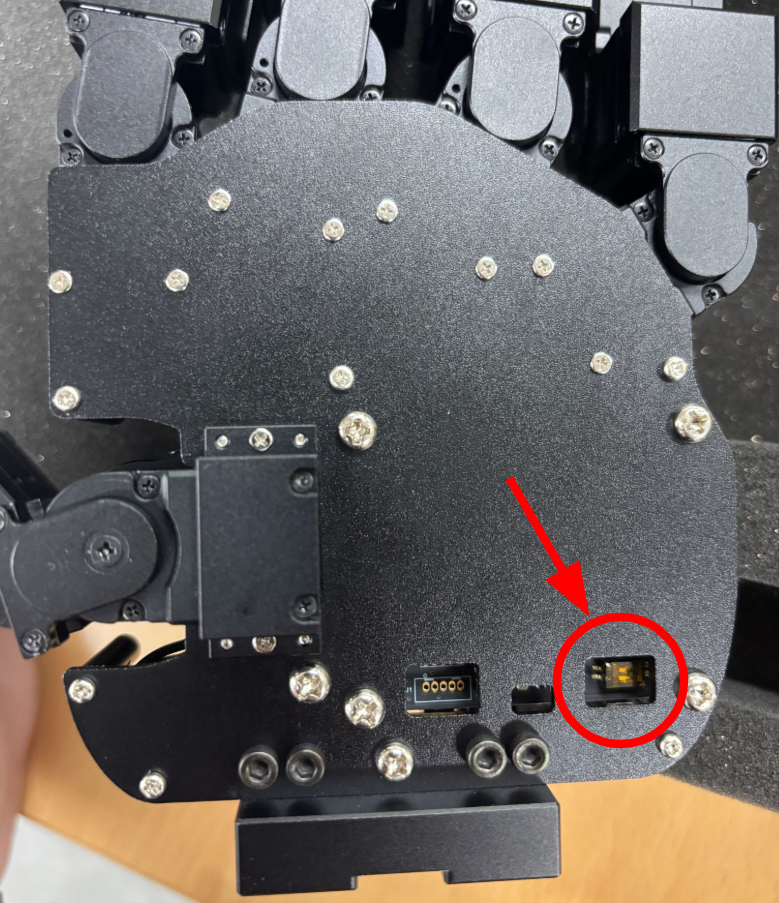
Move the slide switch to enable terminating resistor as shown below.
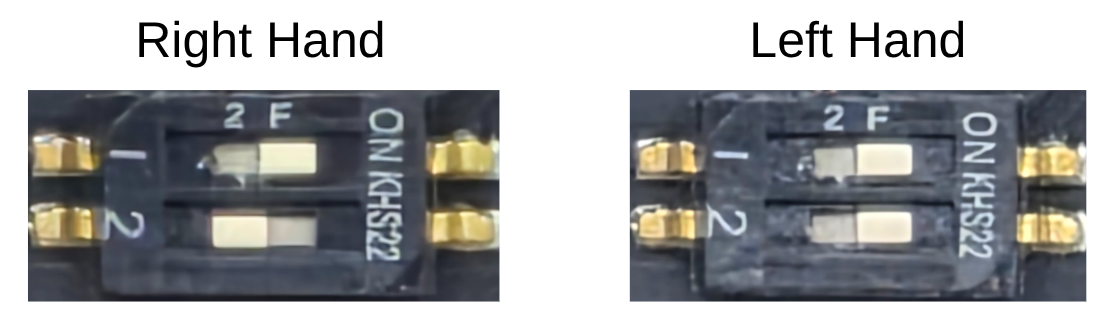
Carefully reattach the back cover.
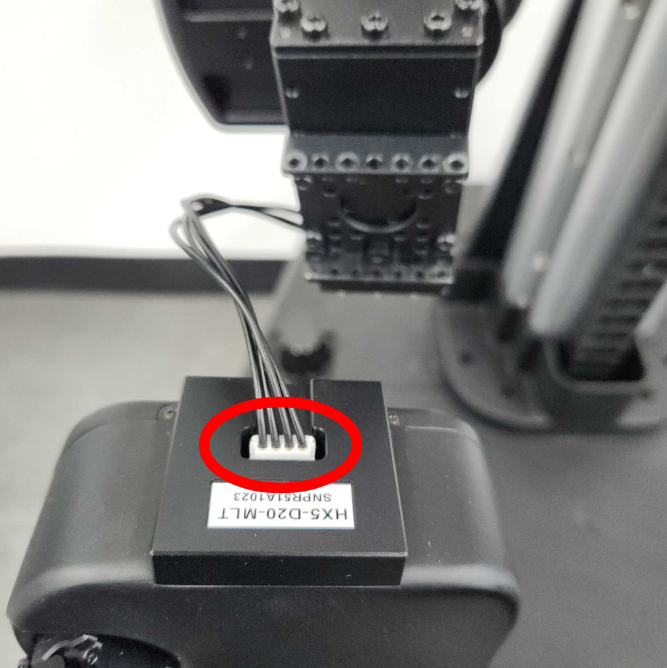
- Connect the Communication Cable: Plug the
4-pin JST cableinto the port located on theROBOTIS Hand. Ensure the connector is fully seated to prevent signal loss or intermittent connectivity.
- Secure the
ROBOTIS Hand: Align the hand with the rotatedFRP42-A110Kbracket and tighten the mounting screws.
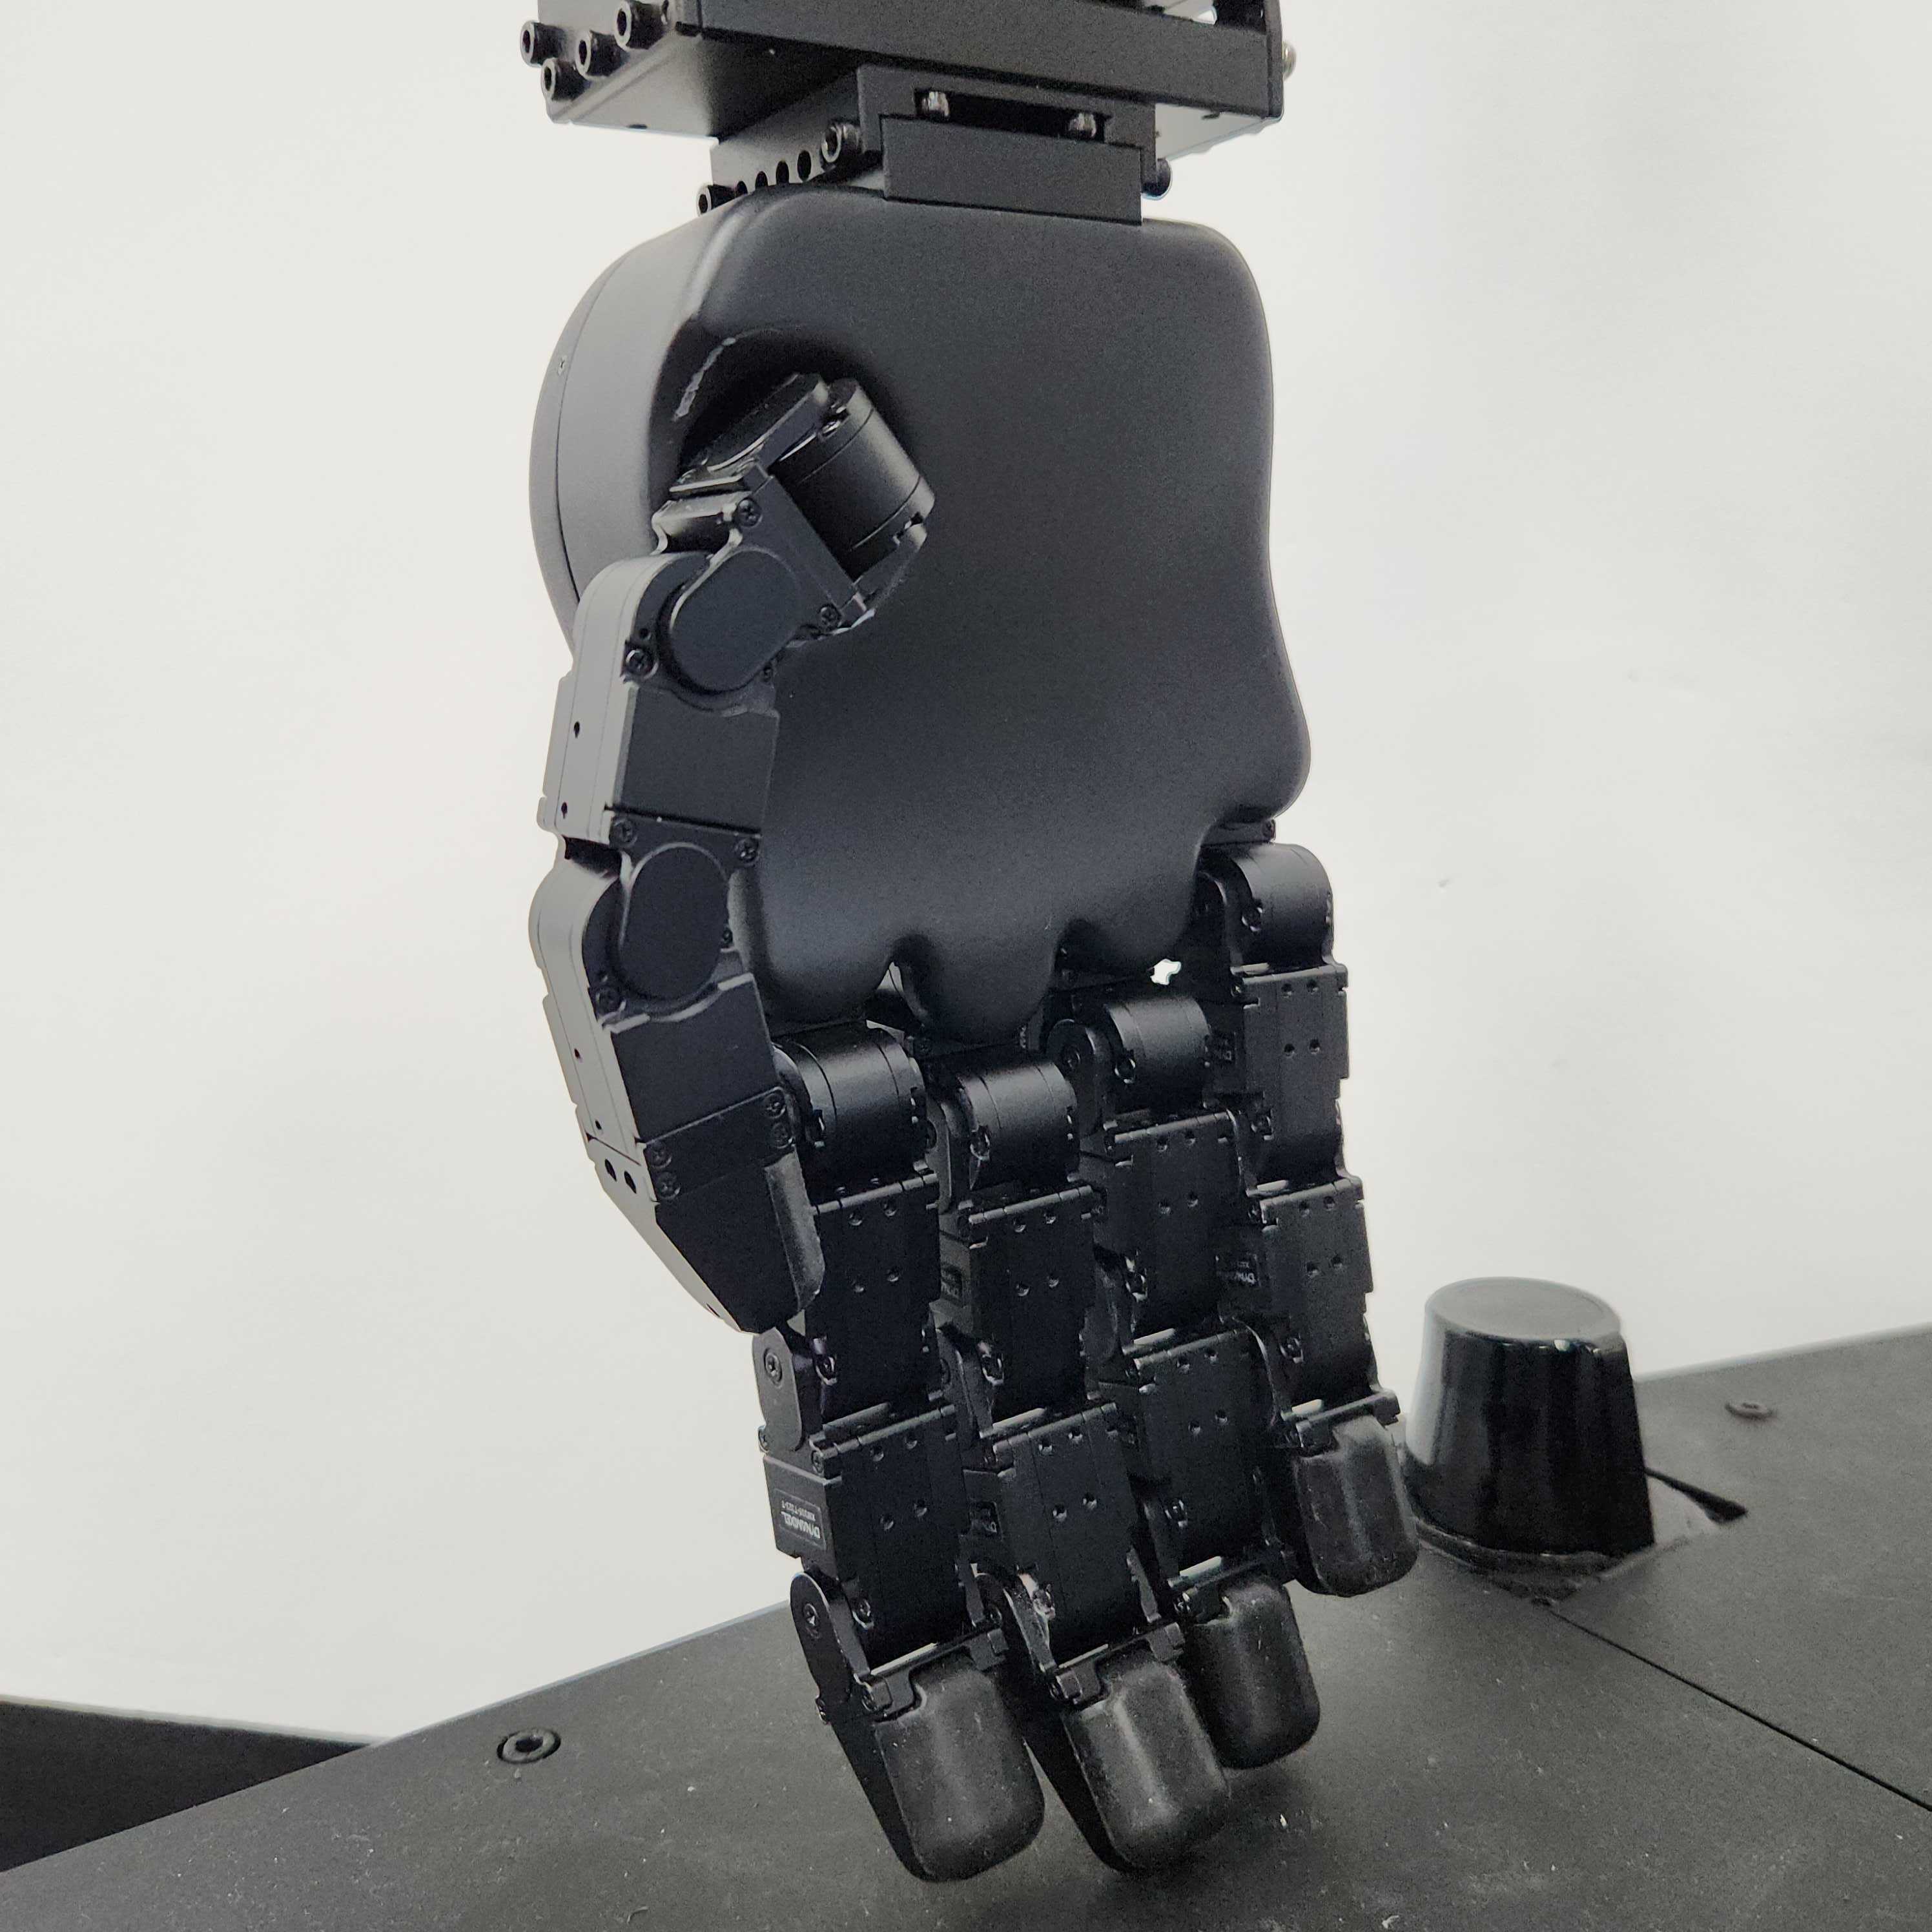
The hardware installation is now complete.